Blog
Lofi beatmaking and mixing: 7 tips & techniques
25 Sep '2019
Whether you’re looking for a tinge of tape, the inspiration of early hip-hop techniques, or the settings to emulate your idols’ hardware in software, we’ll let you in on the best ways to bring that vibe back to your music.
As digital technology marches on and gives us unlimited possibilities in music, there’s one inescapable trend: the reaction. Contrarian musicians and producers react against the high-tech world – give us high-quality WAVs, and we want vinyl; give us computer processing, and we want 60s compressors; give us the ultimate DAW, and we want the bit rates of early samplers.
While silicon valley forces smartphones into our pockets, there’s a nostalgia in the air for a simpler time – one with imperfections, discolourations, and mostly importantly, vibe.
In this guide, we’ll let you in on the best ways to bring that vibe back to your music. Whether you’re looking for a tinge of tape, the inspiration of early hip-hop techniques, or the settings to emulate your idols’ hardware in software, we’ll get you there with a selection of bitesize tricks and techniques for making LoFi Beats and tracks.
Quick and Dirty Retro-izing
To get started right now with some speedy old-schoolerizing, check out these tips…
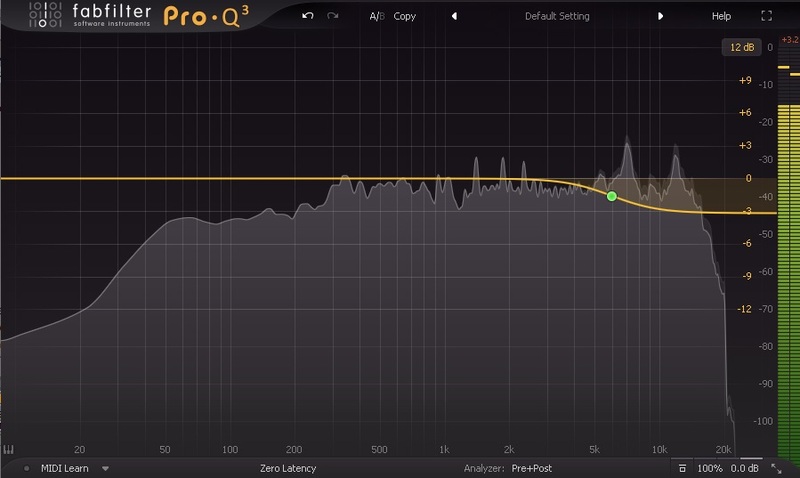
Reduce High Frequencies
Media like cassettes were pretty great at sound reproduction for the technology of the time, but compared to the pristine digital methods of the 21st century, not so much. With a simple EQ curve, roll-off high frequencies to very quickly and scrappily emulate an old-school feel.
Layer in Hum and Noise
Whether it’s due to a less-than-perfect source recording, frequent copying, or the limitations of the playback system, a piece of audio sourced from old media tends to come with a grungy layer of background hiss, hum and/or noise. We’ll show you specific processors for getting this right later, but it’s entirely possible to introduce these sounds by finding and layering the right sample on a new track.

Try Timestretching
OK, warping audio isn’t necessarily an old-school thing, but the imperfections and special effects that even today’s timestretching algorithms can lend to a sound can be reminiscent of audio being misaligned and not quite properly reproduced. This is especially true for Repitch timestretch types, which will retime any variations in the audio too – nice and nostalgic.
1. The Right Sounds
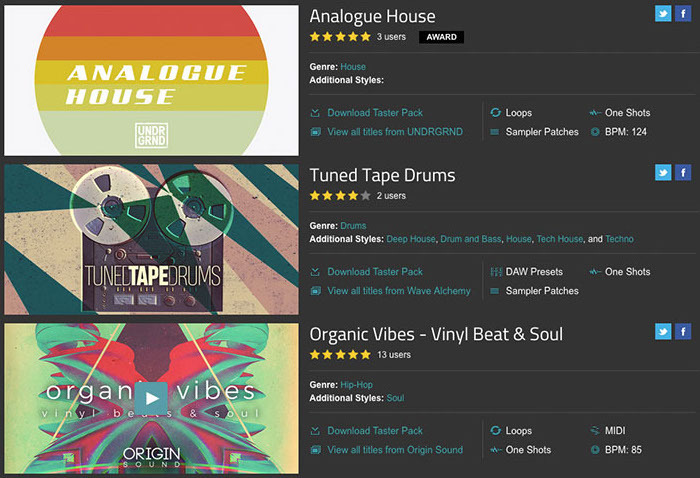
There’s so much competition in the world of sample packs, soundware creators have managed to give each pack specific niche of its own. And yes – some of those niches include retro sound design.
Making house music and want it to sound like you’ve got a genuine Roland Groovebox in the studio? How about Undrgrnd Sounds’ Analogue House as a no-brainer. Need some retro drums for hip-hop? Wave Alchemy’s Tuned Tape Drums reimagines classic drum machines through tape deck hardware, manipulating them appropriately throughout. Prefer some vinyl-tinged melodics? Try Origin Sound’s Organic Vibes pack, which offers some dusty, crackly tones.
The point being, there’s plenty of fodder out there for any producer looking to get any kind of personality into their tunes.
2. Make Modern Synths Sound Old
If analogue-sounding oscillators are your goal and you’ve only got an unashamedly digital synth to work with, there’s something you can do.
Part of the charm of old analogue oscillators is their inability to stay absolutely, perfectly in tune. Sure, a digital oscillator is mathematically incapable of doing this, so long as your output hardware and computer are all working as they should, but the analogue oscillators we know and love from the past were less stable.
If these tips sound like too much work and you've got Serum in your VST library, you might just want to check out these presets from Origin Sound.
The amount of pitch drift on 60s and 70s synths wasn’t exactly huge – the resulting sound was still latched to a very definable note – but the subtle drift in pitch does add to the depth of the sound. So how can we create it in our DAW?
Using a pitch shifter, you can modulate (or automate, depending on your model) an incredibly subtle amount of drift such as 0.01 semitones, which isn’t even possible on certain pitchshifters.
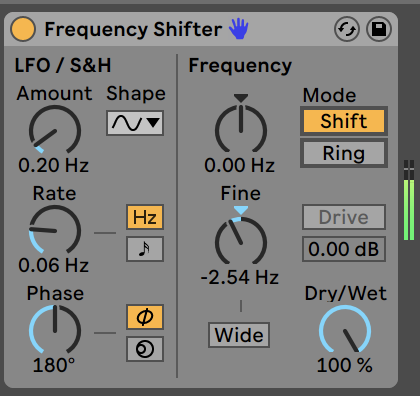
In a pinch, you can also try our a Frequency Shifter. These devices move all frequencies by exact values in Hz, so aren’t quite as ‘harmonically correct’ as pitch shifting plugins, but smaller adjustments such as sub-5Hz values are often possible.
3. Oh The Humanity
Almost everywhere you look in the past, music was recorded in ‘properly’. That is to say, it wasn’t programmed; it was played. In our world of clicking notes onto a grid, we get perfect timing, but this is a relatively recent phenomenon. Even when the first machine sequencers were released, a lot of the music being triggered by ‘the grid’ hadn’t actually been played to the grid, so humanity was everywhere to be heard.
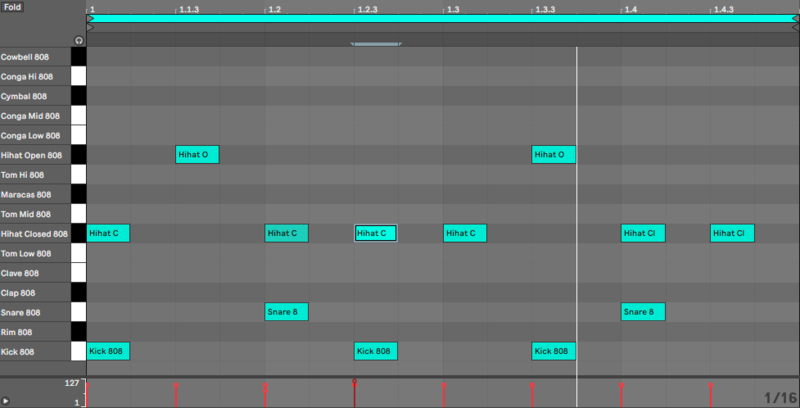
If you ever inspect a real-life human performance against the backdrop of your DAW’s grid, you’ll realise that it doesn’t quite conform to the lines as perfectly as mouse-clicked, snapped-to-grid MIDI does. Instead, there are natural imperfections that lend the music its own groove.
So how can we bring this humanity back in our DAW? First of all, we can record (or re-record) our programmed MIDI in live, using a keyboard controller, pad controller, or often even our own QWERTY keyboard. Sometimes, this is all the humanity necessary for bringing a sense of reality back to a virtual instrument, but there’s more you can do…
Some DAWs have their own ways of imprinting the timing of different grooves onto quantized MIDI tracks, such as Ableton’s Groove Pool plus Logic’s Groove Tracks and Groove Templates. Then, some DAW’s allow you to humanise MIDI with a specific function for randomising velocities and note start timings, within whatever limits you choose. Below, in Studio One’s Humanize dialog, we’ve selected some light settings, which should be good to get the feels while keeping the music tight.
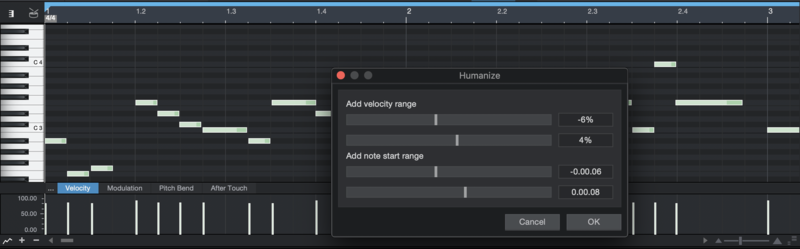
For a basic pointer on getting MIDI velocities right when programming them in your DAW, identify the most crucial notes in a riff, melody or beat, and place them relatively high (around 100). Everything else should be relatively low (around 50) to start with, and each note should be a slightly different velocity to the last time it was played. From there, trust your ears based on the relative ‘importance’ of each note, and whether they should be picked out at higher velocities.
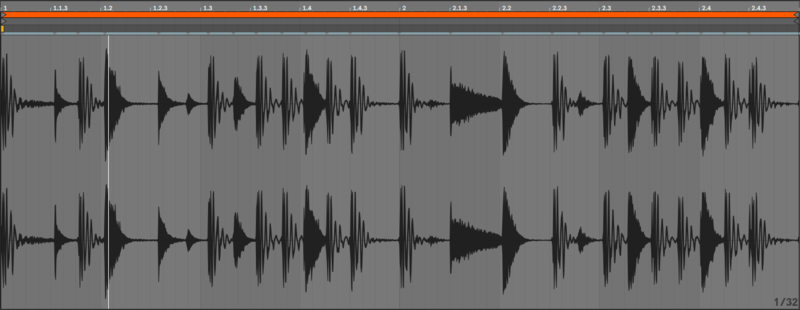
4. Layer Ambience, Crackle and Crowds
You don’t need an entire plugin to go all-out in the retro sonic stakes; there’s plenty of atmospheric samples out there have actually had nothing to do with music – well, nothing immediately to do with music, at least.
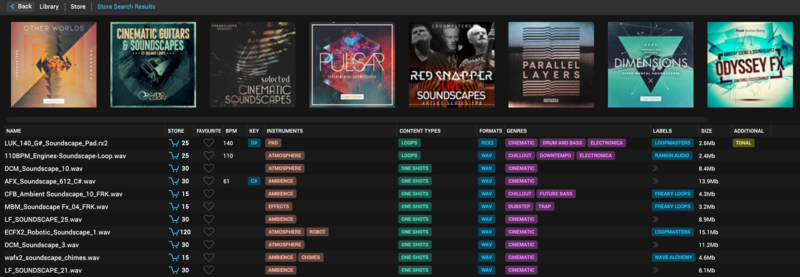
From crowd noise, atmospheric ambience, street noise and more, you can give your tunes the raw feel of live performance, or simply add some subconscious humanity to them. And if you’re into old gear noise, it’s entirely possible to imbue your tracks with the sound of vinyl by just using… the sound of vinyl! Search Loopcloud for Ambience, Nature or Foley tags, or simply type Vinyl, Crowd, Soundscape or anything else into the search bar to reveal a world of readymade sonic worlds that’ll take the edge off your tracks. Check out one of our tutorials to see how to do it.
5. Tubes, Tape and Vinyl: Vintage and LoFi Plugins
The hivemind of the world’s plugin developers have been quick to cotton on to the nostalgic LoFi renaissance, and as such, these days many plugins exist in order to emulate those imperfections and vibes instantly in your DAW.
For those seeking guitar-style tone and the oldest of studio gear, it’s got to be tubes. AudioThing Valves is a plugin that models just that: two types of valve with adjustable Triode and Pentode types switching, plus Drive Bias and Tone controls. There’s also a whole section for cabinet modelling, showing us that this is a guitar amp-style plugin at its heart, which can also be used with just the valve stage to get that vintage tone in software.

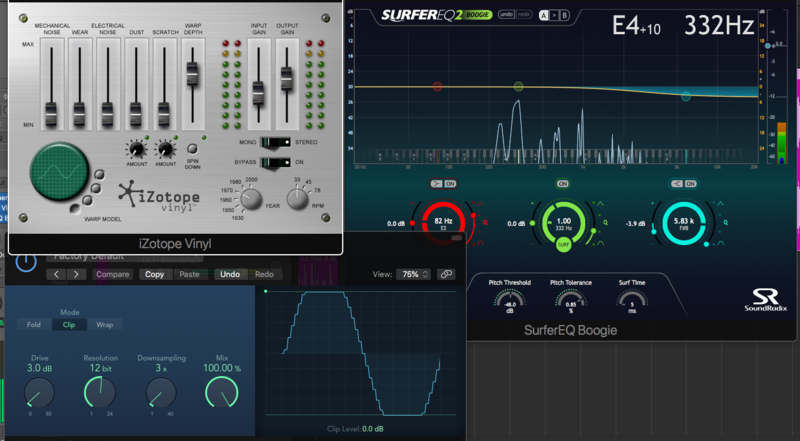
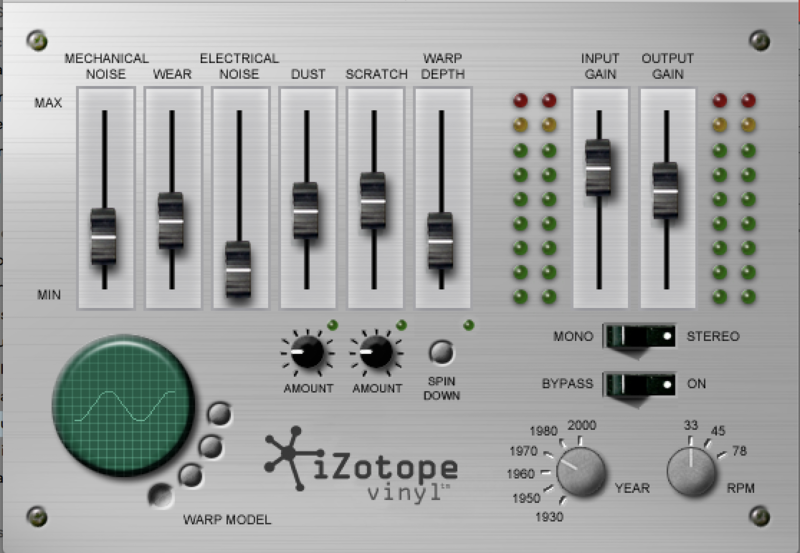
A bona fide classic, iZotope Vinyl gives you the immediate sound of vinyl records in your tracks, with the requisite dust, scratches, hum and many more controls that you’d associate with the format – comprehensive to say the least. Vinyl used to be a paid-for plugin, but it’s now free to grunge up the world.
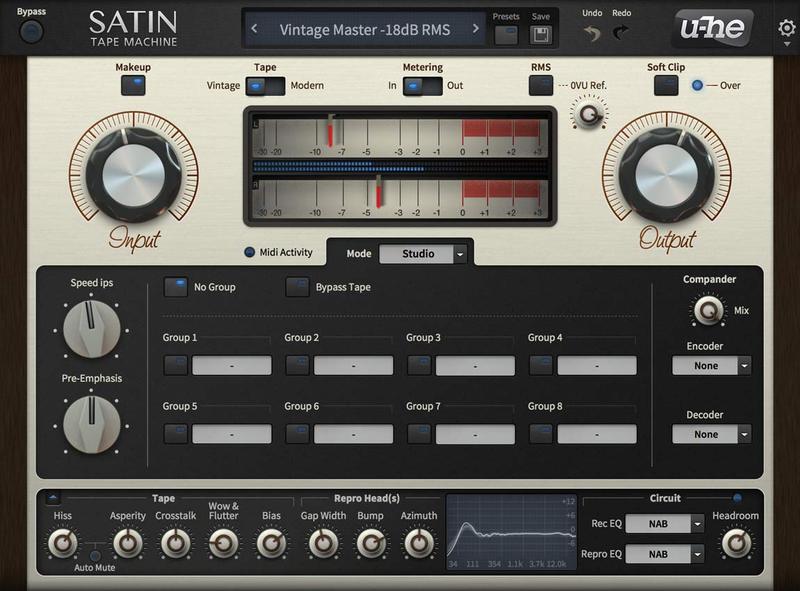
One of the finest tape emulator plugins around, u-he Satin offers the sound of reel-to-reel tape and classic effects like flanging and delay as well. There are comprehensive options to get you going here when you want anything from a subtle tinge of tape to a full-on crusty layer.
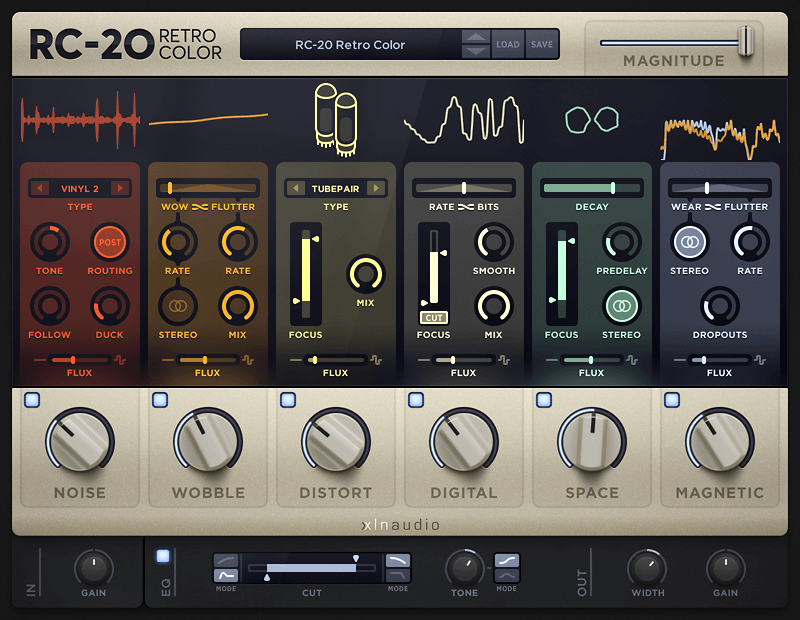
Finally, if you’re looking for a bit of everything, and you don’t want to compromise on quality, RC-20 Retro Color by XLN Audio is a multitalented toolbox with six discrete lo-fi effects. Noise, Wobble, Distort, Digital, Space and Magnetic modules represent a multitude of effects, letting you dial in things like vinyl processing (add Noise and Wobble), Tape (Noise and Magnetic), Amplification (Distort and Space) and loads more besides. For sheer quality of sound, this one’s hard to beat.
6. How to Emulate Old-School Samplers
Any digital audio system has a bit depth and a sample rate, determining what you could call the ‘resolution’ of the signal. CD Quality is a good benchmark: with a bit depth of 16 bits and a sample rate of 44.1kHz, it’s practically so high-resolution that we can’t tell the difference between it and an even higher-resolution system. (We do still need 24-bit systems for actually producing music though – don’t worry.)
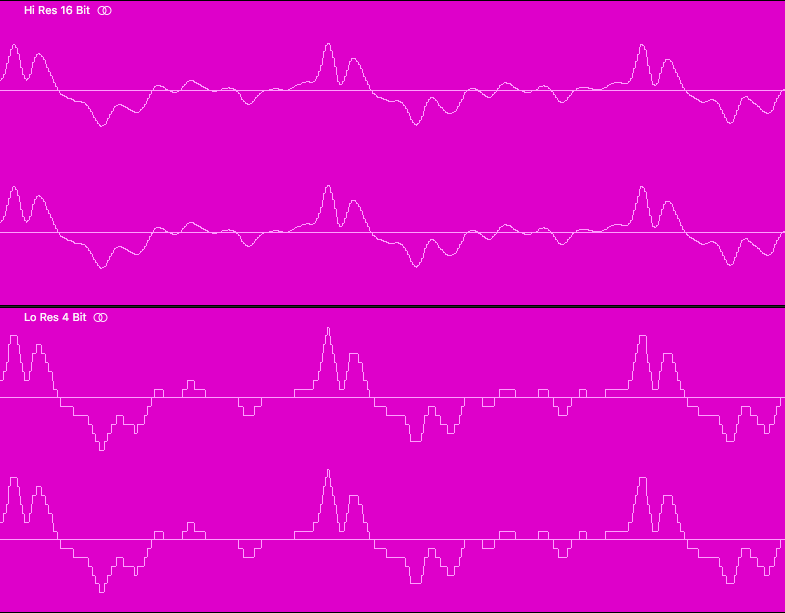
But CD-quality audio required components that were very, very expensive in the early days of sampling. To save the consumer money, manufacturers had to make a trade-off, and every single trade-off was slightly different, leading to a different inherent sound quality for each piece of now-classic gear.
The Fairlight CMI, for example, had a bit depth of 16 with a sampling frequency of 24kHz, while the E-mu SP-1200 had a bit depth of 12 bits and a sample rate of about 26kHz. Akai’s legendary MPC60? 12-bit again, but with a sample rate of up to 40kHz. The Linn LM-1’s well-respected drum samples came out of 8-bit, 28kHz components.
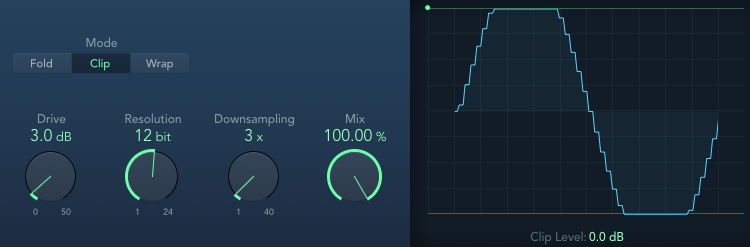
With the range of classic rated and depths outlined above, try using a bitcrusher in your DAW to adjust the flavours to taste. It might even contain
7. VHS-style Sound in your DAW
That magnetic, warbling, inconsistent VHS sound is a bona fide classic piece of audio history, originally unwanted but now very much in demand – from Synthwave producers especially. There are at least two great solutions for getting the LoFi sound of 80s and 90s VHS tapes in your DAW.
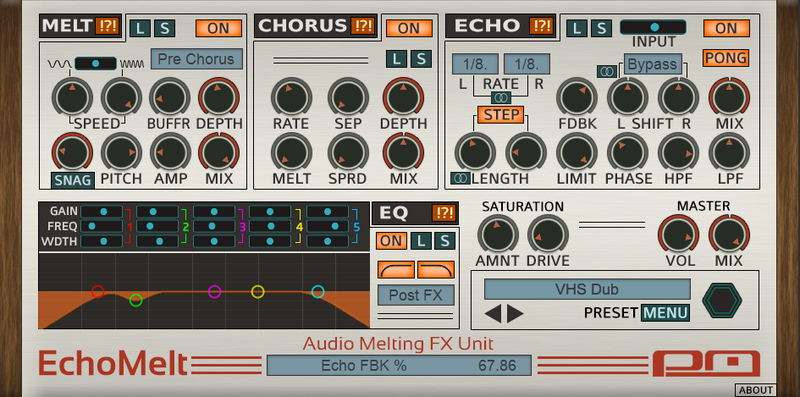
Psychic Modulation EchoMelt is a VST plugin specifically designed around delay effects, with the idea being to constantly degrade the audio as it repeats – sort of like a ‘tape delay’ but with VHS tape for grunging sounds. There are also general VHS-erizing controls for those wishing to forget the delay altogether. For more VHS-style fun, check out VectoMelt, also from Psychic Modulation.
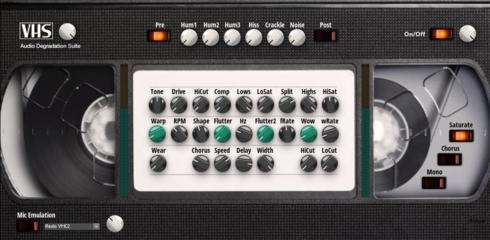
If you’re a Native Instruments Reaktor owner, there a free VHS-tainting plugin available in the Reaktor User Library: VHS Audio Degradation Suite by James Peck. This one features all the Tuning, Drive, Warp and Flutter of magnetic tape, with plenty of extras such as chorus, delay and filtering making things even more creative.
For more inspiration, take the free trial of Loopcloud