Blog
Using Loopcloud to create granular synth patches
20 Oct '2021
Get a little deeper into the Loop Editor and try out Loopcloud as a granular synthesis assistant with this guide

Ask most people about synthesis, and they’ll most likely talk about repeating waveforms that are generated by an oscillating sound source. Sine, square, triangle and sawtooth waves are the most common oscillator waveforms, and most synthesizers will give you options of shaping and stacking these waves together to create unique sounds in a process known as subtractive synthesis.
There is, however, another method of synthesis that is perhaps less well known: granular synthesis. Granulation is the process of breaking down an audio sample into tiny pieces called “grains”, which generally range anywhere from 1-100 milliseconds in length. These segments of audio are then looped and effectively used as oscillators, which can then be manipulated individually and recombined with each other to generate new and unique sounds.
Although the name sounds like an evil weapon from a sci-fi novel, granular synthesis shouldn’t be feared, and is an incredibly useful method of sound design. You can use any sound to create a completely new one and, technically, it’s not so different from any other synthesis method; there's just a different sound source for the oscillators.
Going granular
Granular synthesis lives in the same neighbourhood as sampling, and the majority of granular systems use audio files as their raw material. Sampling involves chopping up a longer section of audio into smaller samples, which in turn become “new” sounds, and if you don’t loop the individual grains you would get a similar effect to sample slicing. The series of grains laid out in chronological order is called the graintable, and when played together at the speed of the original sample, the output would play back that original sample.
As Loopcloud is an extensive library of samples with over four million sounds, it’s an excellent resource for the ingredients that you need to get granular with your synthesis. Any section of an audio sample can be used for granulation, and then mapped onto your MIDI keyboard or controller to give you control over multiple voices. By varying individual parameters like duration, frequency, and volume, you can drastically alter the sounds you are creating. And, with a volume envelope controlling the fade ins and fade outs of each grain, you’ll avoid clicks and glitches and get a smooth, continuous sound.
How it works
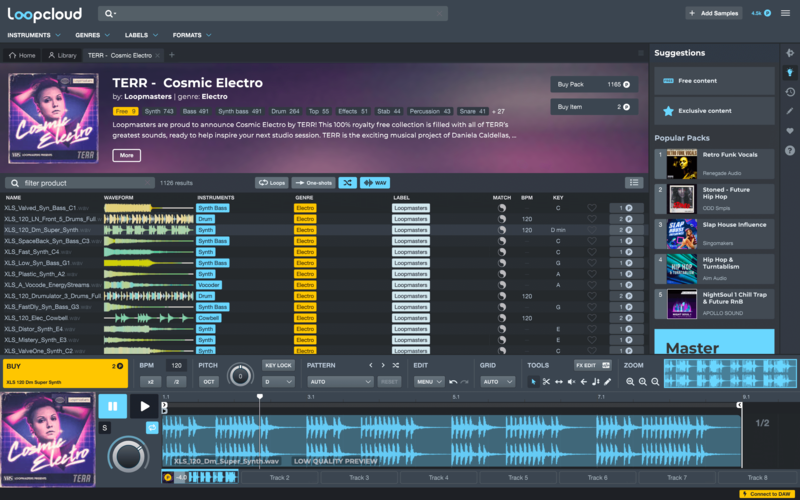
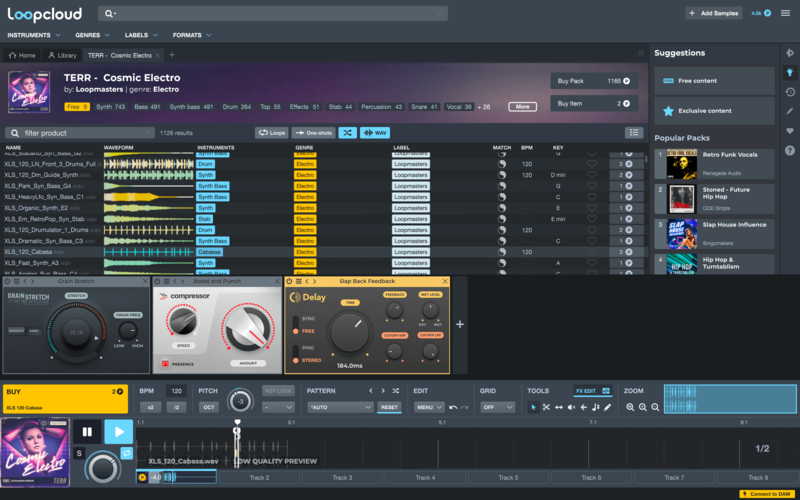
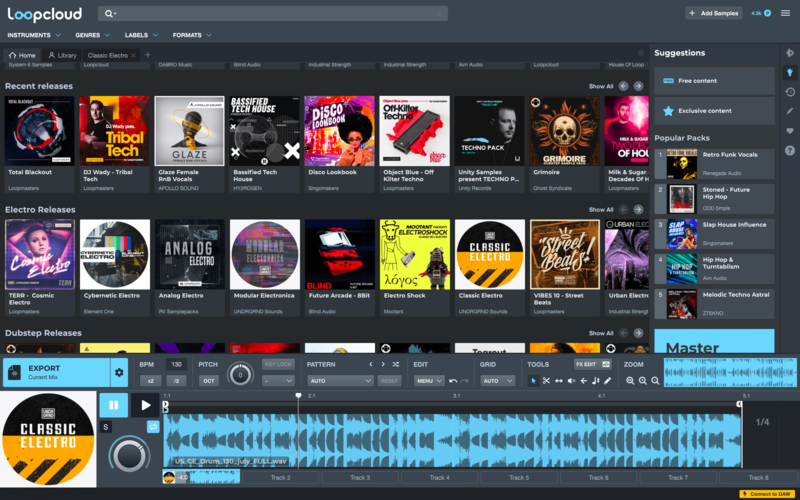
We can demonstrate the principles of granular synthesis within the Loopcloud desktop app. Let’s start by opening up Loop Cloud and searching for a sample - let’s start with something melodic.
The sample XLS_120_Dm_Super_Synth from TERR’s Cosmic Electro pack will work well. It’s a synthwave style plucky lead melody.
We interviewed TERR about her Cosmic Electro pack, read it on the Beatportal blog. You’ll also find interviews with Anastasia Kristensen, Brame & Hamo and Joyce Muniz.
To listen back to the sample on a more granular level, we can loop a tiny snippet of the audio file. This can be done directly in Loopcloud’s one of a kind sample editor. Loopcloud lets you edit your samples before you’ve even bought them, you can then export the edited version of the sample directly to your DAW. You can: trim, re-pitch, speed up, reverse, add effects and much more.
We’re just going to loop a tiny section of the sample. In order to loop as small a section of our sample as possible, we want to turn off ‘Snap To Grid’ in the Grid dropdown menu.
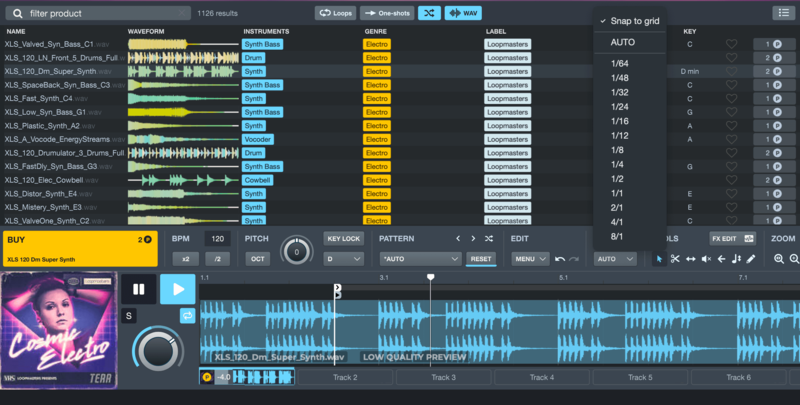
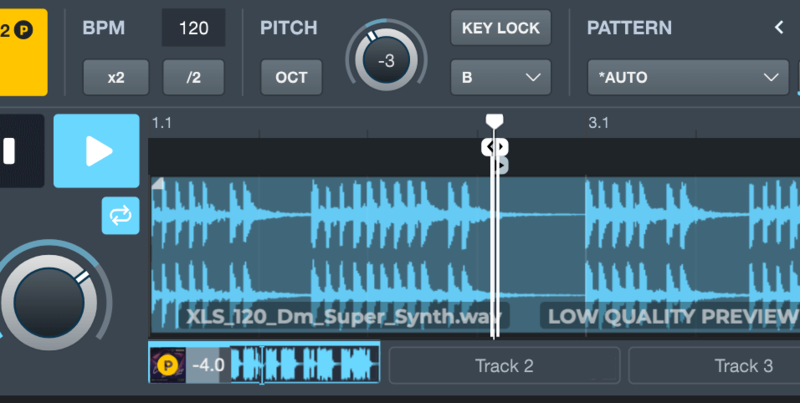
Drag the handles at either end of the sample to loop a small snippet of the audio file. When you get a small enough section looping you effectively end up with an oscillator. Repitching the sample in Loopcloud gives you different notes.
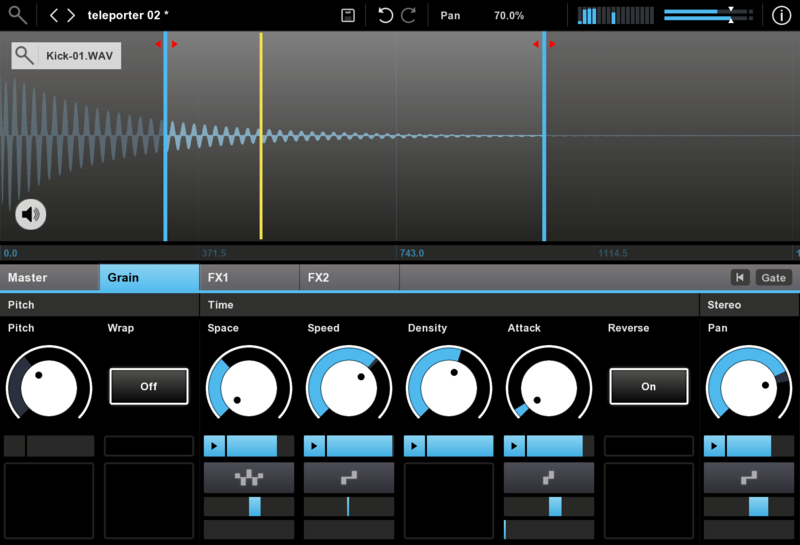
Let’s mess with the sound more. We can add to the granular sound of our loop using the in-built Grain Stretch effect, adding some slow compression will help bring out the punchy, glitch side of granular synthesis, and a bit of delay will give us a fuller sound.
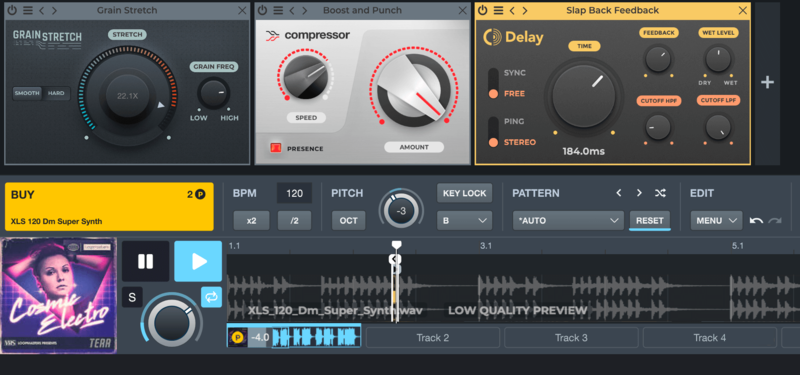
Now that we’ve looped a small section and built an effects chain, we can randomly pick different samples and see how they sound when they’re granulated. Play around until you find something cool!
What is granular synthesis good for?
The process of granular synthesis creates dynamic, organic sounds that don’t always confine themselves to the realm of the predictable. Each granular synthesizer is different, with its own array of parameters to control the generation and design of the sounds it is emitting. Playing around with the playback characteristics and the graintable position will provide you with a huge spectrum of sound material, and the way you choose to combine and layer this material will lead to very different results.
The characteristic “alive” sound of granular synthesis does lend itself very well to textural work though, meaning drones, pads, ambience and other noise layers. You can use automation on the time gaps between the grains, the crossfades, and the grain lengths themselves to create slowly evolving drones, which you could use to build up rich and layered soundscapes. Or, you could take percussive sounds and allow some of the transient into the graintable to create scratchy, fluttering ear candy to sprinkle into the background of your tracks. The possibilities are endless!
Using Loopcloud with a granular synthesizer
Let’s have a go at using some sounds from Loopcloud to create some texture granular synth patches in a DAW. You can follow along to this tutorial with any granular synthesiser, but we’ll be using Granulator II.
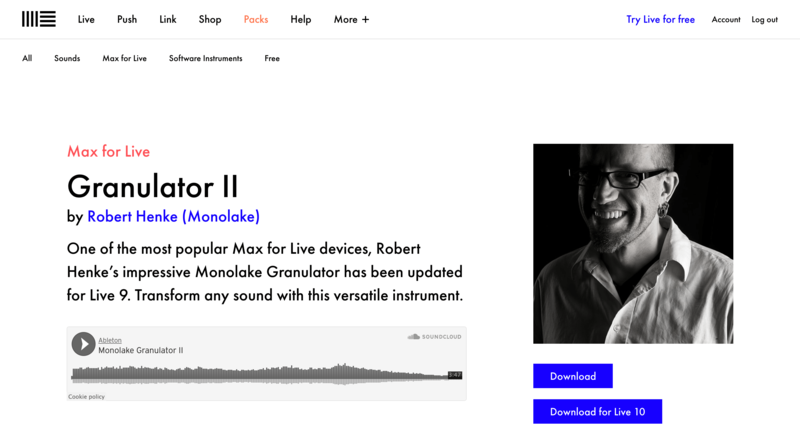
For any users of Ableton Live Suite, Granulator II is an amazing free granular synth that you can download from the Ableton website. Developed in Max For Live by Ableton Live co-developer Robert Hanker, Granulator II is a must-have for Ableton users.
Step 1: Find a sample
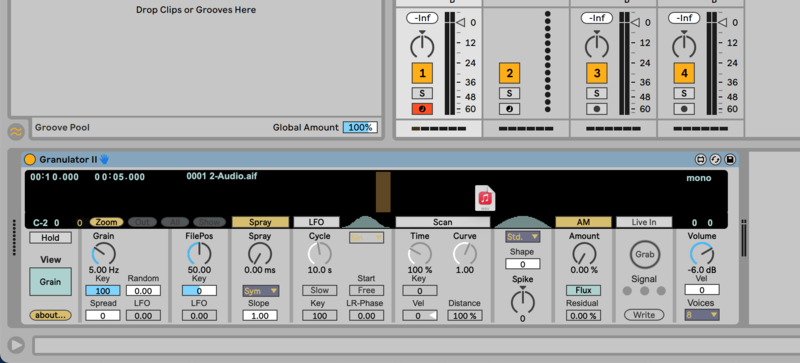
Let’s start by finding a sample to play with. Let’s grab a drum loop from UNDRGRND Sounds’ Classic Electro pack - buy it and then drag and drop it from the Loopcloud app into Granulator II
Step 2: Tweak the sample
The next step is to find a good point in the sample to use as a grain. To do this, hold a MIDI note and turn the FilePos knob.
Once you’ve found a part of the sample that works well, adjust the grain size using the Grain knob. This changes the length of the section of the sample that is looped by Granulator II.
The smaller you make the grain size the buzzier the sound of your patch will get.
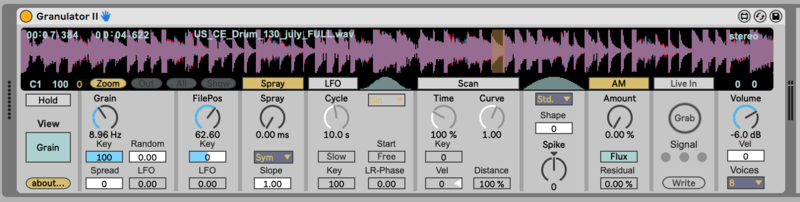
Step 3: Add some randomness
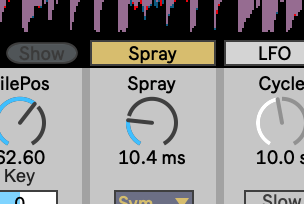
You can stop here with a perfectly good granular patch, but if you want to embrace the random, glitch granular aesthetic, it’s time to add some spray. Spray randomises the start point of the grain, the higher the spray value, the further from the initial start point grains will begin. If you crank spray all the way up, you’ll get a really random sound - subtly is often best here.
Step 4: Experiment!
The exciting thing about granular synthesis is that you never know what you’re going to get. If you don’t love the patch you’ve created, try dragging a bunch of random samples from Loopcloud. You’re bound to stumble across something you like!
The Best Granular Synths
New Sonic Arts - Granite
€99.00
Granite, from New Sonic Arts, has been used on the soundtracks of blockbuster movies and games such as Tron Evolution, and Mass Effect 3. Many people struggle with achieving a “pleasant” sound when using granular synthesis, but Granite has a uniquely musical sound making it an incredibly pleasing synth to use.
It has a minimal interface, but don’t be deceived. The few knobs and dials on display allow plenty of flexibility when it comes to sound design, and the modulation engine is the most intuitive in this list.
Audio Damage - Quanta
$99.00
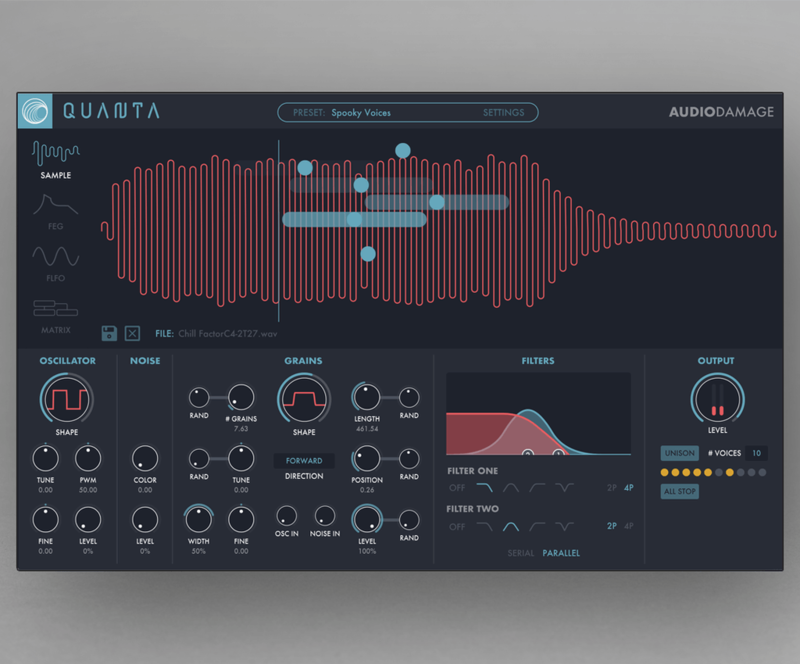
Audio Damage’s Quanta is perhaps the prettiest synth on this list. With its simple but highly functional UI, Quanta is the go to choice for many granular connoisseurs. It boasts a subtractive synthesis engine, many different modulation sources, MPE support, “sidecar” virtual analog and noise oscillators and up to 10 voices. There’s not much it can’t do.
Glitch Machines - Palindrome
$79.00
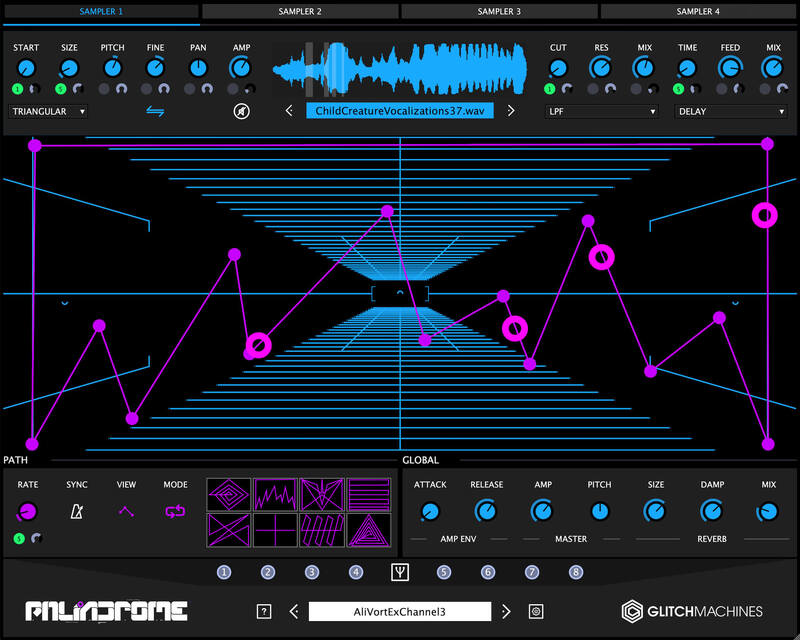
As their name suggests, Glitch Machines are known for their glitchy, experimental effects and instruments. They’ve even got two amazing free effects, Fracture and Hysteresis, that everyone should have in their collection.
Palindrome is no exception, it’s a powerful granular synth with a unique design. It houses four separate granular samplers, using the morphing grid in the centre of the plugin you can design morphing patterns to create a shifting sound scape. On top of that, each of the four samplers has its own effects slots, and the advanced eight break point LFOs mean you can add plenty of movement to your patches.
Granular synthesis is an exciting and versatile way of creating new sounds, and you can dive right in with nothing more than a laptop and Loopcloud. The sounds you create through granulating a piece of audio will be unlike anybody else’s, and that’s before you start playing around with parameters and effects to create different timbres and textures.
Whether you’re using it to create organic synth sounds that will act as a main instrument in your track, or designing ambient backdrops for a piece of music, you’re sure to find inspiration in the process. Using the same old synth patches can be tiresome, and one thing you can be assured of when getting your hands on a granular synth is that it will provide you with something different.
As we’ve outlined above, you can employ granular synthesis through the controls on the Loopcloud desktop app, or go further with a dedicated granular synth VST. Using the examples we’ve shown above as guides, load up a sound from Loopcloud today and get granular!