Blog
Compression & EQ the Easy Way with Loopcloud
2 Nov '2021
You don’t have to dive into a technical handbook every time you need to control a signal. Here’s how Loopcloud users can process things in a flash, using the integrated compression and EQ plugins.
Compression and EQ are probably the two most important effects in the world of music production, and there’s an awful lot of advice out there to match. With Loopcloud, we’ve taken an easier, more instant approach to our compression and EQ effects, helping you to quickly warm up a sample before you even drag it into your DAW. And once you do, you can bring it into your project with those toasty effects baked in!
Compression made simple
For those just entering the realm of music production, compression can be a little daunting. Perhaps it’s something to do with the amount of times the term crops up in mixing tutorials, and how it’s so liberally and nonchalantly used across tracks by producers in ways that make you wonder: “What just happened?” Or, maybe it’s down to the noncommittal control names on the effect’s interface like ‘threshold’, ‘knee’ and ‘ratio’.
Whatever the reason, the issue of compression and what to do with it is one of the most searched subjects in the music production corner of the internet, and the amount of guides and tips out there can make getting to grips with it seem like an insurmountable challenge. The reality is somewhat less dramatic however, and as you’ll see with Loopcloud’s in-built compressor, using it in your projects can be quick, painless and hugely effective.
The basic idea of compression is that it acts as volume automation, balancing out the distances between the loudest and quietest part of an audio signal, or the dynamic range. The way in which a compressor decides what parts of the signal are too loud or too quiet and what to do with them is determined by user input, using a few core controls:
- Threshold – the volume level at which the compressor kicks in.
- Ratio – the amount of compression that’s applied in relation to the threshold.
- Attack – how quickly the compressor catches the signal.
- Release – how quickly the compressor lets go of the signal.
Of course, there are other controls that affect the process, but these four parameters give the compressor its rules of conduct. When you apply compression to an audio signal, there’s usually some volume reduction involved, but remember this is moreso a change in the dynamics of the signal, and it will actually help the sound to be more audible in a mix. Even still, the reduction in dBs can be made up for with Make-up Gain and Output Gain controls.
Loopcloud’s Compressor
As you can imagine, every compressor unit achieves its goal differently, making this compression an area of endless exploration for engineers and audiophiles. Recognising that not everyone is going to be similarly committed to this specific area of production, with Loopcloud’s compressor we’ve chosen to pare back the process to make it a whole lot simpler for you.
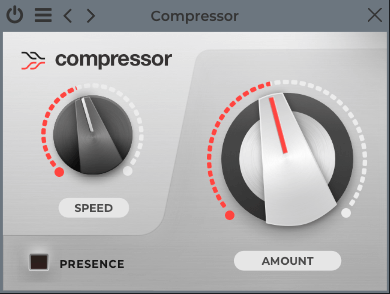
There are three controls on the compressor: Amount, Speed and Presence. The Amount knob affects how much compression is added to the sample, so the more you crank it, the more the sound will be crushed. The Speed knob affects how quickly the compressor affects the sample, and like an attack setting on the majority of compressor units, counterclockwise means faster compression. Finally, the Presence button boosts the upper midrange and treble frequencies of the sample in a way that makes it sound more pronounced and, well, present.
Easily compressing a vocal sample
Let’s take a closer look at how Loopcloud’s compressor works in practice, by applying it to a sample. We’ve selected a vocal sample from our library of over four million sounds, and although it sounds good, it’s missing a bit of punch. In the past, your only way of addressing this issue would be to drag the sample into your DAW and apply processing there, but Loopcloud’s FX Edit function allows you to make and audition changes to the sound at source.
With your sample loaded into Track 1 of the Editor, click on the FX Edit button to pull up the effects screen. Click Add Effect, and in the dropdown menu select Compressor, and the Boost and Punch preset. The compressor will pop up in the effects chain, with both the Speed and the Amount knobs set somewhere close to the middle, and the Presence button turned on.
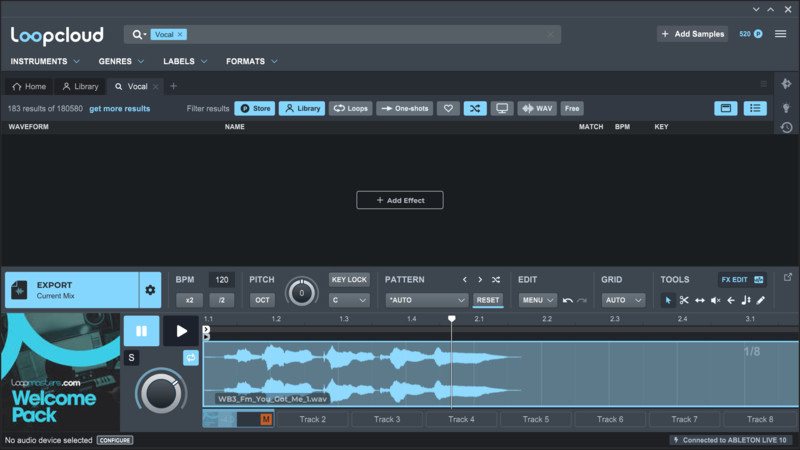
We could use the default setting and adjust until we get what we’re after here, but the Boost and Punch preset puts the vocal right up front and helps it carry through. With the Speed knob in the middle, the compression is neither too fast (which would make it sound very aggressive) nor too slow (which would sound very natural). Instead, there’s an addition of organic energy which is kept sensible with the Amount knob.
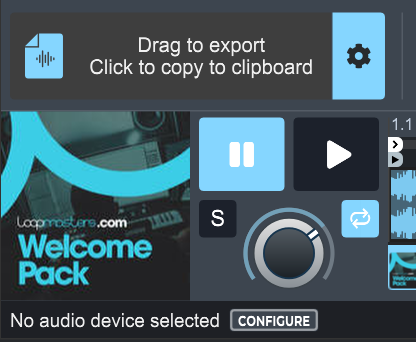
To transfer the sound into your DAW, you simply either click the Export button to consolidate the sample and copy it to your clipboard (then paste it into your session), or drag it over. Don’t worry, both methods will keep the compression that you’ve applied to the sample intact.
Quickly beef up a drum loop
Another widespread use for compression is drum processing. Drum tracks often have a wide dynamic range, with the volume peaking sharply on certain hits. Quieter elements of a drum performance can often be lost in favour of louder ones, and a compressor allows you to create consistency across the track.
As well as smoothing out the performance, you can use a compressor to creatively shape the character of the drum sound. Attack and release times affect the envelopes of notes, so you can play around with the snap and sustain of the drum hits and create punchier or boomier drum sounds. Let’s head back to Loopcloud and take a look at how to add drama to a drum loop using compression.
For this example we’ve found a raw sounding acoustic drum loop in the Loopcloud sample library and loaded it into the Editor. Hit the FX Edit button to bring up the list of effects, and select the Suck and Pull preset from the Compressor drop-down menu. Now, listen to the difference in the sound of the drum loop with this preset applied – it’s quite dramatic!
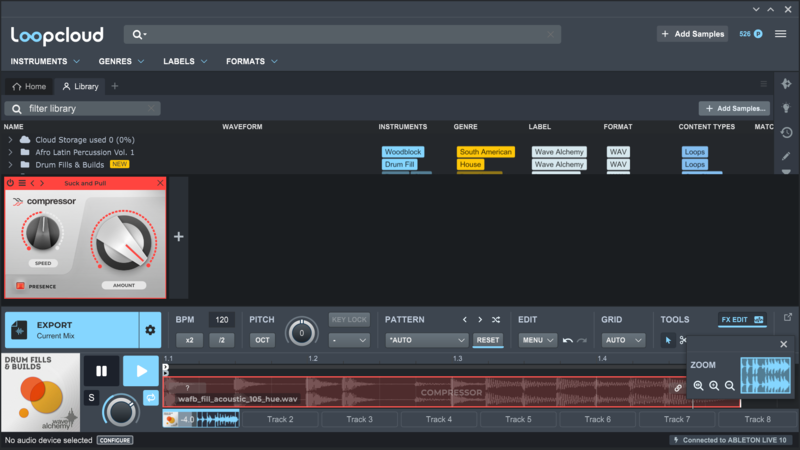
The Amount knob is fully cranked on this preset, meaning there is a lot of compression being applied to the sample. And you can hear it too, as all the low level details in the loop are magnified to be consistent with the rest of the drum hits, adding a whole new layer to the sound. Bypass the compressor a few times by hitting the On/Off button, and you can hear how the thin snare sounds of the original have been blown out and beefed up substantially.
EQing the easy way
Alongside compression, equalization is one of the most fundamental audio processing tools there is. EQing is the main method of shaping sounds, and is essential for creating space in a mix. Digging into a sound and adjusting the volume of its individual frequencies allows you to control its profile, exaggerating what sounds good, playing down what sounds bad, or completely transforming it in creative ways.
Loopcloud’s new EQ unit is a fully parametric four-band equaliser. Each frequency band can be set to a filter, shelf or bell curve, and adjusted using the Frequency, Gain and Q dials, or simply dragging the numbers on the display. Bands can be turned on and off with their green switches.
Filters allow you to cut out everything above or below a certain frequency, and are split into high pass filters (which let anything above a set frequency through) and low pass filters (which let anything below a set frequency pass through). Shelves work in a similar way, but using set amounts of dB boosting instead of a complete cut out. Bell curves boost a frequency at a set point, and can be shaped using the Frequency, Gain and Q dials, which essentially control how wide or narrow the boost or cut is, and therefore how much of the surrounding frequencies are included.
Let’s head into Loopcloud and take a quick look at how all this works in practice. We’ve loaded up a vocal sample from the library in the Editor, and it sounds a bit flat and lifeless. You can EQ any sound, but it’s often with vocals where you hear the most pronounced improvements.
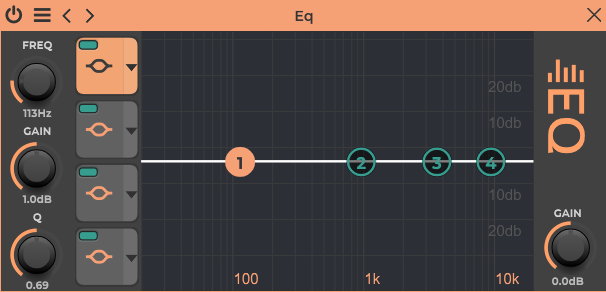
Click on the FX Edit button to bring up the effects section, and hit Add Effect. From here, we can cycle down the dropdown menu to the EQ subcategory, and choose the Add Some Presence preset. As you can see from the screenshot below, a high pass filter has been applied around the 100Hz range, with a bell curve providing a 2.1dB boost around the 3700kHz mark. This cuts out the muddy low end of the vocal and accentuates the higher frequencies, which gives it more clarity and definition.
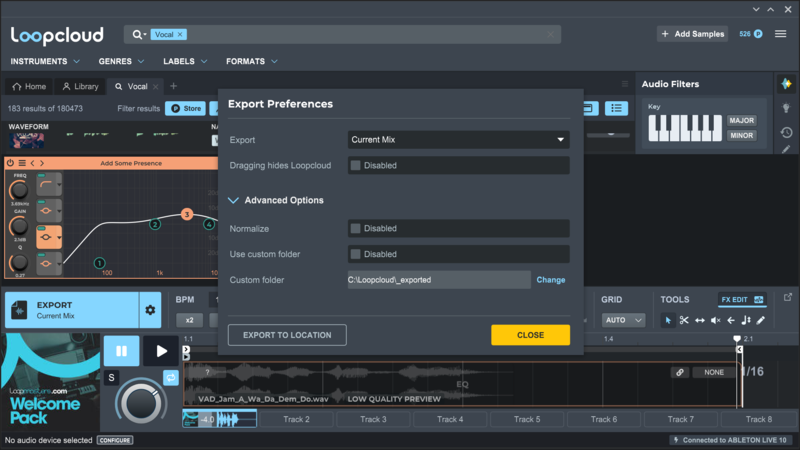
Click Export to carry the sample over into your DAW. Remember, you can click the gear icon to access the Export Preferences tab, which allows you to choose exactly which components of your mix in the Editor you want to export, as well as further advanced options like custom folder selection.
Working with compression and EQ together
If you’re serious about your mixes, you’ll probably be using compression and EQ on most tracks. When you’re working in this way, you need to be conscious of the relationship between the two effects, and not treat either in isolation.
As mentioned before, compression is mostly a volume automation tool, but it does alter the overall tone of the sound as well. Because we instruct the compressor to kick in at certain points of the waveform, it will affect sounds with different frequency profiles differently. Fundamental frequency areas will receive more compression, whereas quieter aspects of the transient and body of the sound will be less affected.
Because of the effect of compression on tone, and vice versa, a common production technique is to add an EQ ahead of the compressor in the signal chain and remove any unwanted frequencies beforehand. This way the compressor can work more efficiently on portions of the sound that do need more attention in the mix. Let’s jump back into Loopcloud to take a look at this in action.
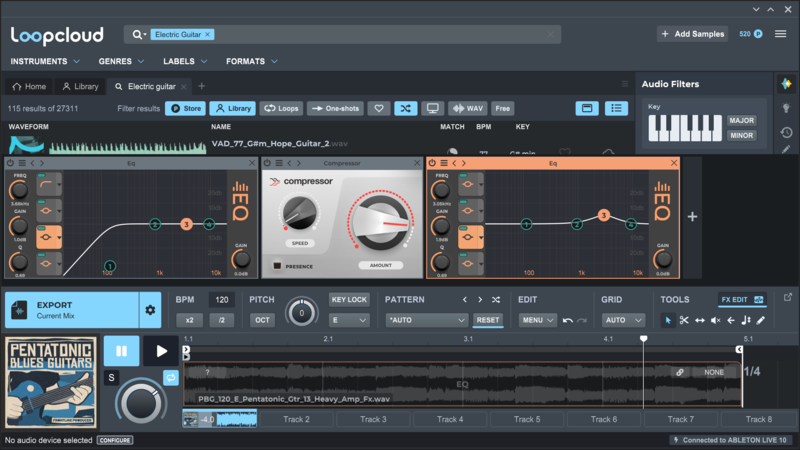
As you can see from the screenshot below, we’ve pulled up an amped electric guitar sample and compressed it quite heavily. The Speed knob is set very fast to catch the plucky transients of the plectrum on the strings, and the Amount knob is cranked for maximum attitude.

Next, place an EQ before the compressor and set it to a high pass filter. Nothing too drastic, just cut off some of the unnecessary low end that isn’t contributing anything to the overall sound. You should notice that the compression response is smoother, because it’s now dealing with a more refined signal.
So, you’ve thrown out all the junk in the sound and handed it over to the compressor to work its magic. The next step is to add a second EQ after your compressor, to boost the frequencies that you want to bring out in the mix without the compressor then taming them. Looking at our signal chain below, you can see that we’ve made a small boost in the 3kHz range, to give the guitar some punch.