Blog
How to create custom drum kits with Loopcloud DRUM
3 Jun '2022
Learn how to create unique drum kits using any sound and make your drums stand out from the crowd with Loopcloud DRUM.
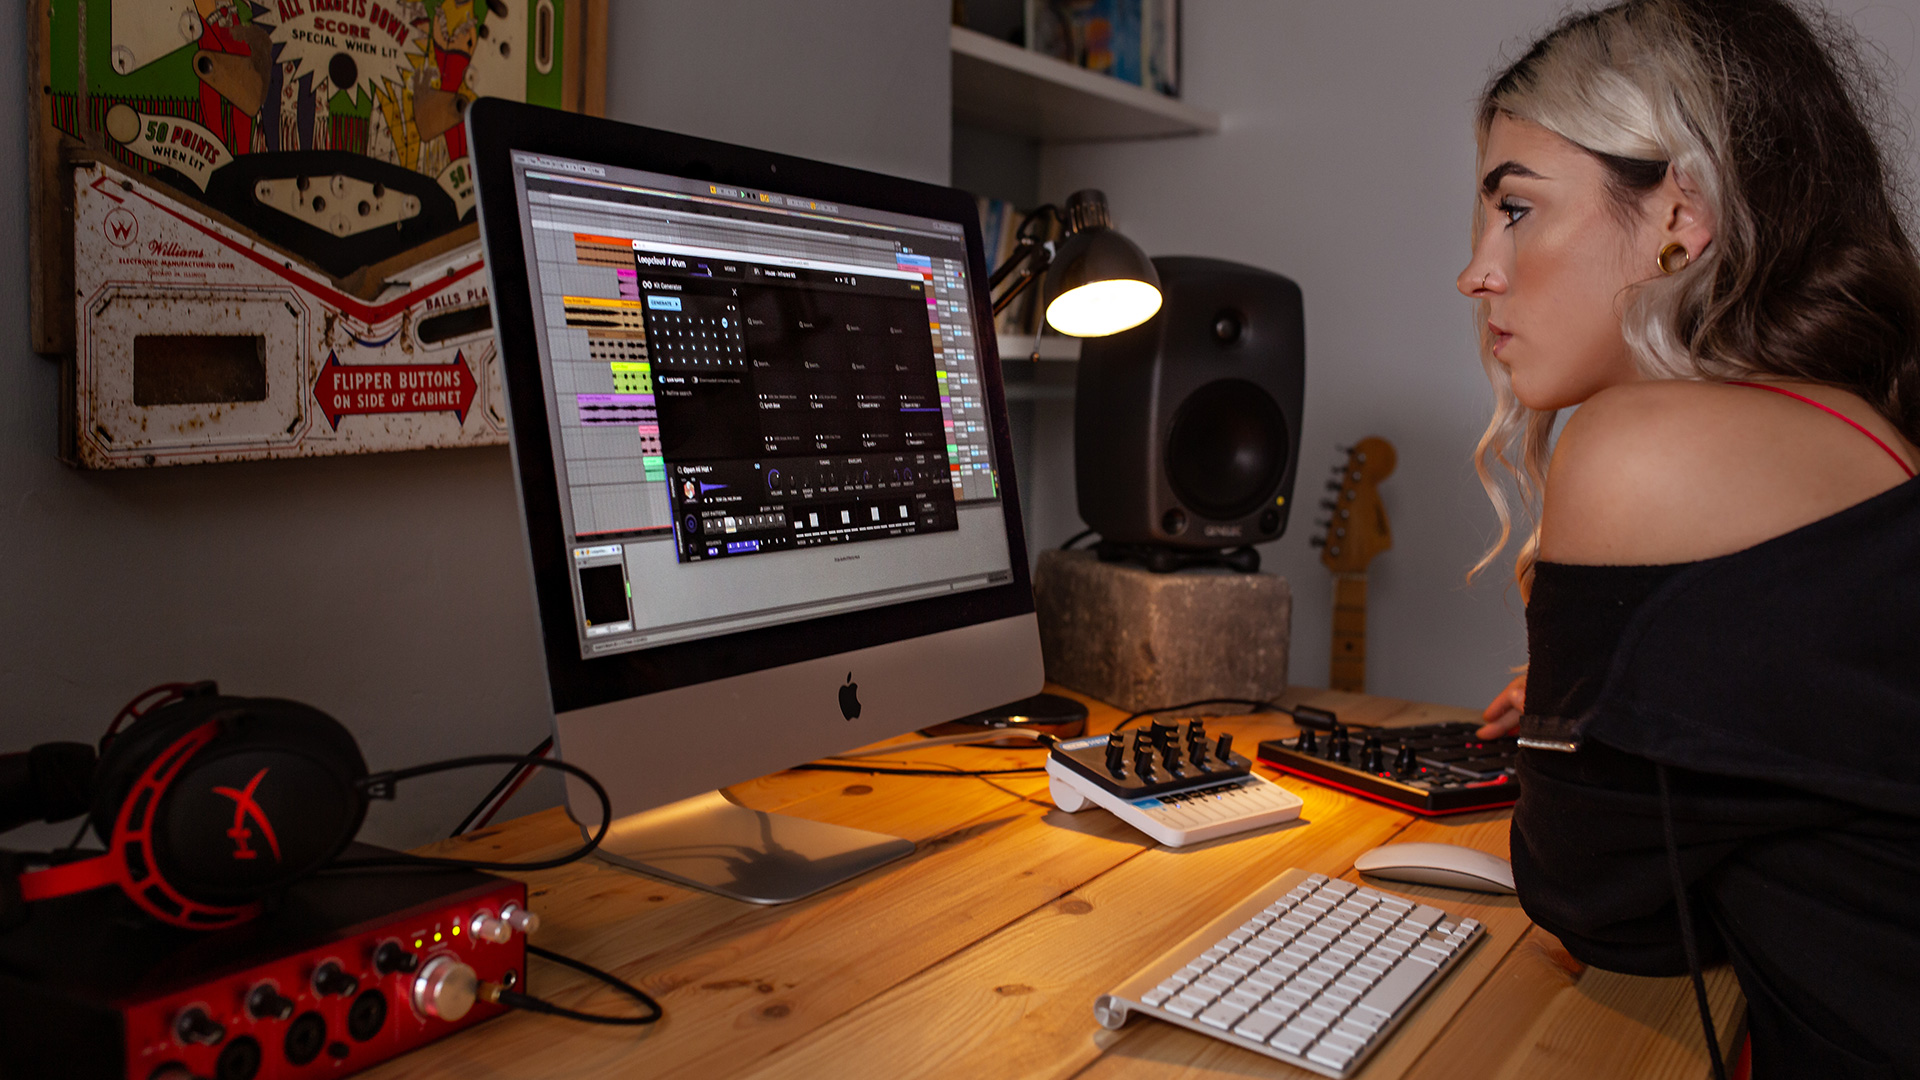
Loopcloud DRUM is a 16-pad drum sampler and sequencer that connects directly to Loopcloud, giving you access to a large and diverse library of premium percussion sounds. You’ll get DRUM with your Loopcloud subscription, and it functions as a plugin within any DAW that supports VST, VST3 or AU plugins. DRUM gives you instant access to cutting-edge kits curated by top artists and exclusive labels, and makes it easy to add top of the line drums to your projects.
As well as the curated kits that come with Loopcloud DRUM, you can also build and customise your own. In this article we’ll take a look at the different ways you can put your own stamp on your drum tracks and build custom kits with Loopcloud DRUM.
Starting from scratch
The Loopcloud DRUM interface is laid out in 16 pads, with each pad a space that you can fill with an audio sample from either your personal library, or the Loopcloud catalogue. How you choose to fill these spaces is up to you – you can add standard percussion elements like kicks and snares, or branch out and try something different like FX or chopped up vocals. The creative possibilities are endless!
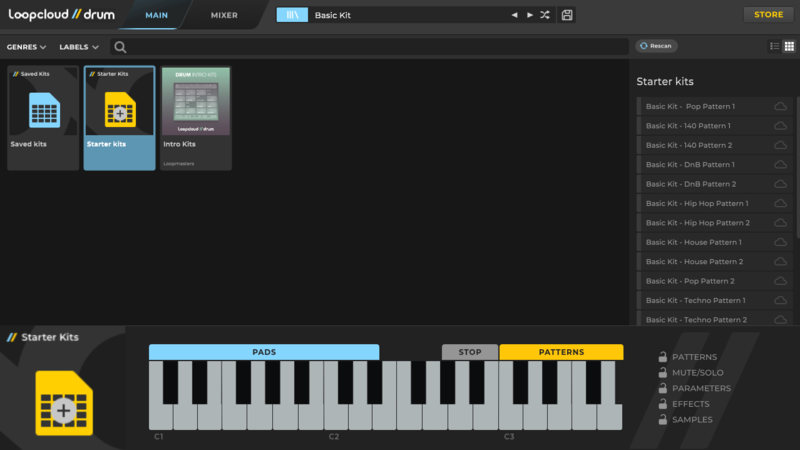
Loopcloud DRUM has a number of starter kits that you can use as templates for your own creations. To access them, click into the browser at the top of the interface, and select the Starter Kits icon. You’ll now see the kit templates open up in a tab on the right.
Note: Any kit that you select can be previewed before adding it to DRUM’s sampler by simply pressing the keys of the keyboard laid out at the bottom of the screen. You can run through the individual samples of the kit in the Pads section from left to right, or hear full loops in the Patterns section at the right hand side of the keyboard.
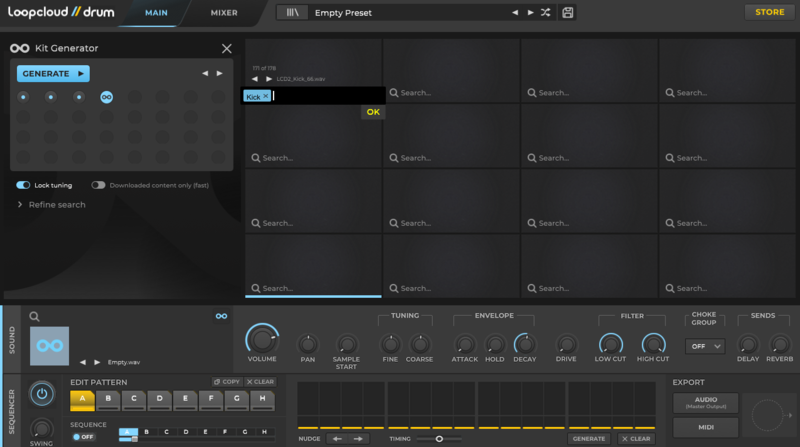
In order to build a completely custom kit, you’ll need to open up an empty preset from the Starter Kits tab. Double click Empty Preset to add 16 blank pads to DRUM, and open up the Kit Generator. You can access the Kit Generator by either clicking on the vertical tab labelled ‘Kit Generator’, or hitting the infinity icon at the top right of the Sound section below it.
Once the Kit Generator has opened up, you’ll see that each pad now has a small search bar at the bottom. To find the samples you need, all you have to do is start typing into the search bar and Loopcloud will suggest tags. For example, if you wanted to audition kick sounds, you would type ‘Kick’ in the search bar, add the blue tag that pops up, and then cycle through the samples that are produced using the arrow buttons.
Working your way along the pads, you can add samples in this fashion until you’re satisfied with your kit. Hitting the Generate button will randomise all samples in the pads according to the individual tags you’ve added. You can also use global filters by genre and label to further refine the search, and lock individual pads so that the selected sound isn’t included in the generating of new samples.
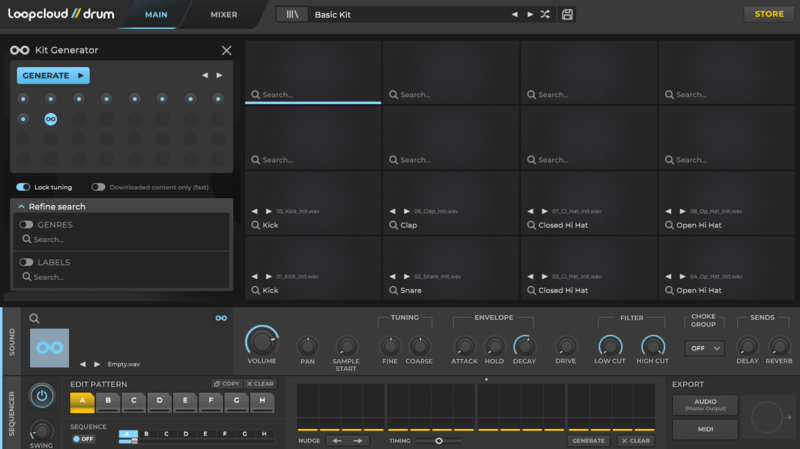
If you would prefer to have a solid foundation to build upon, rather than starting from an empty preset, try the Basic Kit template. This kit has drum samples loaded into the first eight pads, in a standard layout of kicks, snares, hi hats and claps. Using this simple drum sampler formation, you can use the Generate button to tweak and customise your kit.
Editing preset kits
Everything in Loopcloud DRUM is editable, including preset and purchased kits. One way of building your own custom kit is to simply swap out samples from an existing kit and add your own. This way you can end up with hybrid kits featuring samples that you’ve chosen alongside artist-curated sounds. Here’s how it’s done.

Load up a preset kit in Loopcloud DRUM, open up the Kit Generator and click on any pad. You can swap out an individual sample from a pad, or hit the Generate button to randomise all the pads in the kit.
When searching for samples, you can use the Refine Search option to give Loopcloud DRUM further instructions about what samples it should be looking for. You can choose to search only the local content on your computer, or both cloud and local content.
You can also add Instrument tags and Genre tags, so for example if you were looking to cycle through some trap hi hats you’d add ‘Trap’ and ‘Hi Hat’. It’s also possible to add multiple tags in each category to get a variety of search results.
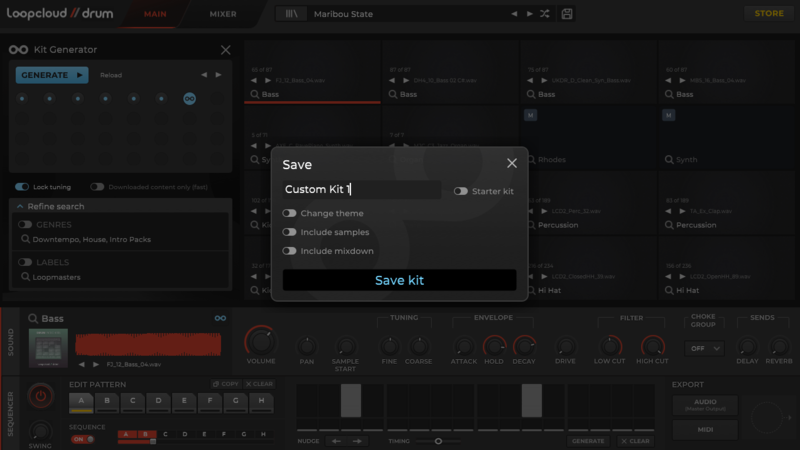
Once you’ve modified the kit to your liking, hit the save button to the right of the kit name at the top of DRUM. You can save the kit under a new name and choose a different colour theme to differentiate it, as well as include the samples in the saved file and any changes you’ve made in the Mixer tab.
Modifying samples
Another way of making your mark on Loopcloud DRUM kits is to tweak the parameters of the sounds in the kit using the sample editing controls on the plugin. That way, you can come up with a new set of sounds by taking samples and completely transforming them.

An obvious place to start with this method is the tuning knobs: Fine and Coarse. The Fine knob allows you to make subtle tuning adjustments to a sample, but the Coarse knob enables drastic alterations. You could remove the clicky transient from a kick sample by pitching it down, or turn a snare into a perc hit by pitching it up.
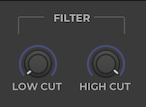
Two other useful tools within the sample editing section for sound design are the high and low cut filters. By removing frequencies above the thresholds determined by each, you can totally reshape individual drum samples, creating textural FX sounds or muffled hits for minimalist productions. When used in conjunction with the tuning knobs you’ll get even more pronounced results.
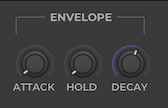
Don’t stop there though - there are even more ways of customising drum samples within DRUM. Use the Envelope section to alter the character of a sample by adjusting the Attack, Hold and Decay, or even layer delay and reverb on top using the Sends section on the far right of the interface.
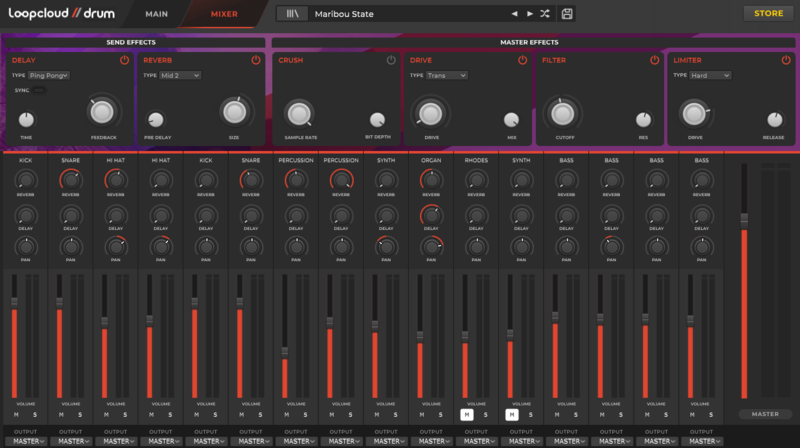
By heading into the Mixer tab you can also get hands on with some of DRUM’s internal effects to further shape the sound of your samples. The mixer has delay and reverb sends for each pad, which you can tweak using the knobs in the individual channel racks, which also include volume and panning parameters. There are also crush, drive, filter and limiter master effects which can be applied to the entire kit.
Sample editing in DRUM is a rewarding creative avenue to go down, particularly with the diverse range of sounds you have access to in the Loopcloud catalogue as starting points. Check out the video Tutorials page here for more specific DRUM techniques and FAQs.