Blog
7 Easy Music Arrangement Tips for Better Tracks
31 Oct '2022
Give your tracks shape and structure with these useful music arrangement techniques.
The first few hours are usually the most fun part of music production. You get a musical brainwave, scurry over to your favourite instrument to flesh it out, record it into your DAW and sketch out a rough arrangement. So far so good, that is until you come back from your tea break and listen back to your handiwork, only to find that the track sections aren’t blending together and the energy feels flat throughout.
The good news is, there’s no need for alarm! You’ve reached the next phase of the creative process, which requires you to refine your track into a full arrangement. Most of the pieces of the puzzle are sitting in front of you, and all you need to do is fit them together in the right order. There are an infinite number of ways of arranging a track, but we’ve made it easy and compiled ten simple strategies to get your project heading in the right direction.
Create dimension with harmonies
There’s nothing quite like hearing a choir of backing vocalists stacking up some harmonies in a track. Harmonies add power and drama to a musical section, and they can also be used subtly as an excellent way of refreshing a part that the listener might have already heard before. Offsetting a main melody with a few choice notes can add extra dimension to your track, and spruce up the second half of a verse or chorus. As an arrangement device, try bringing in harmonies as your track progresses to give it a sense of forward movement.
Some people have a natural ear for harmonies, and others pick them out using music theory – but don’t worry if you’re not in either camp. An easy way of landing on a harmony to support your main melody is to copy the original and transpose it up or down. Good ‘preset’ starting points for this are five notes, seven notes or a full octave above or below the original tune. Adding a harmony to support your melody will introduce a pleasing blend for the listener's ear, but be careful not to overdo it!
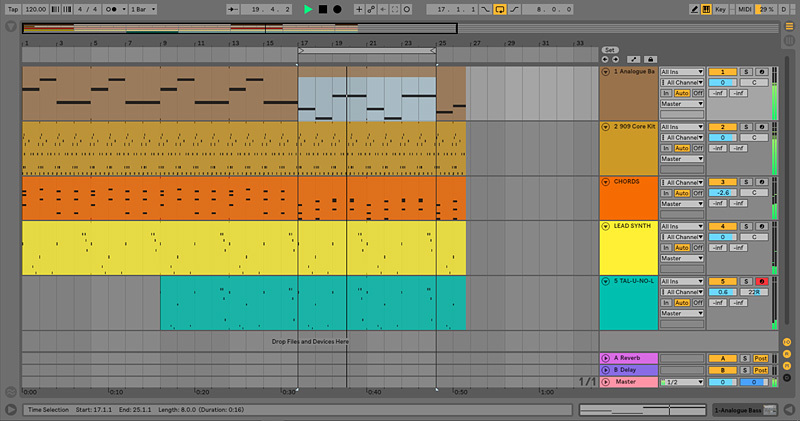
In the example above, the verse was feeling a bit repetitive and didn’t ramp up into the chorus. To fix this, we can bring in a harmony that matches the main synth line (albeit with different pitches) starting halfway through the verse. The main melody pivots around E, so for our harmony we transposed that note fulcrum up seven pitches to B. The rest of the harmony line was created by trialling different note intervals to see what sounded good.
Add interest with single-bar fills
A pleasure delayed is a pleasure enhanced, and sometimes the best way of increasing the impact of a section and keeping the listener on their toes is to add an extra bar into the mix. You can signal the upcoming change in the track with filters and atmospheric FX, but by slightly delaying the point of entry to a drop or a chorus you can crank up the tension to eleven.
Adding in an extra bar is all well and good, but what should you put in it? Well, one approach is not to put anything at all in there! Complete silence can often be your best bet, as it provides the ultimate contrast to a full on chorus or drop section. Alternatively, you could shake things up with some enjoyable flourishes, for example adding a single-bar fill that consists of a melody or drum part designed to springboard into the next section.
Make space with the offbeat
The beat of your track is the pulse which provides energy and forward momentum. For those of us with a sense of rhythm, the gravitational pull of the beat causes all sorts of odd physical reactions including toe-tapping, head nodding, finger clicking and questionable dancing.
Because the regular pulse of a track is so easily felt, it’s easy to load up melodies and sounds on the beat at crucial points of the arrangement. This can create clutter, and lead to sounds being buried in the mix and not getting a chance to shine. By considering where and, importantly, when sounds are occurring relative to each other you can create space in your arrangement.
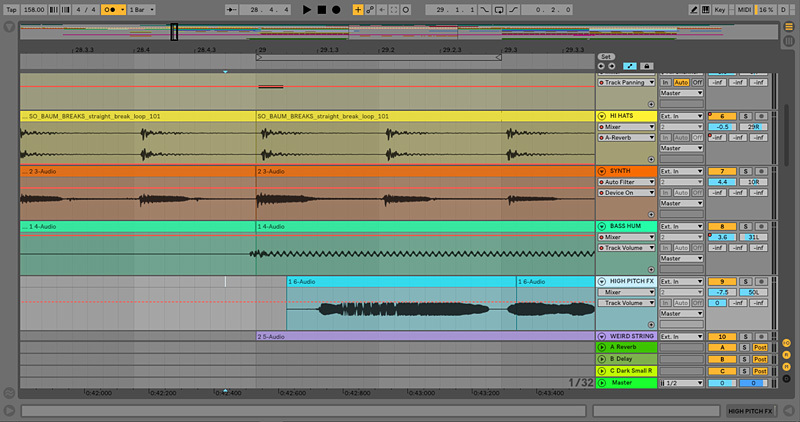
For example, let’s take a pre-chorus section of a track which has a lot of elements that begin on the first beat of the bar. We’ve got hats, a synth pluck, bass and drum parts all kicking off together, which provides the foundation of the sound. There is some high-pitched FX providing atmosphere in the background, and because they’re not a melodic part, we can easily shift it to the off beat to give it space.
Start things off with a DJ intro
Figuring out the best way to start your track can sometimes be a bit of a head scratcher. Today’s streaming serviced youth gravitate towards tracks with minimal lead ins, but there are certain genres in which the intro lives on as b>ly as ever. Dance music, for example, is all about holding the audience’s hand as you walk them into the rhythmic depths of your track, starting with small steps and gradually introducing more and more elements.
If your arrangement is lacking an intro or lead in, you can create a bespoke intro pretty easily by stripping back the main drum loop to its simpler core elements (such as the kick, one or two hats and the snare) and adding some atmosphere with sweeps and other atmospheric FX.
This will both overcome a structuring problem and ensure your track is DJ-friendly – they’ll prefer a rhythmic intro to mix with. DJ intros typically push forward over their 16- or 32-bar run, so it’s a good idea to bring in more percussion as it goes, and perhaps hints of the melody to come, or recognisable FX.
You’ll find plenty of examples of intro edits on Beatsource, an exciting collaboration between Beatport and the world’s largest promotional record pool, DJ City. Pro+ subscribers get access to DJ Edits, adapted versions of songs that have been rejigged to help DJs mix them easily and creatively with other tracks.
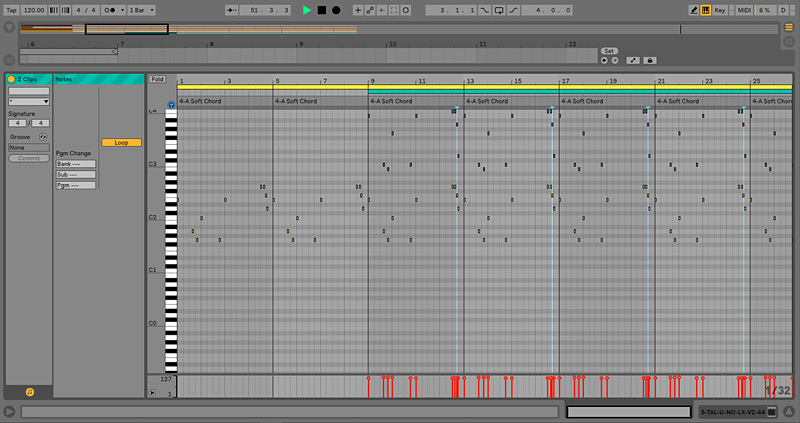
Change the range of a melody
There’s a reason why we’re drawn to well written melodies: they tell our brain where they’re going. Descending melodies suggest resolution and tapering in, while ascending melodies give us a sense of lift off and euphoria. Repeating riffs or melodies in a song can become boring easily, which is why transposing parts into different octaves or ranges can be a quick way to inject movement to a part.
![]()
In this example, we’ll pitch up the melody of the lead synth part during the second half of the chorus. This gives the sense that the chorus is moving towards something, in this case the hook section. This particular synth melody is MIDI, so we can add a pitch transposition effect to bump it up a whole octave, and automate the effect to switch on halfway through the chorus.
Alternatively, if you’re struggling to get two or more parts sounding clearly when playing together, pitching one up or down an octave can give it its own space to live in. This can be further accentuated with the use of EQ, to ensure the parts are occupying a complementary space rather than competing and ending up flat and muddy.
Anticipate changes with filtered builds
To maintain interest throughout your track, it’s important to make sure that changes are anticipated and have the desired impact without being jarring or underwhelming. In dance music, one way of doing this is to use a filter to selectively cut out bass frequencies, leading into a payoff – the drop – that returns to the full frequency range. By automating the filter to ease the full frequency range back in over the course of the build-up, you increase anticipation for the listener and ensure that the incoming section packs a punch.
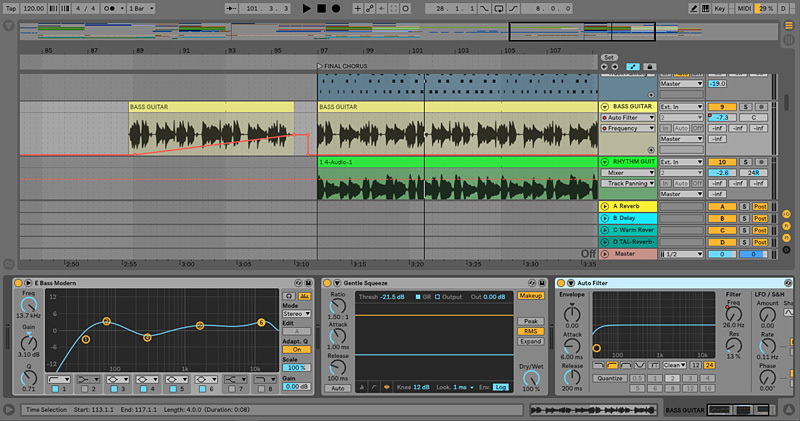
In this example, we’re transitioning into the final chorus of the track. We have a bar of silence just before the chorus kicks in, which adds impact, but we can add a high-pass filter to the bass guitar riff to intensify that effect. By automating the filter so that it reaches 650 Hz at its peak, the bass guitar riff dissolves before kicking back in with full frequency range in the chorus.
Switch up the supporting chords
If, after listening back to your rough arrangement, you find that it’s sounding a bit musically tired as the track goes on, you can try revamping the chord structure in certain sections for some fresh momentum. Whether your lead is a synth line, a guitar or a vocal, switch things up by changing the supporting chords beneath it to different, complementary ones. This will give your melody an ear-catching ‘same but different’ vibe.
A good way to start this process is to change the bass line first. Make one or two subtle adjustments to the bass line (staying in key), and then match those changes in the chord structure. You can play around with the chords by inverting bass notes or adding in extra pitches, but you should be able to create a slightly different chord progression pretty quickly. Once you’ve managed this, you have the option to return to the original bass line under the new chords, or stick with the new bass line.
In this example, we needed a way to switch up an outro section. We kept the lead melody exactly the same, and switched up the supporting chords underneath. The register of the bass line is lower than the original riff, and the chords follow suit, giving the track the sense that it’s fading away or losing energy.