Blog
Sound Design: Create twisted audio textures with Loopcloud
9 Sep '2022
Loopcloud’s multitrack sample editing workstation can be used to add character to boring sounds

In the physical world, we use “texture” to describe the feel, appearance or consistency of a substance. In music production, we can use it in a similar way, albeit using sonically equivalent terms such as timbre or dynamics. Texture informs the unique character and quality of a sound that enables you to tell if it’s an analogue synth or a violin playing the same note, and by the same token, to discern between a cheap violin or an 18th century Stradivarius.
If you want to create complex sounds with plenty of presence and sonic character, crafting a diverse textural profile is the way to go. Read on to see how you can enhance a sound by building your own textural layers in Loopcloud’s sample editor.
Creating and blending layers
Using a sound design technique called layering, you can take a basic sound and build it out into something very different in your DAW. By mixing and arranging a collection of audio layers into one sound, you can add a textural dimension that can be used subtly as character-defining ear candy, or stacked liberally to create interesting soundscapes or musical patterns. If it’s all sounding a bit complicated, don’t worry, with Loopcloud it doesn’t have to be!
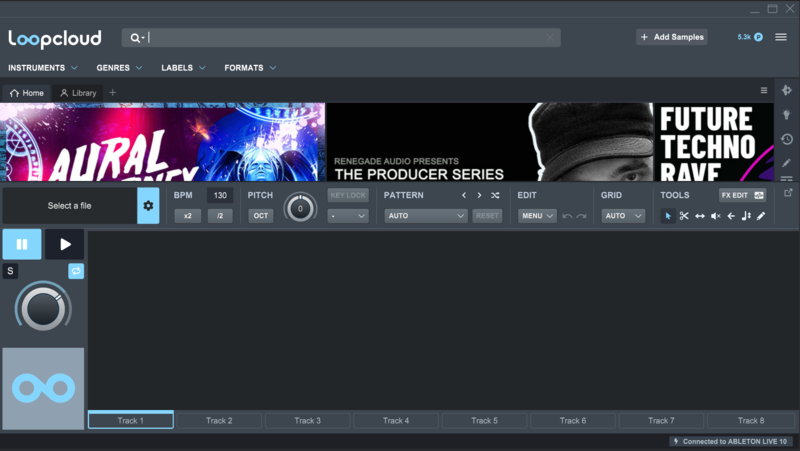
The Loopcloud catalogue is full to the brim with all manner of sounds, which makes it a great place to look for ready made textures and ambiences. Let’s build up some background ambience using Loopcloud’s sample editing section, which features eight track slots and a host of customisable parameters for mixing.
When you click into a track and adjust a parameter like pitch or pattern, your changes will apply to the sample that’s loaded in that track only. The same goes for any effects you add to the FX Edit section. This makes it easy to create a unified sound that’s made up of multiple elements, perfect for layered sound design.
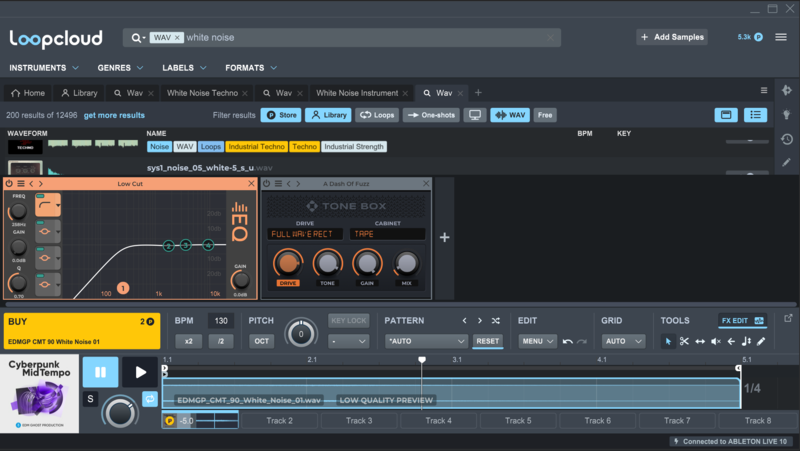
We’ll start by adding a white noise sample into Track 1. Because we’re looking to create a background texture, it’s important to choose a sample with an even volume profile that you can loop seamlessly. Our sample is a downlifter from the Cyberpunk Mid Tempo pack, so we’ll reduce the volume from the first section of the sample and make it more even. Add an EQ with a low cut filter to cut out everything below 1kHz and give it some air, and then add Tonebox with the A Dash of Fuzz preset to fizz it up somewhat.
Next, it’s time for some vinyl crackle. We’ll pinch a crackle loop from the Lofi Melodies & Beats pack, and drop it into track two. Crackle works best when it’s barely audible, so we’ll decrease the volume of the sample by dragging the volume automation line down to -10dB.
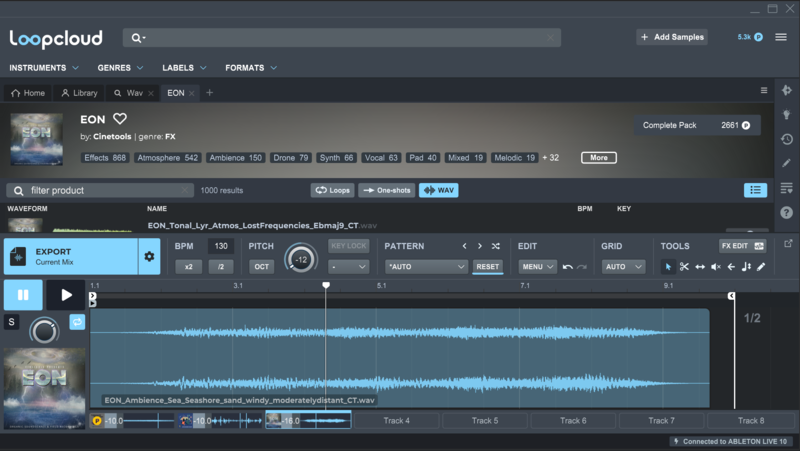
To complete our layered background ambience, let’s add in a wind sample. Loading a wind ambience sound from EON by Cinetools into track 3, it’s immediately apparent that the sample is too loud. We’re aiming for texture here, so subtlety is key. We’ll lower the volume of the sample to -16dB, and pitch it down a whole octave to make it sound muddy.
Exporting your sound
With our sound design session complete, it’s time to export all the layers out into one audio clip. We stopped at three layers, but in the five remaining track slots we could have continued to stack and blend more sounds. Remember, the more you add, the denser the frequency profile of the sound, so make sure to use Loopcloud’s EQ to remove unnecessary frequencies from the layers as they’re added.

To export all the layers as one, either drag from the Export button or click on it to copy your audio to your clipboard. Once it’s on your clipboard you can paste the sample onto audio tracks in your DAW, or a folder on your computer.
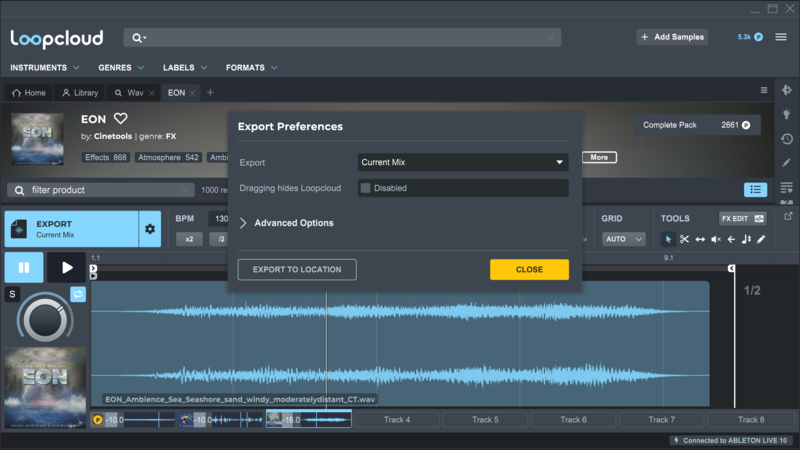
You can also set your export preferences on Loopcloud to adjust the type of file you’d like to export in future. With this function, you have several options: Current Mix, Original File, Processed Separate Files, Processed Current Track and Original Separate Files. Exporting out separate files will deliver the individual layers in isolation, which can be useful if you want to do more in depth processing in your DAW.
Building rhythmic textures
As well as static sound layers that add depth and character to a sound, you can also create atonal rhythmic textures that can slot in behind your drums. This is a useful technique for transforming bland beats and filling in space in the mix, and it can be achieved very easily using Loopcloud’s Pattern presets.
To illustrate this, let’s take a simple 808 beat with a kick on every beat and a snare on every second beat. On its own, this is pretty boring, so let's spice it up. Take a white noise sample from Loopcloud (it doesn’t have to be white noise – any textural loop will do!) and double click it to load it into the editor.
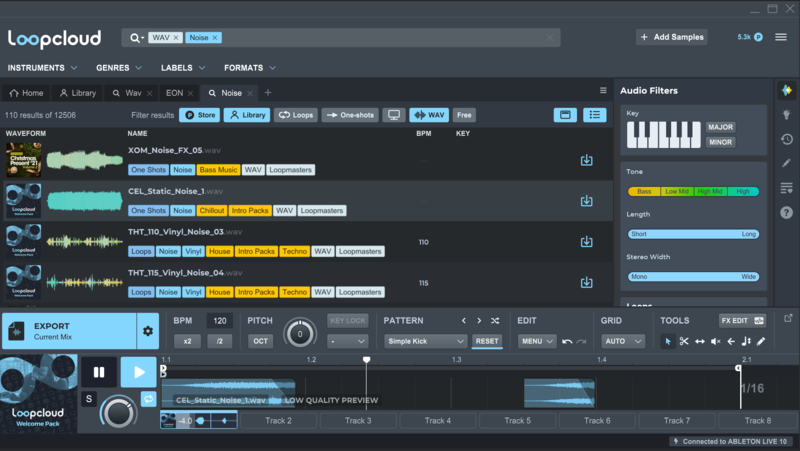
With the two components of our drum track landing on the beat, let’s try layering in the white noise on the offbeat. Click into the Pattern dropdown menu and choose the Simple Kick pattern from the Essential Starters group. You can alter the pitch of the sample to find a sonic colour that you like.
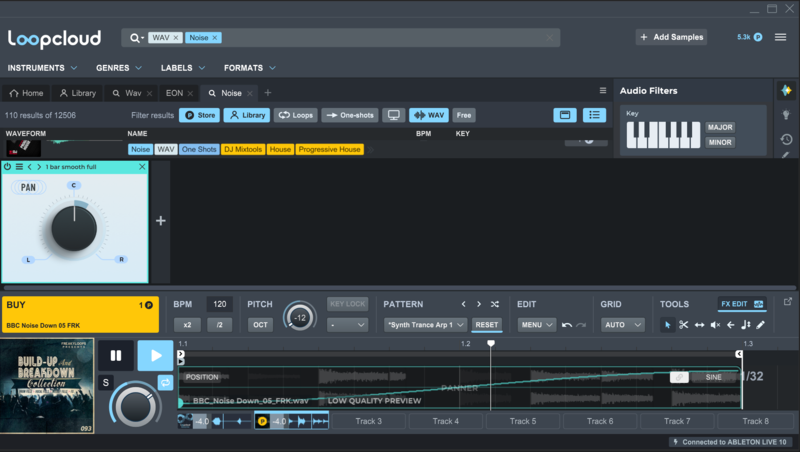
With the drums and the first rhythmic layer playing off each other, let’s add another. Using a different white noise sample in track two, select the Synth Trance Arp 1 pattern. This creates a syncopated rhythm that occupies the space in the sparse drum track. We can drop in a low cut EQ to accentuate the high frequencies of the sample, and then create a moving pan by loading up the 1 Bar Smooth Full preset on the Panner plugin in the FX Edit section.
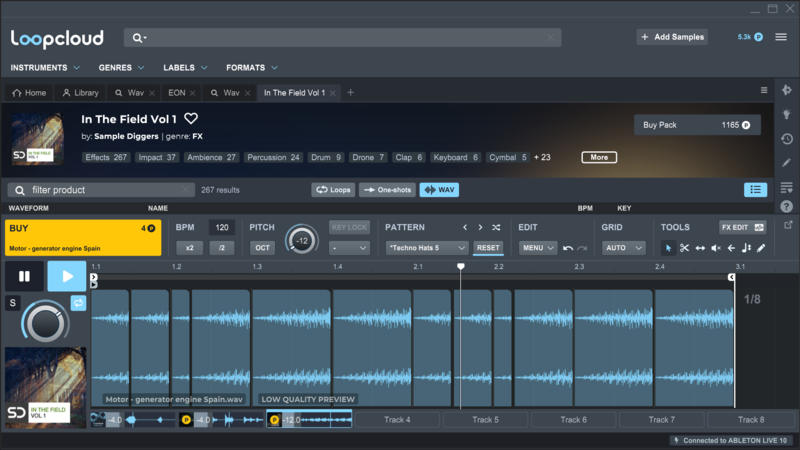
Finally, we’ll add a low techno rumble underneath everything. As we mentioned earlier, you can use any sample to form the sonic ingredients for your rhythmic roux. Foley or found sound is often a great source material, so let’s add in the sound of a generator engine from In the Field Vol. 1.
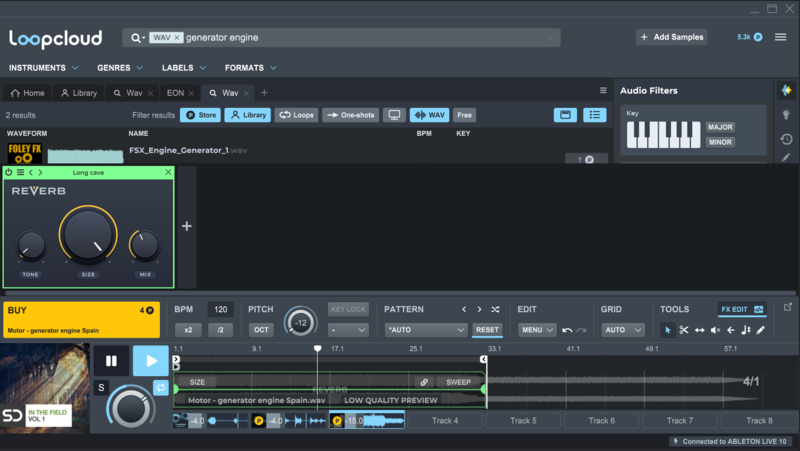
Pitch the sample down a whole octave, and then select the Techno Hats 5 pattern. Lower the volume to -12dB. Give the sound some atmosphere with a long reverb preset like Long Cave. Now we’re rumbling!
Further processing
Building up textural layers enhances the sound, but you have to be careful not to allow them to dominate the mix. Judicious use of EQ is necessary to cut away frequencies and create space in the mix, otherwise you run the risk of ear fatigue.
Using Loopcloud’s built-in EQ plugin you can carry out some early processing on your textural layers, but once you’re in your DAW you can continue to shape and sculpt your sound. Try experimenting with bitcrushing, saturation and distortion to add further detail and grit to your sound.

The magic of a DAW is that it’s a very high-precision instrument, but the knock-on effect of this is that sounds can be quite static and clean. Using Loopcloud you can create and combine entirely new rich musical voices by layering up to eight different samples.
Where you choose to find the sounds for your textural layers is up to you, and with Loopcloud’s extensive catalogue of over 4 million sounds you won’t find it hard to find what you’re looking for. Use the search filters to hone on a sound, and if it’s not quite right, use a section of it by splitting the clip or changing the loop length.