Blog
How to Get the Sounds of Tech House with Loopcloud PLAY
30 Nov '2022
Create custom instruments with PLAY’s versatile and easy-to-use sound engine.
After spending two years as the second best-selling genre on Beatport, tech house officially took the number one spot in 2021, leapfrogging techno and house. If you’ve paid any attention to electronic music festivals and clubs over the past while you’ll no doubt be none too surprised, and even if that’s not your kind of thing, your ears have probably gone a few rounds with a big room track blasting out of a car radio or gym speakers somewhere.
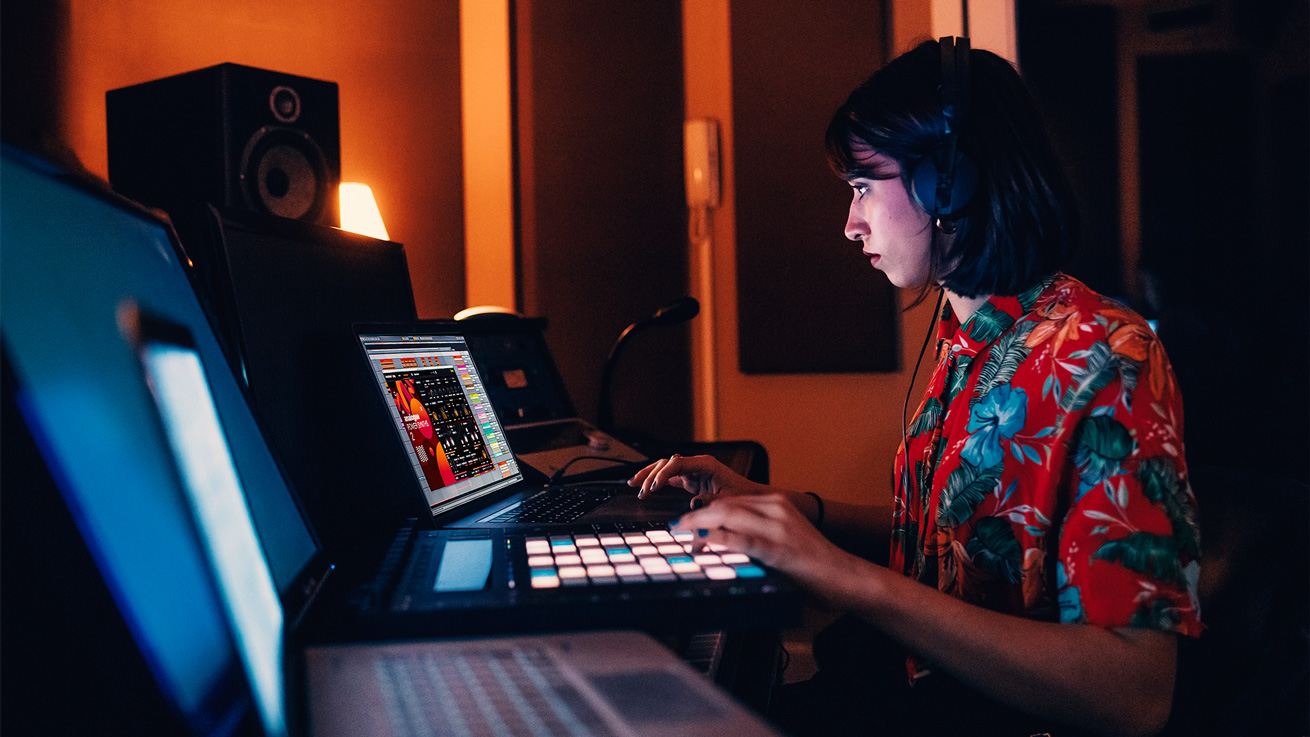
Tech house artists like Michael Bibi, Solardo and Max Chapman and others have become known for their muscular, driving beats, with taut synths and other melodic elements borrowing from neighbouring styles like progressive house. With its sound design capabilities and the ability to load up sounds from top producers around the world, Loopcloud PLAY is the perfect sandbox to experiment with tech house sounds, and in this article we’ll show you how it’s done.

Designing a Tech House bass in PLAY
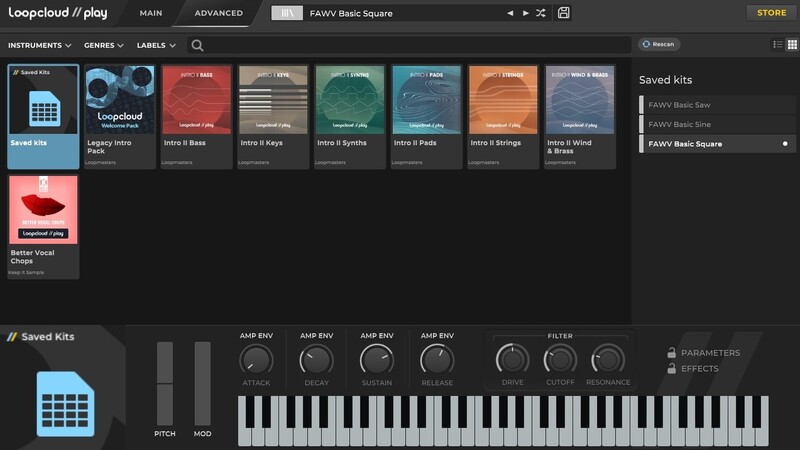
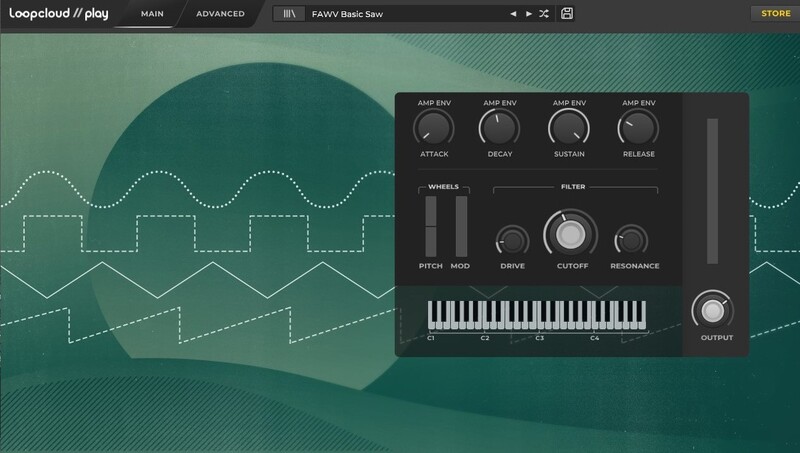
In tech house music, the bass lines are typically played in a very low range, so it’s important to get your sub bass right. For our tech house bass patch, we’re going to use a square wave instead of a sine wave to create a sub-heavy bass, due to its added harmonics. The default patch for PLAY is the FAWV Basic Square, so we can start from there.
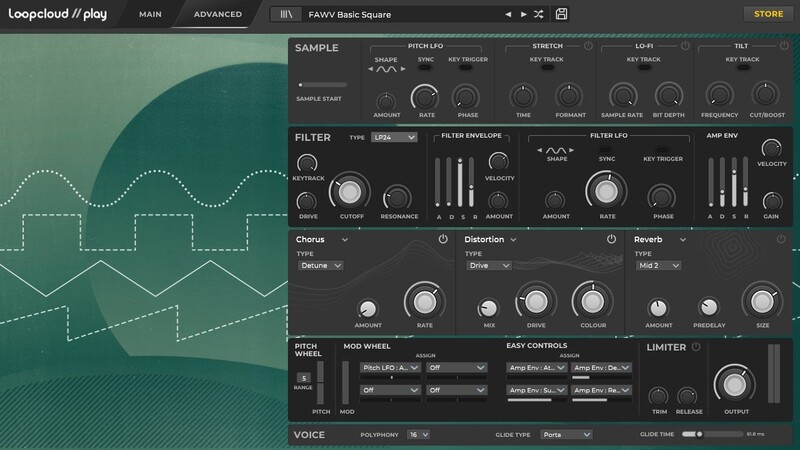
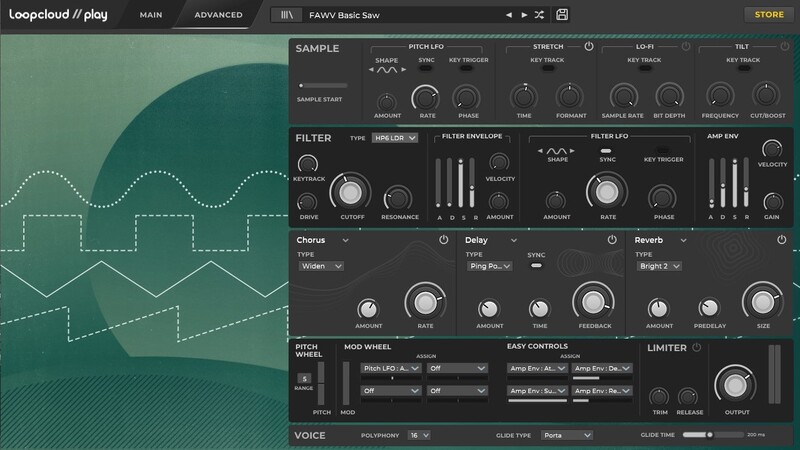
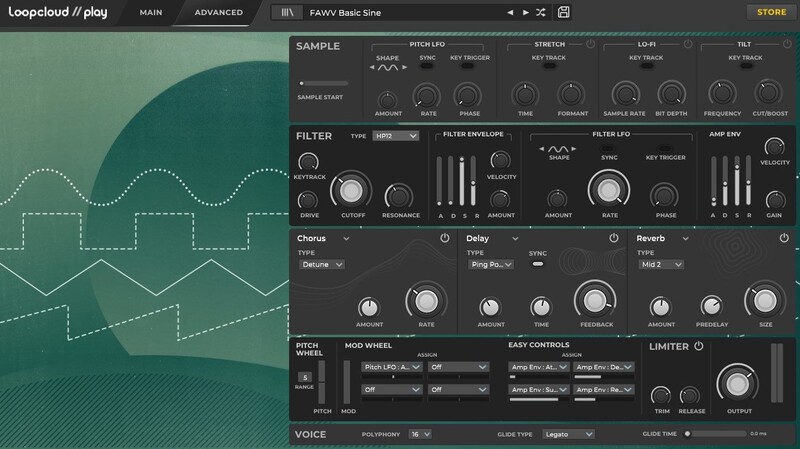
Loopcloud PLAY’s Advanced tab is where you can really get under the hood and customise patches. The first thing we’ll do is adjust the Filter, which should be set to LP24, an aggressive low pass filter that will cut out most of the high frequencies. Set the Cutoff to around 160Hz, and the Drive to 50%. We don’t want much resonance in this sound, so you can leave the Resonance knob at 25%.
We’ve already made quite a transformation to the patch by engaging the low-pass filter, but we can shape the sound further with the Filter Envelope section. Set the Velocity to 70% to give the patch a bit of bite. Next, turn to the other envelope section, the Amp Envelope, and bring down the release to somewhere between a quarter and a third of the way up the slider. This reduces the length of the notes, which is important as tech house bass lines are usually quite funky and bouncy.
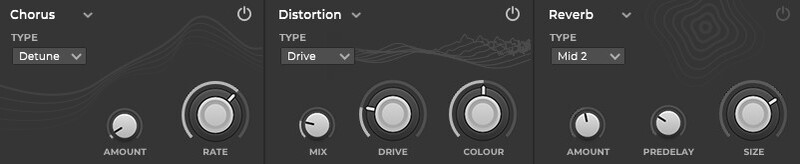
Moving on to the effects section, let’s switch on the Chorus module with the Detune type selected. This will thicken up the bass sound, but you only really need a touch of the effect here. Set the Amount to 5% and leave the Rate knob where it is. By clicking on the arrow next to the effect name, you open up a dropdown menu where you can also access Distortion and Reso Verb effects.
Choose Distortion, and then pick Drive as the effect Type. Adding a small amount of drive to the bass sound will roughen up the edges and help the harmonics to come through even more. Set both the Mix and Drive knobs to 20%.
We can adjust the Glide Time at the bottom of PLAY’s interface, to around 60ms. This will make the patch less staccato sounding, and round off the transitions between notes if we’re playing a busy bass line. The last stop is to crank up the Output dial a few dB and put that bass in your face!
Our tech house bass patch is pretty much there, but we can finetune it a little with the addition of an EQ to the signal chain. It’s perhaps slightly too subby, so we can bring out the mids with a slight boost in the 400Hz range, and a little bump in the high frequencies to add some extra definition.
Making a tech house synth lead in PLAY
Synth leads are used in tech house music to give the audience an energetic and memorable melodic moment over the top of everything else. We’re aiming for bright, brash and bombastic, so let’s kick things off with the FAWV Basic Saw patch in Loopcloud PLAY.
We can perform a bit of surgery in the Sample section of PLAY before we go any further. Turn on the Stretch module, and adjust the Time to 110, which will help to make our patch sound a little less stock. With that taken care of, it’s time to proceed to the Filter section. Choose HP6 LDR from the filter Types, and set the Cutoff to 400Hz. Bump the Drive up to 15% and leave the Resonance at 25%.
We can introduce a small amount of movement to the patch by engaging the Filter LFO. With Sync switched on and the Rate knob at 1/1, and a sine wave shape selected, set the Amount to 10%. If you’re getting a clicky sound at this point, slow down the Attack a touch in the Amp Env section.
Now for the most important part – the effects. Tech house synth leads are big and characterful, so we’ll need to switch on all three of PLAY’s effects modules. Starting with the Chorus, set the Type to Widen for a huge spread, and adjust the Amount to 60%. The Rate knob will affect the speed of the chorus, and in this case we’ll put it to 4.60Hz.
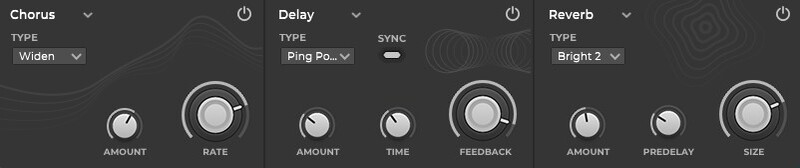
Let’s get a quick delay going to help fill out some space in the mix. Set the Time to 1/16D and the Feedback to 90% for longer repeats. Too much of this effect will only get in the way, so the Amount dial should sit somewhere around 30%. Using a Ping Pong delay Type makes the delay repeats bounce back and forth across the left and right channels, which adds another dimension to the patch.
Probably the most important effect of the lot is the Reverb module. Big synth leads go well with big reverbs, at around 75% Size and 45% Amount in this case. Any more and you risk washing it out completely! As for the Reverb Type, choose one of the Bright options as we want this synth to sit at the top of our mix and have some fizz.
Last but not least, add around 200ms of Glide to smooth the transitions between notes in your melody, and crank up the Output dial to get that synth kicking like a mule!
How to create tech house stabs with PLAY
The final patch we’ll design in PLAY today is a tech house synth stab. Tech house stabs are typically made up of minor or minor seventh chords, and are used to add rhythmic accents and extra harmonic layers to tracks. From a sound design perspective, it’s a simple sound which won’t require a huge amount of tinkering.
Starting with the FAVW Basic Sine patch, let’s head straight into the Filter section and choose a high-pass filter, HP12, from the Type dropdown menu. Set the Cutoff to around 200Hz and the Resonance to 40%, with the Drive hovering around 35%. With the filter working on the sound, the Basic Sine patch has become more harmonically complex and closer in line with the synth stab we’re aiming for.
We can open up the Filter Envelope with the Velocity knob, by setting it and the Amount to 35%. Before we hit the effects section, let’s try something a bit different with the Filter LFO. Turn the Rate all the way to 50.00, and the Amount to 5%. With such a high rate, the LFO will add almost a buzzing sound to the patch, but set at such a low amount that it will just provide some extra sonic interest.
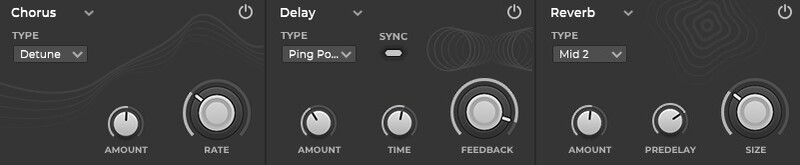
For the effects, turn on both the Reverb and Delay modules. A 1/8D delay is a safe bet with short stabs, set to Ping Pong if you want the stabs to spread across the left and right channels, or Stereo for a more contained approach.
An ideal reverb Type for this patch is Dark, to help to suggest some muted dimensions behind the sound. We don’t want the reverb to wash out our stabs, so it’s a good idea to crank up the Predelay and establish some space for the notes being played before it kicks in.
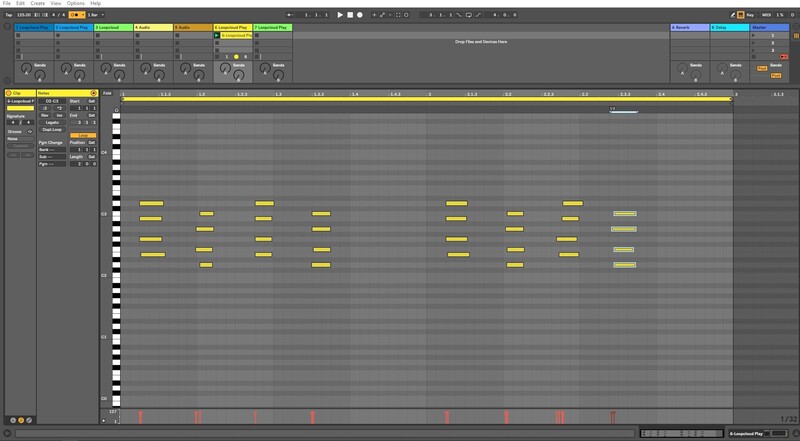
These three sounds aren’t the only features of the tech house genre, but they’re a pretty good foundation for most tracks. Your next task is to write and record some groovy bass lines and energetic synth melodies, and the best way to do this is to load up a beat in Loopcloud DRUM, somewhere between 120–130BPM, and start experimenting! For some drum sequencing tips that will help you to program better beats with DRUM, check out this helpful guide.