Blog
Mastering Lo-Fi Hip Hop in FL Studio: A Comprehensive Guide with Loopcloud Sounds
12 Feb '2024
Crafting chill Lo-fi Hip Hop with big vibes in FL Studio is a breeze with Loopcloud Sounds – keeping it in-key and in-tune has never been easier

Lo-fi beats have exploded in popularity in recent years, thanks in part to Spotify's abundance of curated lo-fi study & chill playlists. Interestingly, lo-fi beats tend to be pretty minimalistic while still capable of delivering a potent and unmatched relaxation experience.
Today, we’ll be combining our Loopcloud Sounds plugin with the hip-hop producer’s ultimate DAW FL Studio to demonstrate how you can truly maximize your workflow. If you aren’t working within FL Studio then don’t stress! Feel free to follow along, regardless of which program you’re in - You might have to adjust certain steps according to your personally-favored DAW slightly.
Loopcloud Sounds allows you to swiftly browse the entire Loopcloud samples library, preview sounds, and purchase/download them ready for instant use, all within a plugin inside of your DAW. Teaming Loopcloud Sounds’ efficient design with FL Studio’s supreme beat-making workflow will have you producing lo-fi bangers sure to send listeners into a flow state in no time.
If you’re already a Loopcloud member, Loopcloud Sounds is available to you now for free. If you’re not a Loopcloud member you can trial Loopcloud for 14 days, totally free.
Step 1: Build a foundation using a chord sample
Once you’ve set your project tempo to anywhere between 60-90bpm (the typical range for lo-fi hip hop), you’re ready to open an instance of Loopcloud Sounds and start browsing.
Today, let's kick things off by hunting for a fitting chord sample. These chords will set the track's emotional tone and steer the remainder of the creative process. In Loopcloud Sounds, we filtered for 'Chord' and were graced with a slick lo-fi 78bpm loop in the key of A Minor.
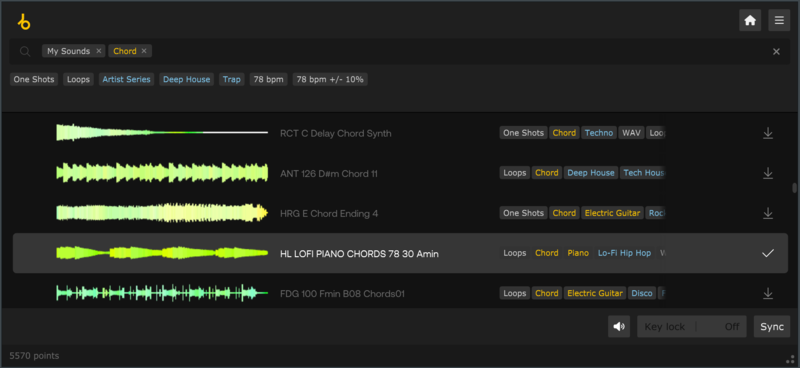
You can preview samples in Loopcloud by hovering over them and clicking the Play button on the left. After selection, purchase with Loopcloud credits or use the download button on the right. Drag and drop the sample into your FL Studio Playlist or Channel Rack.
For simplicity’s sake, we aren’t modifying our chosen sample in any way, however, if you want to alter the pitch or resample your chosen loop, then now’s the time to do it.
We've set our project tempo to 78bpm to align with the chosen sample (again, for simplicity). If you need to adjust the tempo of your sample, use the Stretch button in the top left of your Playlist window, shown by our mouse cursor in the image below.
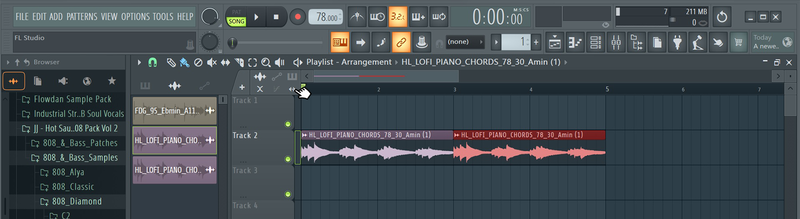
You can then click and drag your sample's start and end points within the Playlist window, but bear in mind that this will also affect the pitch of your sample, so you’ll have to manually readjust the pitch within FL Studio’s sampler.
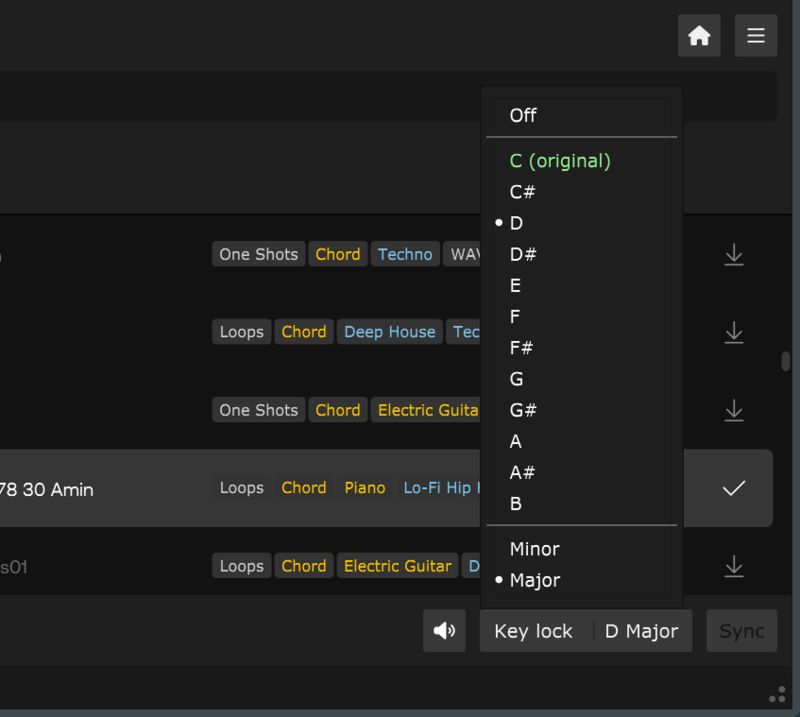
Once you’re happy with your sample, you can lay out your loop onto one of your Playlist’s tracks. We’ve placed two, totaling a four-bar duration. Now you’re ready to move onto the next step! When selecting a sample, Loopcloud Sounds allows you to filter for specific keys within its interface using the Key-Lock panel, as shown below.
Step 2: Building your drums
In this next step, we’ll be going on a hunt for some lo-fi drums. We’re going to be using Loopcloud one-shot samples to build our drum pattern inside of FL Studio’s Channel Rack, but there’s no reason why you couldn’t opt for a drum break loop sample instead.
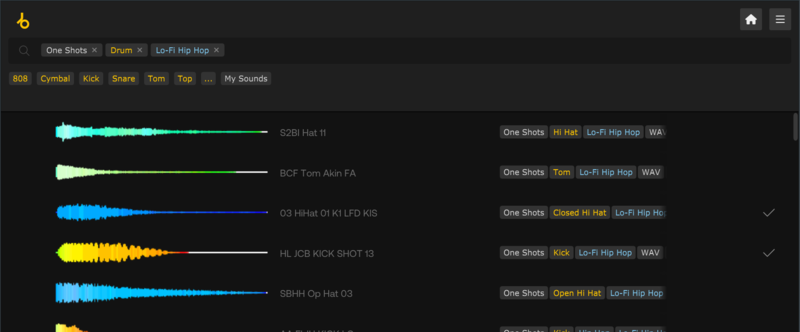
We’re going to be using Loopcloud Sounds’ Filter settings to speedily narrow down our search for some ideal drum one-shots. We set our Filter parameters to One-shot, Drum, and Lo-fi Hip Hop, and managed to find a soothing closed hi-hat with a complimentary kick and snare (feel free to build your drum kit with extra elements).
After downloading your chosen drum elements in Loopcloud Sounds, drop them into FL Studio's Channel Rack to start assembling your pattern. Play around with each hit’s Velocity, as well as the overall Swing (control knob at the top right of the Channel Rack) for a more organic feel. Check out our tweaks in the screenshot below!
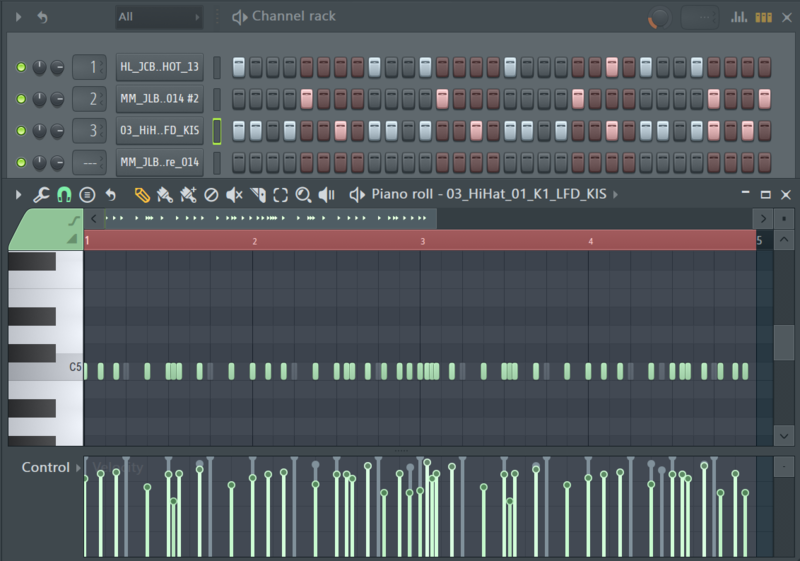
Try to construct your drum pattern so that it builds a rhythm with the first loop sample that you chose. Most Lo-fi drum patterns are typical of old-school boom bap hip hop where the kick falls on the downbeats (one & three) and the snare falls on the upbeats (two and four). Everything else is for your inner creativity to decide.
Thanks to Loopcloud Sounds’ seamless integration into FL Studio, we’ve built an effective drum pattern in no time at all. Now it’s time to add some groove to our track by adding a suitable Lo-fi bassline.
Step 3: Adding a complimentary bassline
Return to Loopcloud Sounds and set your filter to start looking for a bass sample. We'll stick with a one-shot for this tutorial - showing you how to tweak it in FL Studio's Sampler. If you prefer a pre-made bass loop, set Key-Lock to your track's key and the Loopcloud Sounds menu will only display samples already synced to your track’s key.
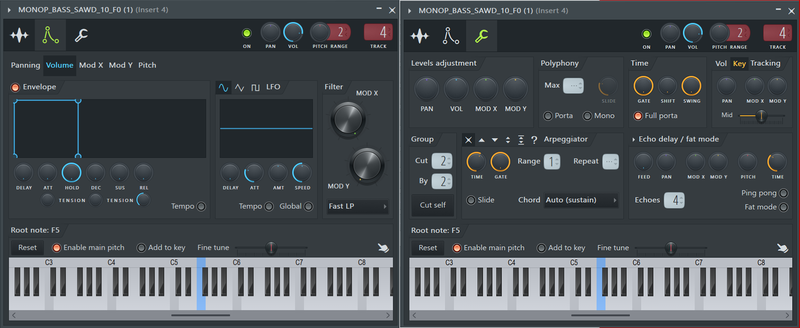
We've picked a robust bass guitar one-shot in the key of F. After bringing it into FL Studio, a few tweaks are needed before we lay down the bassline. This ensures the sample is mapped to the right MIDI key and will behave as we want - with a single-note polyphony and a quick note release for that natural bass guitar sound.
Right-click on the MIDI keyboard to select and map the root MIDI key (match it with the sample's file name). Adjust the ADSR envelope as shown below. Also, set the Group settings to cut off for each new note by clicking 'Cut Self' (shown below).
Now we can create our bassline. For this step, you’ll want to make sure you only use notes inside of your track's musical key.
If music theory isn't your thing, don’t fret. In the Piano Roll, use the Stamp drop-down menu at the top left to select 'Major (Ionian)' or 'Minor Natural (Aeolian)' based on your scale. Click on your scale’s root note and FL Studio will add MIDI notes for your scale. Jot these down, then clear them out to pave the way for your bassline.

Now you know what notes you can and cannot use, go ahead and lay down your bassline. Remember, the goal is to build a groove that compliments your drum rhythm and chord progression, but as with many parts of music production, there are no strict rules.
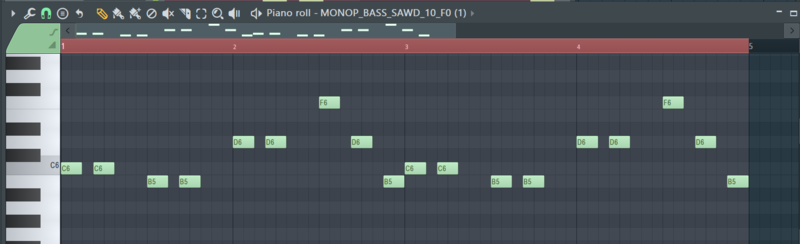
Because we’ve adjusted the ADSR envelope to have a long sustain and short release, we can play around with each note’s length within the piano roll to choose when each note will end. You can also adjust the velocity of each note for further customization.
Additional tips and tricks
And there we have it. We’ve built a basic lo-fi beat using the expansive and swift Loopcloud Sounds library plugin. Of course, there’s still much more you can do to flesh out your project and build it into a fully-fledged lo-fi beat, and we’ve got a few pointers on how to do that below.
Adding further layers
For starters, even though lo-fi is often very minimalistic, you always have the option of throwing more layers onto your canvas to bring your project to life. Loopcloud Sounds is jam-packed with an expansive catalog of vocal and melodic samples that could be used to further build upon your track’s foundations.
How to get that trademark lo-fi sound
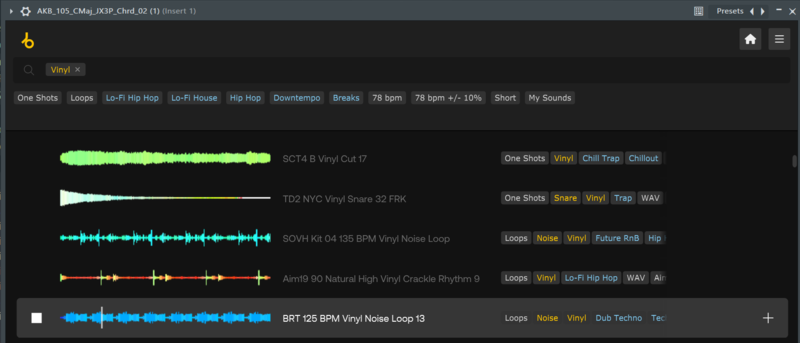
Another distinct feature of the Lo-fi genre is its low-fidelity sound, hence the name. Many Lo-fi beats will have a level of distortion and/or noise littering the ambient field of the track to make it sound like it’s being played through an old tape player.
To infuse that signature lo-fi vibe into your track, various effects plugins offer those sounds, however, exploring Loopcloud Sounds for vinyl static or tape noise effects can bring more inspiration to your process. We did a quick search, and found several suitable options.
Track arrangement and finalization
After adding your layers and fine-tuning any effects or processing, the final phase is arranging and mixing your beat, getting it prepped for mastering. While we won't cover those steps here, you can check out the YouTube video below where Arcade uses Loopcloud Play to create a complete lo-fi instrumental, from beginning to end, including the arrangement phase.
Remember, if this is your first time trialing Loopcloud Sounds and you enjoyed this process, you can continue to reap the benefits by becoming a Loopcloud member today for as little as £5.99.
We hope you’ve found this tutorial useful, and have leveled up your lo-fi production game as a result. If you want to continue your journey to level up your Loopcloud know-how, you can take a look at our articles on making Trap and building Hip Hop. Be sure to check out the FAQ sections for additional learning on the topic.