Blog
7 Drum Programming Tips to Improve Any Groove
9 Apr '2025
Do beats better with these seven tips for adding humanisation, style and dynamics to your beats, patterns and sequences

Image by Techivation on Pexels
Drums are the backbone of almost any genre in electronic music, making or breaking tracks. We don’t need to tell you how ubiquitous drums and beats are in music, and we also don’t need to tell you that not everyone has years of experience in playing the drums. So how do so many top-flight producers get the feel and groove of professional drums in their tracks?
Programming drums and beats is both an art and a science. Get something wrong, and it’ll stick out like a sore thumb… but actually getting something right is more a case of trial and error to the beginner in virtual drums. Most likely, your producer heroes have had a lot of practice when it comes to programming drums.
We’re going to give you a leg up with some techniques that can improve your beats, whether you’re just starting to move forward from basic 4/4 beats, or you’re a dab hand at the sequencer who wants to try some fills, we’ve got some new strategies to make your programmed beats sound better.
1. Get the Dynamics Right
Whether programming beats in MIDI or audio, the default activity behind building a beat is to put the notes in the right places, but there’s way more to it than that. If you’re building beats using MIDI, you might leave all the notes at their original velocities; if you just build using samples, they’re likely to stay at the same level each time they play.
But the real beating heart of what makes a good drum beat is all about dynamics – the differences between the loudest and the quietest notes. Instead of programming every single drum hit at full pelt and giving yourself no room to manoeuvre after that, vary your velocities to allow for more expression, more feeling, and more groove. Here’s how…
Your main hits should be the loudest, naturally. Mark out what beats feel most significant to you (1 and 3 are always a good place to start) and make those most impactful. Start with the rest of the hits at quite low velocities, but from here, start bringing more of the other notes in at higher velocities and see (and hear) how this starts to affect the groove.
Try adding variation between hi-hats, making on-beat hits stronger than off-beat ones – even this can make a huge difference. We’ll discuss ghost notes in a later tip, as these notes are so quiet that they deserve their own section.
In MIDI velocity terms, the region between 110 to 127 should be your very highest-volume hits, 100 to 110 should be ‘loud’, 90 to 100 should be ‘normal’, 80 to 90 should be ‘quietish’ and 70 to 80 should be ‘pretty quiet’. The velocities below 70 are reserved for ghost notes, which we’ll mention more later.
Especially with compression, which is almost always added in the mixing stage of a track, these variable dynamics shouldn’t mean that these elements are heard less – just that they’re heard differently.
2. Add Reversed Sounds
Reversed sounds are an aspect of groove that can easily be ignored. When a sound is reversed, it has the same timbre as the one it came from – usually an element of the drum beat already – but has a completely different impact.
It’s easy to do this in Loopcloud to either individual sounds or by slicing a region out of a whole loop (as shown below). The Reverse tool can make short work out of any sample or whole region.
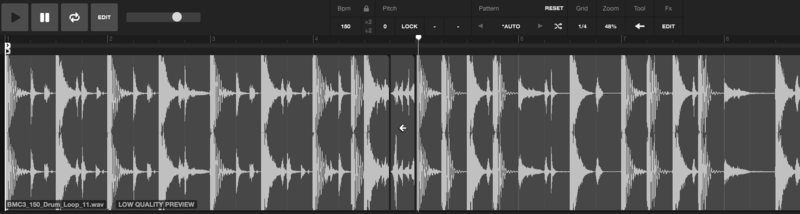
Claps are great sounds to remove, as are snares, and even kicks can add a short ‘sucking’ burst before another hit takes its center-stage impact. While you’ll often reverse a sound and leave it in place, it may be necessary to move it slightly later in time, as the ‘start’ (previously the end) of a drum sample will contain mostly empty, inaudible space.
Short sounds might need a lot of reverb, so experiment with some of your spatial plugins before thinking you’ve found your perfect reversed sound.
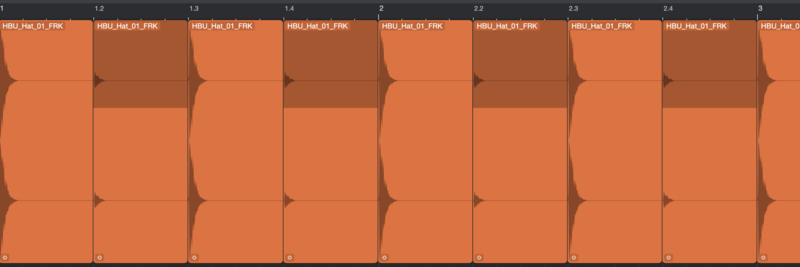
3. Don’t Beat Repeat
Most drum samplers have round-robin capabilities, meaning that if you play the same note twice, at the same velocity, the underlying sample will actually be switched out for a slightly different one. This aims to get rid of the ‘machine gun effect’, when a snare roll or hi-hat line just repeats quickly in an in-your-face way.
It’s fine in some genres, such as trap, and for creating glitchy effects where something’s supposed to sound like it’s gone wrong, but repeating the exact same sound very quickly is mostly going to end up badly.
This tip goes deeper than that though. Wherever you see the same thing come up, add some variation. This even goes for something like hi-hats, for example – you should vary the levels or MIDI velocities of hi-hats that crop up right next to each other. This will usually influence not just their volume but their filter frequency cutoffs too, creating even more variation between successive hits.
To those building their drums from audio, it’s really easy to search for alternative hi-hat samples using Loopcloud, so take advantage!
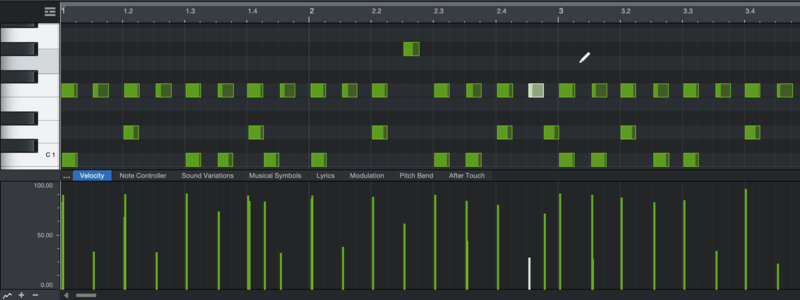
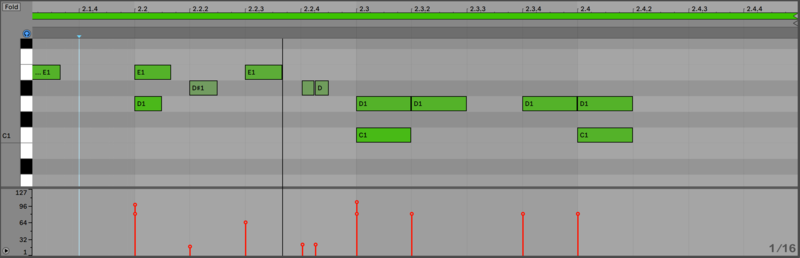
4. Programming Ghost Notes
Taking the concept of dynamic in groove to another level, ghost notes let you add a hint of flavour that’s actually quite tiny but goes a very, very long way in the overall result it has on the beat.
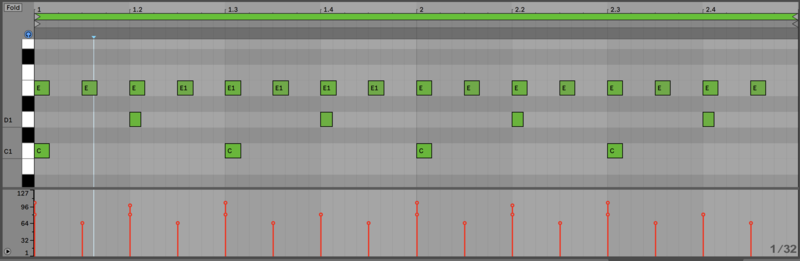
Ghost notes are usually played on the snare by a real drummer. Here’s a step-by-step to how they happen and why they work…
Step 1
Here’s our initial beat played with kick, snare and hats. It’s a simple one to demonstrate everything, and there are some nice variable velocities right from the start.
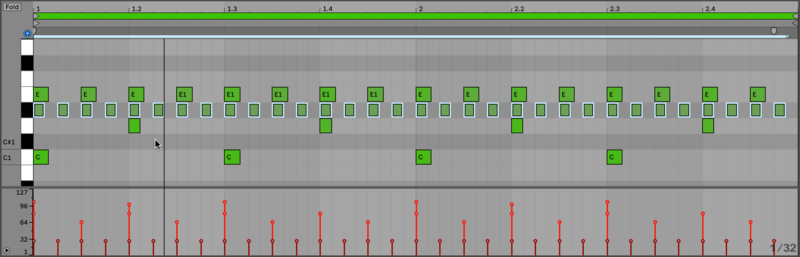
Step 2
We need to add more snare. We could use the existing note on D, but in this drum kit, E also offers and alternative snare. We’ll program in 16th notes throughout the entire beat, and we’ll lower the velocities to about 25.
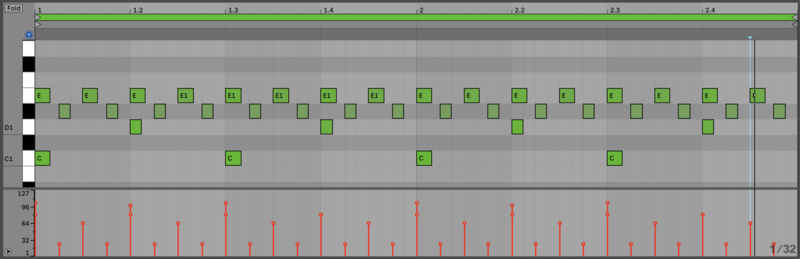
Intermission: How it works
When a real drummer is playing the hi-hats with their right hand and the snare with their left, there’s a lot more action for the right hand than the left. This frees it up to play ghost notes. Keeping in time, the left hand plays in between the right-hand hi-hat hits, so that each hand plays alternately. That’s exactly what we end up in Step 3, when we take away the notes that already play the hi-hat…
Step 3
Now remove every one of the programmed notes that coincides with a hi-hat or a snare. Now the only hits left are playing 16th-notes with the left hand, only every other 16th-note.
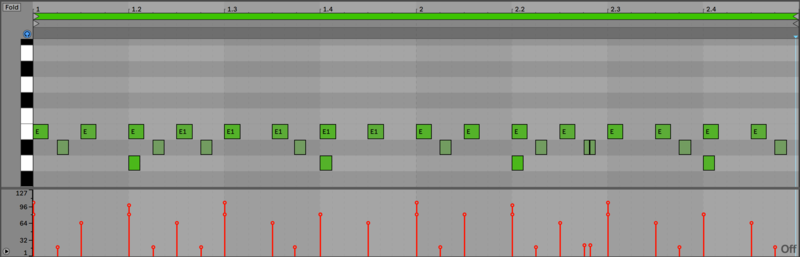
Step 4
Now remove a few of the notes that remain, creating a subtle, ghost note groove, experimenting as you go. You can also double up some notes to create drags. Tweak the velocities of what remains so you can hardly hear the ghost notes when they’re playing, but if you take them away, the beat sounds sterile and boring.
5. Use Beat Fractions
Imagine your track’s tempo as a huge clock keeping the beat. Each element of the drums will be playing to it, but it’ll be playing a certain subdivision of it. If our master clock is hitting every bar, our kick happens four times (1/4), our snare happens two times (1/2), and hi-hats can vary but may hang around 1/4, 1/8 or 1/16. It’s these ‘fractions’ that can provide the essence of groove, so why not experiment with a few more?
By placing three evenly spaced notes in the place where two were previously, we can get a triplet feel to add even more rhythmic interest
Triplets are a great place to start here. By placing three evenly spaced notes in the place where two were previously, we can get a triplet feel to add even more rhythmic interest. This is especially easy since every DAW’s piano roll is capable of snapping notes to ‘T’ variations on your chosen time signature, if only momentarily.
Experiment with other fractions like 2/3 to see what works for your beat. Straying into the territory of 5s and 7s might be a little too far, though.
6. Humanize – but How?
A lot of DAWs have humanizing functions to make your beats sound realistic, but how much is too much? What levels of humanization are going to make things realistic, and which will make your drums sound ridiculous?
For velocities, the result always depends on how sensitive your particular sampler or drum instrument is to MIDI velocity, but for maximum variation across a beat or a track, we’ve set a limit at 4% positive or negative change. This doesn’t make a huge amount of difference to the sound, but it provides realistic human variation.
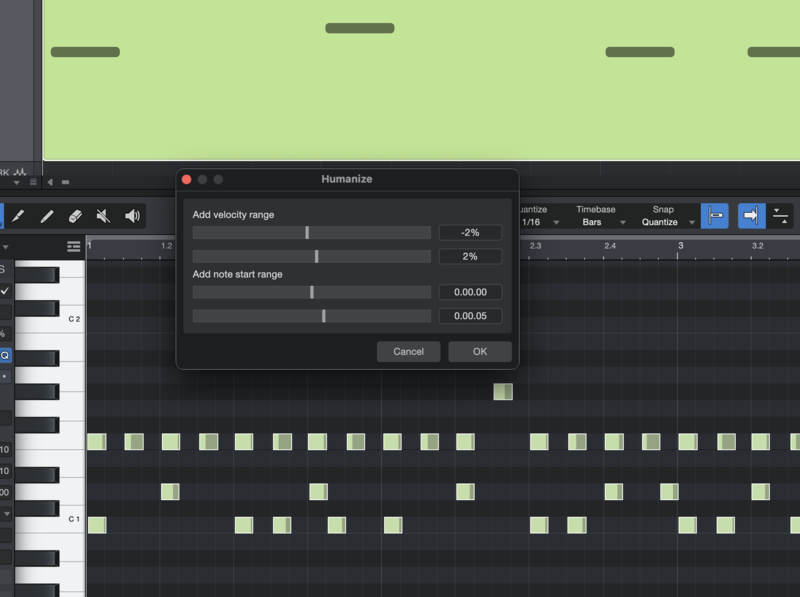
For MIDI timing, if your Humanization options let you adjust this in ‘MIDI ticks’, select up to eight. Ticks are the lowest level of MIDI timing information, and they do depend on your tempo, so you can increase the number for faster tunes. Remember, human timing isn’t perfect, but it’s still pretty tight.
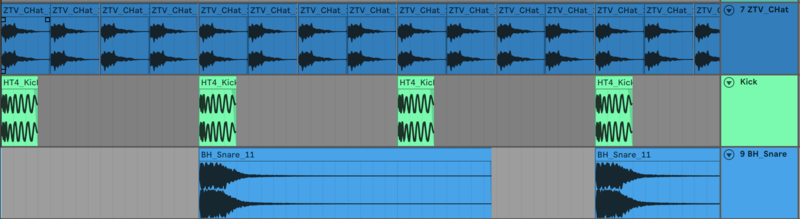
7. Making Better Fills
Want to make better fills? Don’t just program a rhythm on a single drum. Below, the original rhythm on the snare drum is joined by the kick playing every beat. It’s fair but it’s not dynamite.
Instead, let’s ‘fill in’ every 16th-note (since this is a 16th-note fill), with notes on that snare. We’ll keep the original notes we wanted at higher velocity (and pick some out as even higher, for some nice rhythmic flavour), and keep the newly added notes as very quiet notes.
The outcome: instead of picking out particular notes on a drum, we get a lifelike mix of dynamics.