Blog
Creative Vocal Processing Techniques
29 Oct '2025
Go beyond the conventional voice tones and lyrics with these eight ways to process your way to great hooks in your DAW

Vocals are, as we’ve said many times, a critical element in any track. It’s critical to get them sounding their best, it’s critical to make them loud enough to compete, and it’s critical to get them ear-catching and unique.
With the ever-growing stock of vocal tools available to the modern producer, there are many routes you can take when producing modern vocals. From your DAW’s audio editing, chopping and slicing tools through to today’s best vocal plugins, there’s a technique out there to help any song stand out – whatever the genre.
In this article, we’ll cover eight techniques to process vocals creatively – using plugins and other tools to achieve something beyond recording or choosing vocal samples.
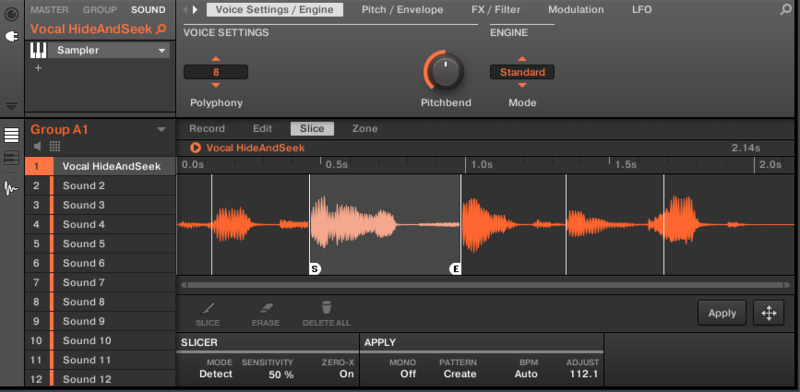
1. Slicing and chopping in your DAW
When a vocal is playing more of an instrumental role in your track, rather than being the primary focus, chopping it up rhythmically and creating a fresh pattern that harmonises with other instruments is a neat way to make your track stand out. You can use your DAW’s native sampler to achieve this, or use a third-party sampler, like Maschine 3 or Serato Sample.
Alternatively, if you’re a Loopcloud member, the Loopcloud’s new Flip Sample feature can transform a chosen vocal sample into a stand-out hook. You can either import one of your own into the Loopcloud browser, or search the featured samples across a four-million-strong library.
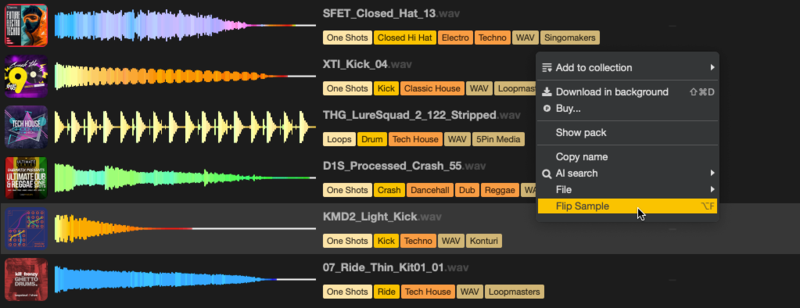
You can access the Loopcloud app, and the Flip Sample feature, with a 14-day trial period.
2. Creative pitching
A fairly obvious and immediate way to bring a vocal to the forefront of your production is by using pitchshifting tools, like Auto-Tune, Waves Tune Real-Time, Melodyne, or SoundToys Little AlterBoy. Tools like these may have been originally designed for pitch correction, but today they have found a new use – for creative alterations and transformations of vocals.
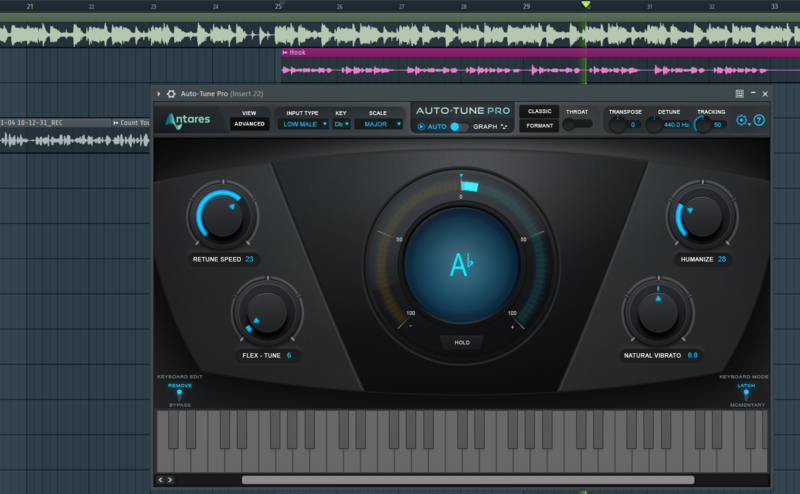
Next time you’ve got a dense vocal section, like a chorus or bridge, try to think outside the box. How about using Little AlterBoy to create three distinctly pitched complementary layers and blending them? Or by solely using a wet Auto-Tune signal parallel to a main vocal? You could even try automating the Auto-Tuned signal to blend in and out of focus.
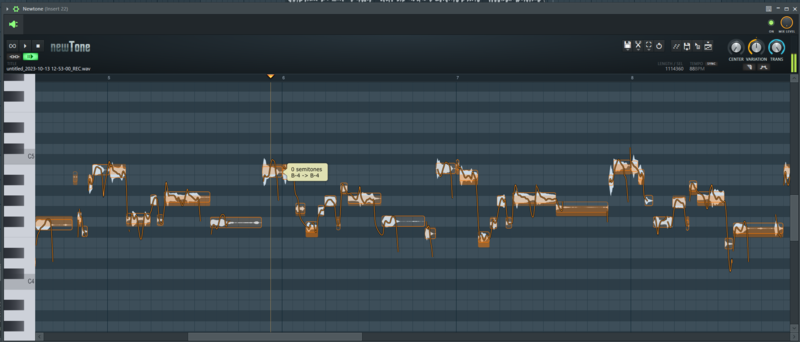
Audio editing pitch correction tools like Melodyne, Waves Tune or FL Studio’s native Newtone also have intricate transposition controls for more surgical creative procedures.
3. Use a multi-effect and go preset surfing
Running your vocals, individually or using a send track, through a comprehensive multi-effect plugin, like Devious Machines Infiltrator 2, or Cableguys ShaperBox 3, is a failsafe way to overhaul your creative control. These two specifically come stocked with a plethora of effect modules and presets you can apply individually or in tandem. Plus, modulation parameters, like Infiltrator’s vocoder or ShaperBox’s LFO, are super powerful.
Otherwise, vocal-specific multi-effects like CLA Vocals or JJP Vocals are optimal choices to whack on a vocal track, and lather it with professional effects modules in an instant. These two are a bit more simplified, with basic faders to mix the wet signals at your leisure.
4. Multiband processing
An often neglected vocal mixing technique is separating your vocal into multiple frequency bands and processing them individually. Naturally, a multiband compressor, like Vengeance Sound’s, is an obvious choice. However, to really venture down the road less travelled, don’t just stop at compression.
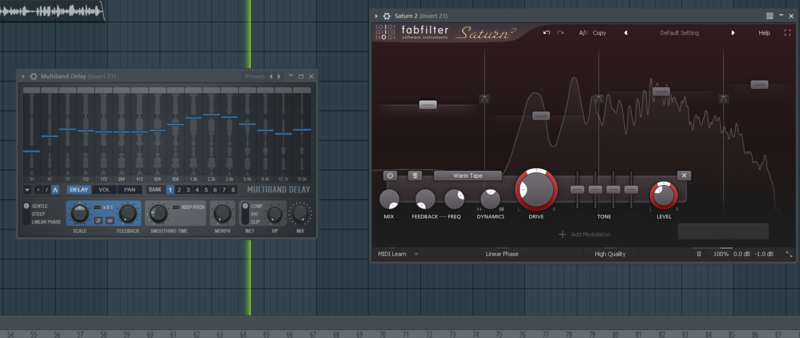
Targeting the main body of your vocal with reverb, cutting the lowest lows and highest highs, can avoid drowning the whole signal. Similarly, isolating certain bands of the vocal and processing them with individual saturation effects can really distinguish a pro mix from an amateur one.
5. Granular and timestretch madness
Most modern DAWs let you stretch and warp audio far beyond natural boundaries. Pushing it to extremes will bring you into granular territory, using micro-loops to make shimmering, glass-like tones, or glitchy stutters.
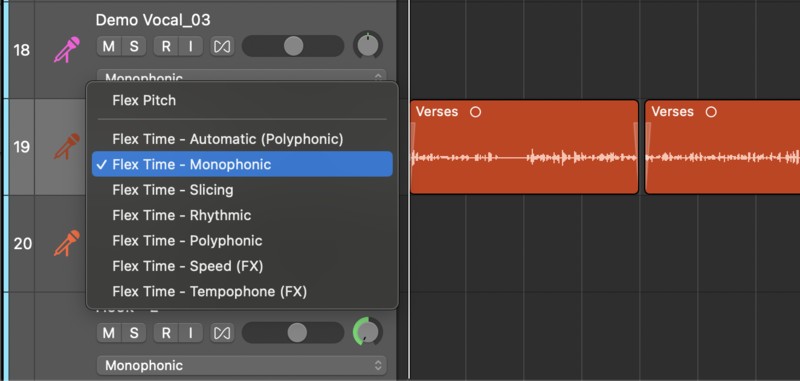
Ableton’s Warp modes, Logic’s Flex Time, or plugins like Output Portal and Granulizer 2 excel at warping samples into this bizarre territory. Vocals are no exception, and you can try freezing a vowel, stretching it into infinity, or granulating an isolated syllable into a rhythmic bed. These sounds often work well layered and tucked behind the main vocal, creating mesmerising ear candy that pulls listeners back on repeat plays. It’s a great method to make vocal sections feel complete, thick and dynamic.
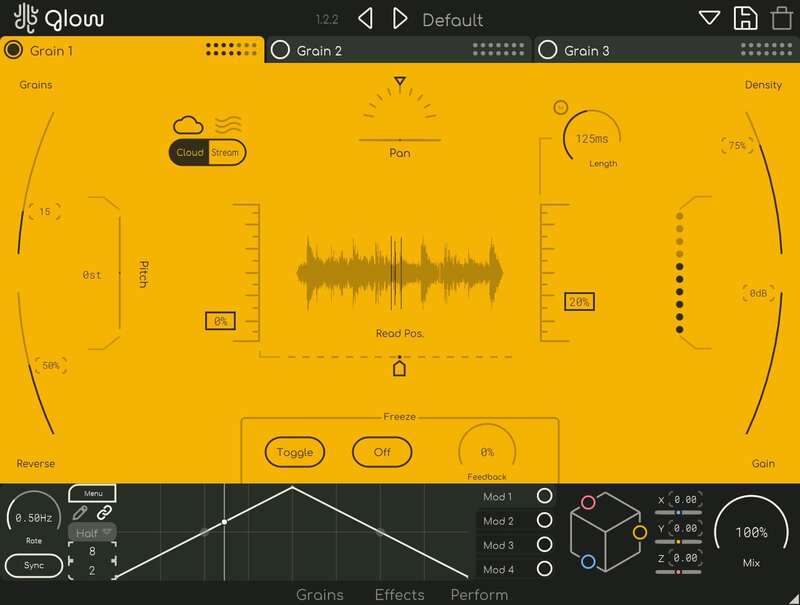
Glow, by Lese, is another relevant effect plugin, introducing granular processing to your vocals effortlessly, helping to achieve the above-mentioned sound. Combine it with the above tools to really get down and dirty with the timestretch/granular madness.
6. Vocoder and resynthesis tricks
A vocoder isn’t just for Kraftwerk-style robot voices – it can be a powerful textural tool. Layer a vocal with a synth pad using a vocoder, and suddenly your chords “speak.” Or resynthesize your vocal into a wavetable instrument and play it as a lead. Again, the emphasis is on using the effect creatively to bring out the best in your vocal track or section, rather than relying on it solely to do the heavy lifting.
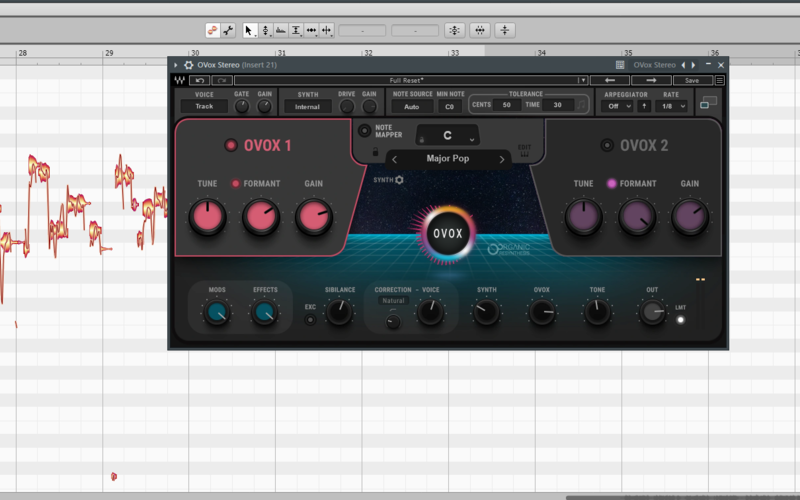
Waves OVox is a great all-in-one vocal resynthesis engine with total voice transformation potential. However, you can also use it solely for its vocoding, talkbox, tune/pitch effects, and other tools to get more intricate with your vocal sound design, sculpting the overall tone and texture of your vocal section.
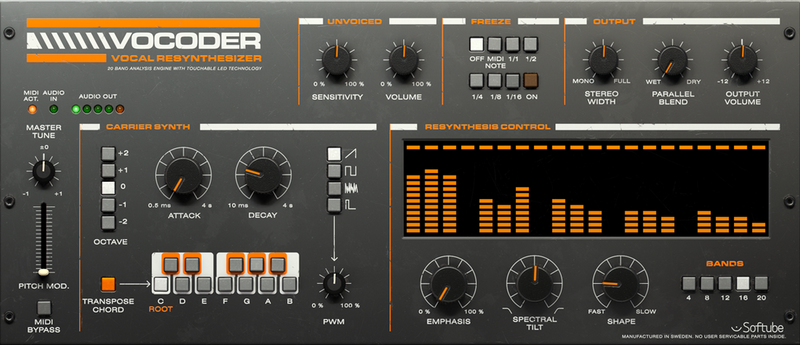
Additionally, tools like Vocoder V, by Arturia, and Vocoder by Softube are decent contenders with less in-depth controls, still capable of building parallel textural layers in a creative manner.
7. Reverse and resample
We’re relying on intentional and strategic sample manipulation to highlight a vocal's presence in your track. This time, specifically focusing on reversing samples to create depth, texture, space and dynamics across your vocal sections.
You can try reversing whole samples, then slicing up the result, or… you can slice them within your favourite sampler instrument and reverse individual sections as desired.
To maximise this technique’s effectiveness, we recommend creating a few different reversed and sliced patterns of your sample, which you can switch between periodically throughout your track to emphasise transitions and build-ups and drops. Also, keep an eye out for key parts of vocal samples to reverse, like reverb tails; specific words, phrases or syllables, and even breath sounds and sighs, which are also fair game for pitching down and timestretching.
8. Layering and widening
Last, but certainly not least, we have the age-old technique of layering and widening using stereo effects and panning to thicken your vocals and bring them into primary audible focus within your mix.
How about creating numerous vocal layers and blending them to create a fully-fledged, powerful chorus or bridge section? This includes a main vocal layer, at least one right and one left layer, as well as any doubled layers (for thickness), ad libs and backing harmonies that you might bundle into a singular section.
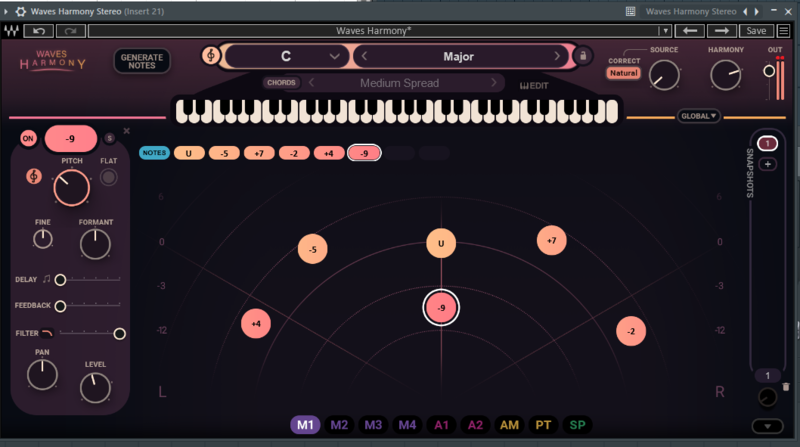
Really, there’s almost no limit to how many vocal takes you can compile together, as long as each one adds something complementary to the mix with intention. A tool like Waves Harmony is a good mention here, as it can artificially create up to seven harmonising layers for you to space and pitch accordingly.
FAQs
How to professionally EQ vocals?
Generally speaking, don’t go too crazy with the EQ adjustments. In some cases, it's necessary, but if you’ve got a solid raw recording, captured using a professional microphone and audio interface, you should only need to use EQ for minor enhancements and attenuations.
It can also be a good idea to whack two instances of EQ (sometimes more) onto a single vocal effects chain. Typically, you’ll do most of the EQing as the first effect in your chain. Then, you might opt for some further minor tweaks on a separate instance once you’ve loaded the bulk of your other effects.
How do artists get their vocals so crisp?
Aside from using a pro-grade microphone and preamp, professional vocals are often made to be crispy and clear through the mixing process. Specifically, making the right EQ adjustments to a vocal is what can shape its tonality and clarity.
Often, removing all frequencies below 60-100Hz, and attenuating the muddy, low-mid frequencies (100-500Hz) will instantly make a difference in clarity. You may also opt to slightly boost high-end frequencies (>4000Hz) to add further crispiness. But, be careful not to overdo it, as it can make the vocals hiss harshly or sound tinny.
What are the six steps in vocal production?
There can be fewer or more than six steps in vocal production, depending on the circumstance. However, as a general rule of thumb, six steps can most often be applied to all vocal processing chains. They go in this order: corrective EQ, compression, tonal EQ, de-essing, delay, and reverb.
Yet… pros will not adhere to such a mandated blueprint and rely on creative judgment to reduce or add to these steps. For example, adding saturation or multiband processing can be just as integral to a vocal’s end result as any of the aforementioned steps.