

Blog
Eight Vocal Chain Ideas for Professional Results in Any Style
7 Apr '2026
Want upfront vocals that slap? Or crystal clear verses that also have depth? Maybe something more atmospheric, and floaty? Take a look at eight vocal chain ideas that can make your vocals pop.

How you process your vocals can be the difference between a banger, and something that stays in your USB forever without getting played. In this article, we showcase eight vocal chain ideas on a powerful female vocal from the Loopcloud Library. Give your vocals presence, get experimental, or create an atmospheric bed that envelopes your tracks with these chains.
1. Thick Vocal Sound
Duplicate your vocal twice, and pitchshift the duplicates so one is slightly higher and one slightly lower (under a semitone each way). Apply reverb from either all three copies or just the source. Blend the original source against the duplicates to get less or more of the effect.
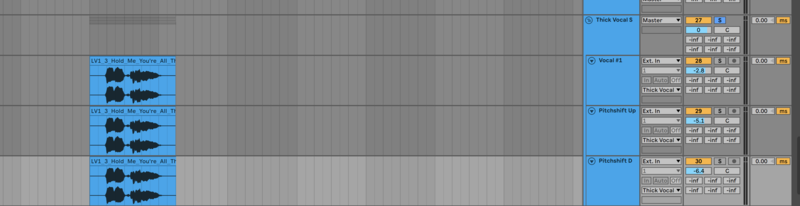
This chain can give a thick, chunky vocal that holds its own in a mix. Subtle is the key here when adjusting the pitch as too much can sound unnatural, unless that is the effect you are going for! It’s important to remember for all of the chains mentioned in this article to find what works for your style, and for the particular vocal you are using, as what works for one vocal, may not work for another. In the example below one of the duplicates is slightly quieter than the other, as that’s what sounded good. Get creative, and hear where it takes you.
2. Hard, Weighty Vocal
On your vocal channel, EQ to taste then use a slow, character compressor (LA-2A, Fairchild) to get some gain reduction (5-10 dB). On a bus channel (split from the vocal source, not post FX), use parallel compression, dial in very heavy compression and blend this signal to taste with the main channel.
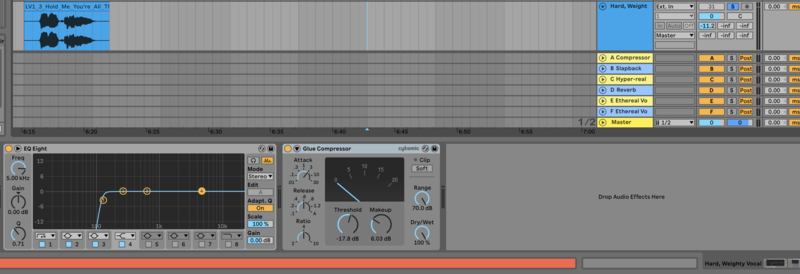
If you make music on the heavy side, this could be for you. Maybe you make Rock, Metal, Dubstep, or other types of music where a vocal with presence hits. The more parallel compression you send the more all elements of the vocal get brought up in volume, so keep an eye on this when doing so. Here, and when working with vocals in general, it can be a good idea to remove sibilance with a de-esser if needed.
3. Choral, Spacey Vocal Sound (Bus FX)
Run a chorus and delay into a reverb and blend to taste. Swap the delay and chorus for different sounds.
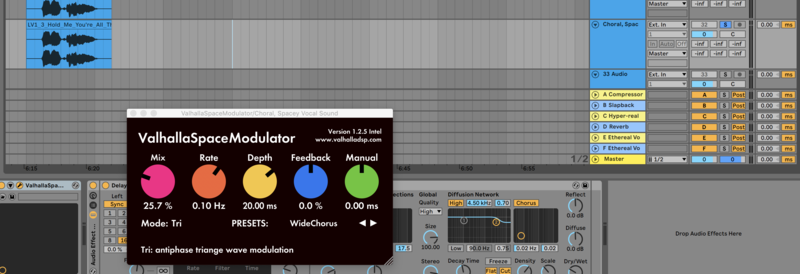
A great shout for more melodic genres where big echoing vocals that take up a lot of space really slap, such as Liquid Drum and Bass, Ambient, Melodic Techno, and more. You may want to crank the feedback up on the delay and have your vocal repeat for hours, or increase the length of the reverb for a reaalllly long tail. Increase the dry/wet for a muddier sheen to the vocal, or keep it lower, so your vocal still sits upfront with a sea of space behind it.
4. Classic Slapback (Bus FX)
Run your vocal into a delay with a time of about 50ms for instant 1950s style. EQ the delayed signal (high or low pass) for a slightly different spin.
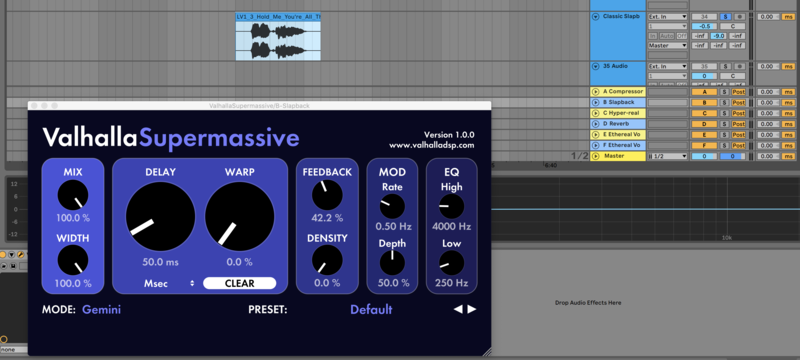
A stalwart of music production, the slapback can sound more like a reverb than a delay, due to its super quick, short single delay. If you are making Rockabilly, Country, Reggae, or anything that you want to add some vintage Rock and Roll swank to, this could be the one for you. Valhalla, one of the leading reverb and delay plugin designers in the market have a free plugin called Valhalla Supermassive which is an incredible tool. It’s being used to give the slapback effect on the sample below.
5. Hyper-real Modulated Atmosphere (Bus FX)
Push your vocal into a bus reverb, and heavily compress that reverb signal. Modulate the heavy-handed reverb with a slow phaser, blend in to taste. It won’t work on every vocal!
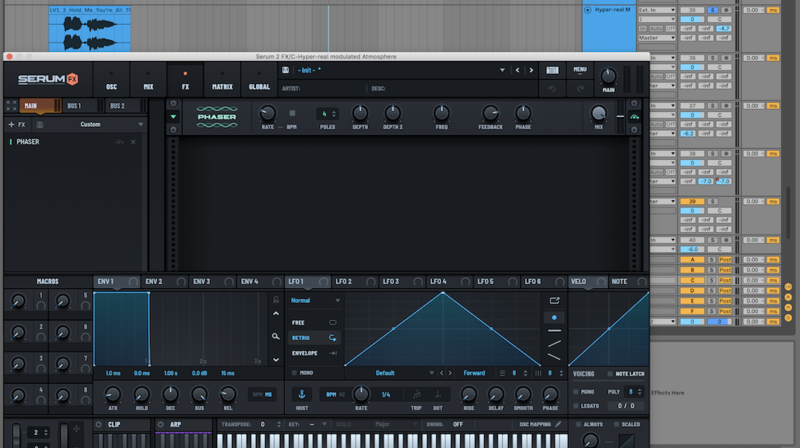
This is definitely one for the Ambient fans, but it could work in many different genres. In the sample below Serum 2 FX, a separate, more CPU friendly plugin than the full edition, has been used to add a subtle phasing, automating the dry wet, as it worked well with the particular sample. You could add more rhythmic modulation, more extreme, and modulate different parameters to get the reverb moving, depending on your taste.
6. Reverb – But More Professional (Bus FX)
Add a reverb on a bus, then filter out the lower frequencies that are generated. Add a compressor after the filter, and sidechain it from the vocal, setting it slow, to dip the reverb when the actual vocal is sounding.
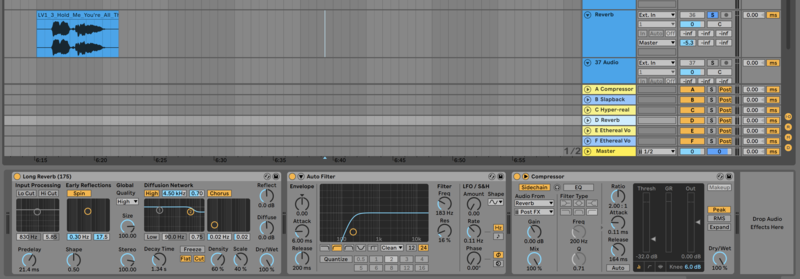
EQing your reverb can help it to sound cleaner, take up space in the right places in the mix, and remove muddiness and a lot of unpleasant noise in the low end. The technique can be great for songs where the vocal is the most important element in the track, and you want it to be crystal clear, and upfront, with the sidechain letting the vocal breathe.
7. Ethereal Vocal Verb
Send to a reverb, then pitchshift this reverb signal up an octave. You can set up multiple busses of pitchshifting stages, each with a one-beat delay added, so the reverb gets progressively higher over time.
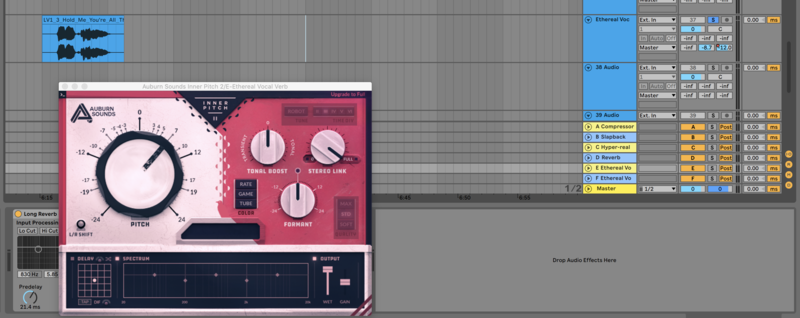
An eerie effect that can be used to add depth and interest to your vocals. This chain can be great for minimal and atmospheric genres. For the sample below, on a return track we’ve used the free edition of Auburn Sound’s Inner Pitch v2.1 to shift the reverb up 7 semitones (half an octave), and for the second half of the vocal, we’ve automated a second send to also start mixing with the signal, which uses Inner Pitch v2.1 to shift the reverb up a full octave, as we felt this worked well for a vocal with two distinct sections.
8. Mangled Pitch and Formant Chain
Use a formant plugin or pitchshifter to downshift a female vocal into the deep register (approx two octaves). High-pass this copy, try adding modulation. Compress both channels as a group, and set up a reverb from the original signal.
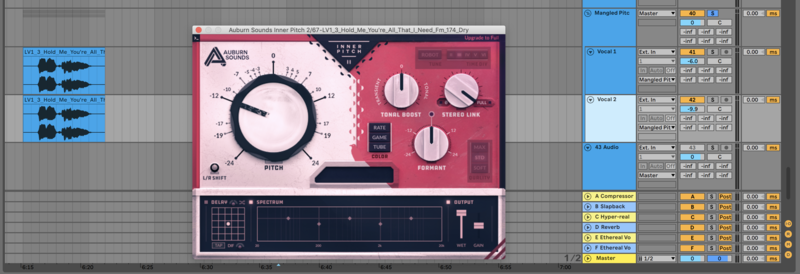
A popular sound in Deep House, Trap, and RnB, this effect can be used alongside the original vocal or by itself. Get creative and experiment modulating different parameters for interesting results. You can really twist vocals up, or use it more subtly.
Need professional vocals in a snap? Demo some samples with the Vocal Tag on Loopcloud online!