
It's one of the great contradictions of modern music production that, while we all celebrate the fact that we have the ability to record at pristine quality and keep our signal path clean, many of us also see it as desirable to damage our sounds or splatter them with a bit of distortion and dirt.
There are countless ways of doing this, and to get you started, we've got the following suggestions - 10 ways to dirty up your sounds.
The sound of silence
In sparse tracks - especially ambient or orchestral ones - the background sound of near-silence in between instruments playing can be layered into the mix to increase the authenticity of the recording or add some warmth.
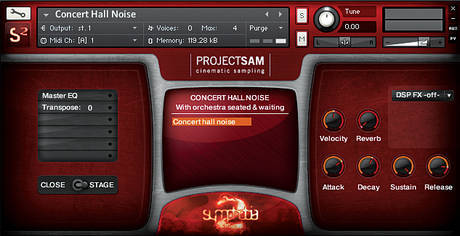
Orchestrator David Hearn - whose credits include The Chronicles Of Narnia - produces orchestral mock-ups for directors in post-production, in which he always includes the low-level room ambience of an orchestra simply sitting in their seats.
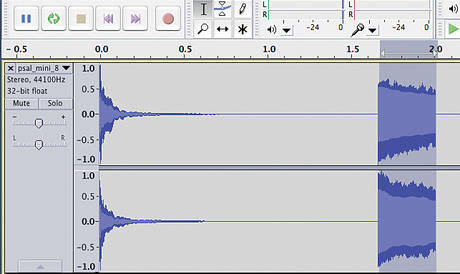
Try this trick yourself by taking a portable digital recorder and capturing the 'silence' in some real spaces of your own with friends. You might feel a bit stupid standing there saying nothing while the recorder does its thing, but try hard not to make noise for the sake of it. The recordings will never be truly silent, and this barely discernible ambience can really help to create a more realistic sound-scape.
Contrast is key
If your whole track is particularly grimy, give the listener a break by with a few seconds of 'clean' audio, perhaps on a breakdown or bridge section. Removing all the nasty effects and using acoustic instruments for a short time provides a good contrast and will make the return to a dirty section very effective, enhancing this element of your mix.
Boost your chances
Try boosting or normalizing very quiet samples - or even just quiet release tails – in extreme ways to bring out the low-level hum and distortion already present in the sound. This works particularly well with release/reverb tails that have been recorded in their typical acoustic environment, like string or guitar ROMplers with natural room reverb.
In and out
Playing samples out of your speakers and recording them back into your DAW via a microphone makes for a cheap and easy way to create a rough, gritty sound. Indeed, it'll be even more effective with any blown speakers you may have lying around. Just point the microphone at your monitors and hit record, but keep an eye on your levels to prevent feedback - or, alternatively, crank up the volume to amplify it!
No cleaning sound
If you're lifting samples from tape and vinyl, there's no need to clean them up with noise reduction. Leave the audio artifacts and errors intact and you'll achieve a far more groovy and authentic vibe.
Get on the tube
Don't be afraid to rip samples from YouTube and other low-quality online sources (as long as you keep it legal, of course). There are plenty of great videos of enthusiasts showing off their retro synths, so plunder their videos for short snippets of classic sounds at low bit-rates.
Check yourself
It's easy to get carried away adding distortion and noise plug-ins and lose sight of your original sound. Continuously monitoring an A/B mix and switching effects in and out will help you to keep perspective on the overall sound and ensure that the essence of your track doesn't become lost under the weight of all those grungy effects. By achieving the right balance you'll end up with the dirt in your mix you are after, without losing the mix in a wall of distorted sound (unless that's what you are after!).
Hi-fi and lo-fi
Combine low- and high-quality samples and instruments in one track to add variation to your tunes. Dirty lead synth lines over crisp bass-lines and beats work well, as do distorted beats combined with lush string pads.
You can also experiment with using different effects on one element of your mix. For example, using over-driven vocals in the verses and a relatively clean sound during the chorus will be far more interesting to listen to than just one effect all the way through the track.
Reverse equality
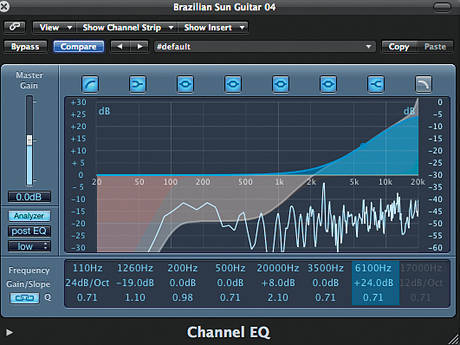
We all know that EQ can bring a dull sample to life by emphasizing its key frequencies, so it stands to reason that you can reverse this idea to bring out the dirt. Boost the 'noisy' areas of a sample - either the top-end hiss or low-end rumble - to transform a nice sound into a nasty one.
Make some space
If you're mixing a track with lots of dirty elements, it's even more important than usual to try and create 'space' for each instrument, as they're battling increased noise and hum. You may be familiar with the idea of carving each instrument its own frequency range using EQ cuts and boosts, but you'll find that noisy samples generally need a narrower EQ range to stop the noise from bleeding into other parts. So, use high and low-cut filters judiciously.
Using reverb on the master bus can result in a wash of noise if you've got a lot of dirty elements, so set your reverb times carefully, and if in doubt, use a little on just a couple of tracks to prevent making a mess of your final mix.