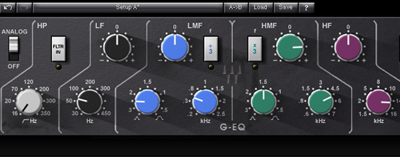
As producers we love to know how other producers EQed a certain vocal or drum sound to get that tight punch or shimmering highs so prominent in a mix. When you’ve mastered the EQ spectrum and you know where to go when you need to fix or embellish something, you are definitely ahead of the game. If you can listen to a sound and say to yourself, “Oh that needs a little more 250 Hz,” or “I think a cut at 1.2 would totally do the trick,” then you have something to be proud of.
There are sometimes reoccurring themes in audio engineering; certain frequencies pop up more frequently than others. If you can grasp where you will find these following six frequencies then you can definitely make your life easier, and your production faster.
Frequency 1 – Thickness/Muddiness
Instruments and sounds that are dominant in the lower frequencies can have a tendency to dominate them a little too much. Too much low mid can thicken up a sound so that it lacks clarity and definition. The low mids, around 200 Hz are a good area to check for any unwanted muddiness or boominess in your mixes.
Frequency 2 – Boxiness
This is the bane of the bass drum. I personally hate kick drums that have too much of that cardboard box flavor. If it’s done 100% right it does have a natural earthy flavor that’s kind of cool but just a little bit too much can kill the sound for me. It just sounds like a fist pounding a cardboard box.If you are struggling with boxiness then the frequency area around 3–600 Hz should be your hunting ground. Boost your EQ all the way up and stop when the boxiness is unbearable. Then swiftly cut down the middle. Don’t worry if your cut isn’t super narrow, it’s OK to cut the kick drum a little more drastically in that area.
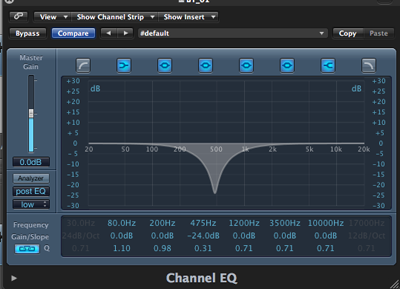
Frequency 3 – The Cheap Sound
This is a very annoying frequency for acoustic guitar players that also happen to be engineers. Like me. You know when the guitar just doesn’t sound good. It just sounds like somebody bought it at Wal-Mart and brought it to the studio expecting a great sound. Ok, that might not actually happen but sometimes some guitars just sound cheap. Obviously this can’t be fixed all the time. But there is a cheap cheat frequency that you can use to get rid of at least some it. The mids around 800 Hz have this characteristic that makes the acoustic guitar sound a little cheap. So by cutting it a little bit you can usually bring out a warmer and less biting sound.
Frequency 4 – Nasal Sound
It sucks to record a singer when he has a cold. Not to mention the possibility of catching it yourself but your recording will too. What’s even worse is when your singer doesn’t have a cold but he somehow sounds like he does. Nasally or tinny sound can be a product of too much of 1–1.2 kHz. Too much in that area and your instruments sound horn-like and tinny and your singers sound nasally and congested. If you feel like you have a vocal that’s suffering from the aforementioned symptoms then make sure you check to see if a cut in the 1 kHz area can’t help.
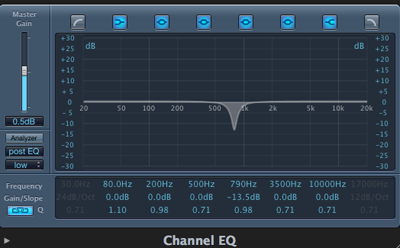
Frequency 5 – Presence
If I had to pick between the frequencies for a favorite one (which sounds ridiculous but whatever), I would have to choose 5 kHz. 5 kHz just brings out the character in so many instruments. Whether you need to put some make-up on a dull vocal or bring out the bite on the electric guitar, 5 kHz just really makes it all shine.
Frequency 6 – Air
That final stretch of spectrum from around 10 kHz and up is sometimes referred to as Air. As you might think from the name it kind of lifts up the higher frequencies, opening up the instruments that occupy that part of the spectrum. The high notes of instruments, subtleties of the piano for instance or the sound of drum cymbals.14 kHz or so onward can be used to subtly brightening things up that aren’t necessarily dull but might need a little….well, air, to make them stand out. By boosting there you are boosting frequencies out of the way of other instruments, as many instruments won’t be affected that much that high up the spectrum.
Conclusion
I hope some of the examples above have shed some light on your endeavors in the EQ spectrum. By knowing what you are looking for and where to go after it you make your life much simpler and easier. It’s easy to cut down on muddiness if you know where it’s located in the low mids; if your vocalist sounds like the tin man it’s easy to cut that out and if you need some presence or air to your mixes it’s all possible with a few mouse clicks on the screen or twists on your equalizer.
Original source: here.