To anyone that says there's no money in music anymore you can tell them there is where scoring for film, TV and video games are concerned. Here's 9 steps to scoring to picture in Cubase 8 Pro.
Recording, composing and programming music to picture has become far easier in the last couple of decades as computers have got much better at playing back digital video and the range of virtual instruments and effects available to you has gone through the roof. The good news is that it’s fun, creative and potentially a money maker! Let’s look at how it works.
1. Load up a project
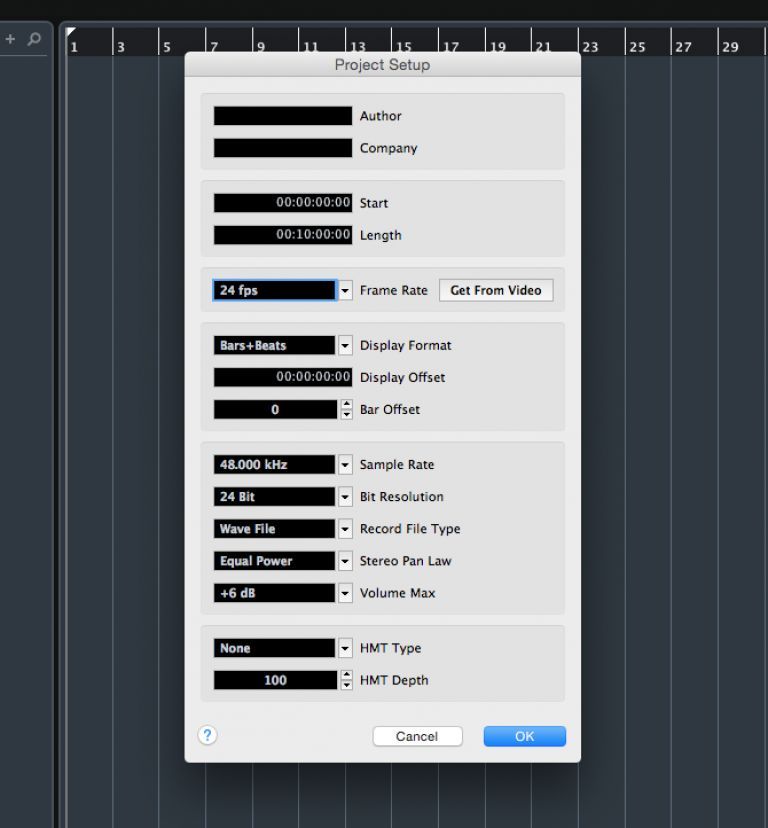
Open a blank project and before you do anything, go to the Project > Project Setup menu. Here, choose a frame rate for the project based on the frame rate of the video you will be importing. Don’t worry too much if you don’t know this yet, as after importing video you can return to this window and press the Get From Video button to make Cubase analyze the clip and adjust itself accordingly. More important are the audio settings lower down in this window. Go to the sample rate box and set this to 48kHz. This is the sampling rate of a lot of digital video’s audio content. Again you can change this later but that involves extra steps. Getting it set up right initially saves time.
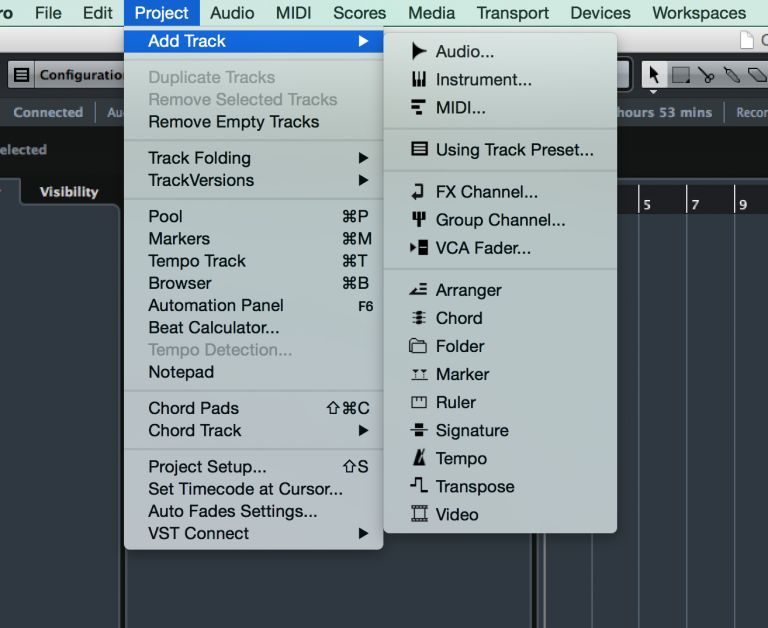
2. Create a video track
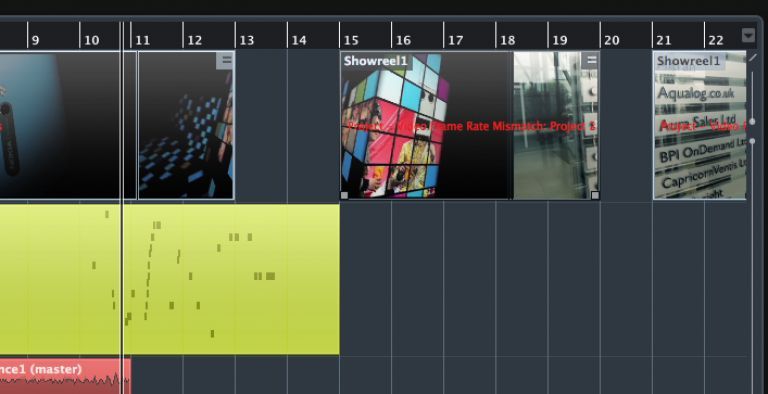
Go to the Project menu and choose Add Track > Video. You can only add one video track per project because Cubase isn’t a video editor as such, but it allows some flexibility within that single track. For example it is quite lenient with allowing you to import videos at different frame rates and sizes and playing them all back fairly smoothly in a single window, which removes the need to do loads of tedious video file conforming before you even get started.
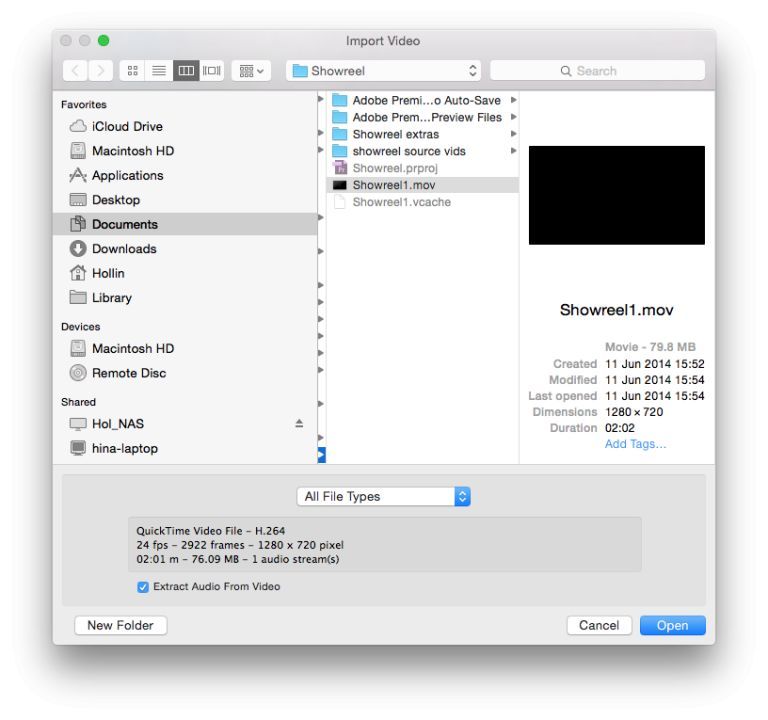
3. Import a file
Now go to File > Import > Video File and navigate to your video. The browser window will show you whether a file is compatible with Cubase or not. If a file can be imported, it will show as “lit” and if not it will be greyed out. The info area at the bottom is important as it shows you the characteristics of your file like frame size and rate and video length. There’s a box you can tick to make Cubase separate off the audio onto a new track during import which is often useful because it means you can mute it if needed.
4. Customize the playback window
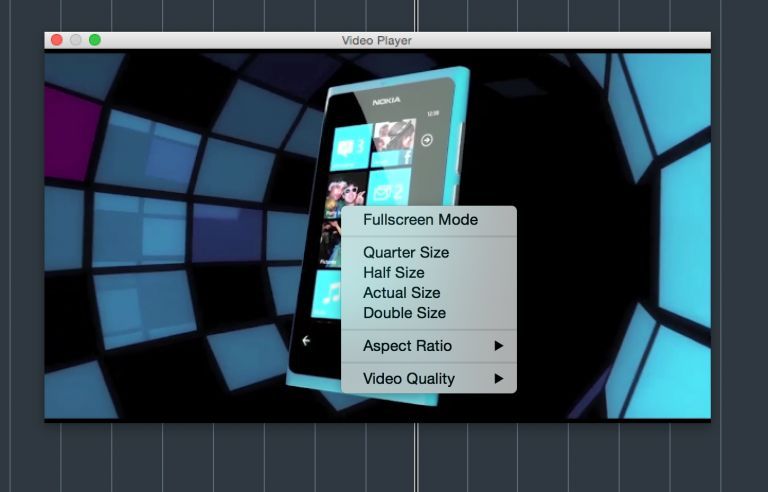
Double-click on the video clip and it will open a playback window. This can be freely moved around, maybe to a second monitor, and resized by dragging its edges. If you right-click on it, you can change its aspect ratio and playback quality as well as jumping to preset sizes like half or double. Most modern computers should have no trouble playing back high-quality digital video, especially from an SSD drive. It’s probably not necessary to have the video blown up to a huge frame size though.
5. Record some music
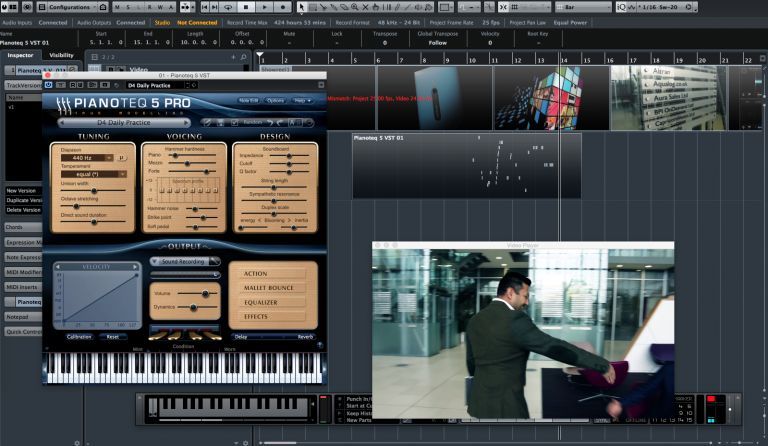
You can now create tracks and record just as you always would in Cubase, but along to the video inside your project. You will still need to work to a timebase because quantization and edits rely on your music being locked to a grid of some sort, so choose a tempo in the Transport panel and turn on the click track. Here I have created an instance of Pianoteq and played some MIDI-triggered piano along with the video. Since I used a click I can go in and quantize it afterwards if required.
The preservation interval menu.
6. Add loops
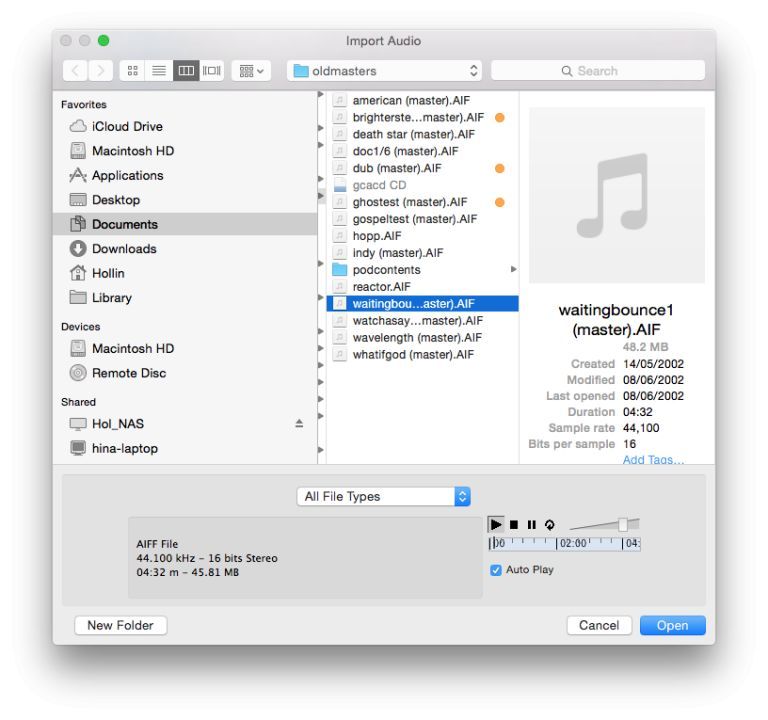
You can bring loops in just as with any composition. Add an audio track and select File > Import Audio File or drag and drop from your desktop. You can use Cubase’s time stretching tools to adjust the tempo and/or pitch of any loops to fit your project. Using loops to build a rhythmic bed on which you can then build the rest of your track is a great timesaver.
7. Edit your video
Cubase has basic editing tools that can be used on video clips. Primarily, the scissors tool can be used to cut clips (this obeys the snap setting as always) and the pointer tool to move them around. Copy, paste and cut commands also work on video tracks. So although you can’t do anything as fancy as add transitions, you can do enough to get basic control over video clips. Imagine for example that you needed to take a scene out of a clip, or make a ten-second gap where you knew a new scene was going to eventually go. You could do these things by just cutting and moving video events on the timeline.
8. Finish and mix
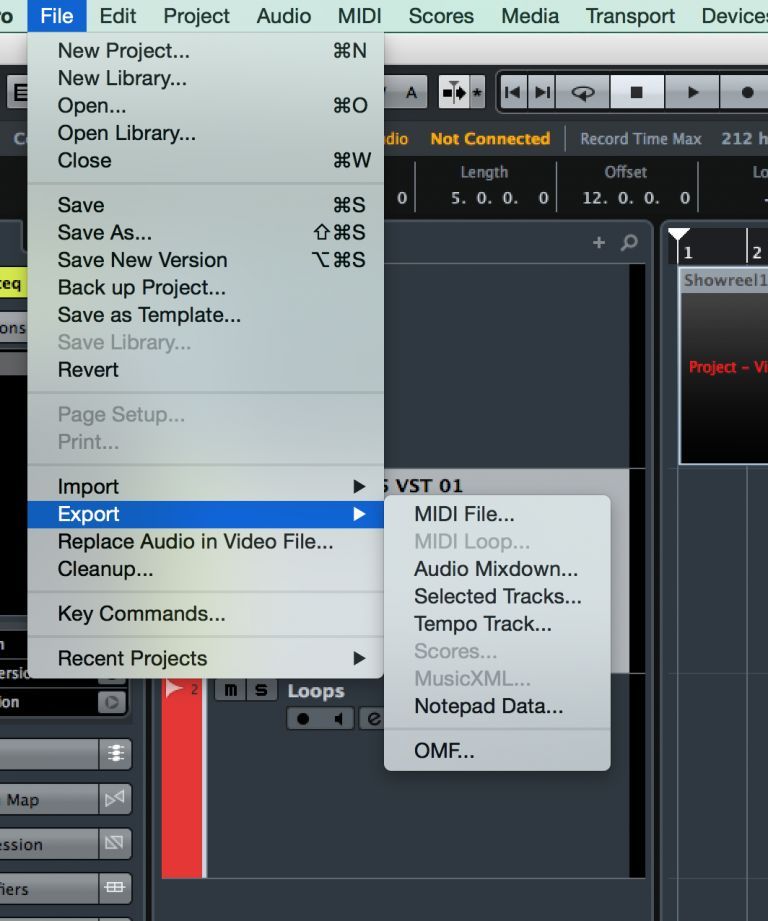
This is easier said than done of course, but the majority of your time will be spent recording, programming and arranging then mixing the music to picture. This works just like composing any music from a technical point of view, though stylistically it will need to complement the visuals and work with any dialogue that’s present. This side of things is a whole art in itself! When you’re done you will want to export your music so a video editor can stitch it into their project in an app like Final Cut Pro or Premiere. Go to File > Export > Audio Mixdown.
9. Export your tracks
How you proceed here depends on the job. It could be that a simple stereo mixdown of the whole music track is fine, in which case you can just export the master stereo out channel. Other times though, the sound editor might need multiple stems from you. Audio post production can mean mixing or remixing music to suit a project. You won’t know what the eventual levels of the dialogue, ADR or effects will be so sound mixers often like to have access to stems to tweak this themselves down the road. Mixes for surround also often require a different treatment. In these cases, select the stems you want (grouping tracks together can help here, all drums, bass, all guitars and so on) and export!

Original Source: Here