Serum is one of the most successful software synths out there, and it doesn’t show signs of being unseated from the virtual instrument throne. With its dual wavetables, flexible modulation, its rack of effects and other features – all within a straightforward interface – Xfer’s super synth is popular with producers the world over…
But with such a fanbase, even Serum’s 458 presets inside its Factory Library have probably been used in loads of tracks. Many producers opt to download and install new Serum Presets made by professional sound designers, to stock their sonic larder with more tasty supplies. There’s even a Free Pack available from Loopmasters. Here’s how to do it yourself.
See Best-Selling Serum Presets on Loopmasters
1. How to Find Serum’s Presets Folder
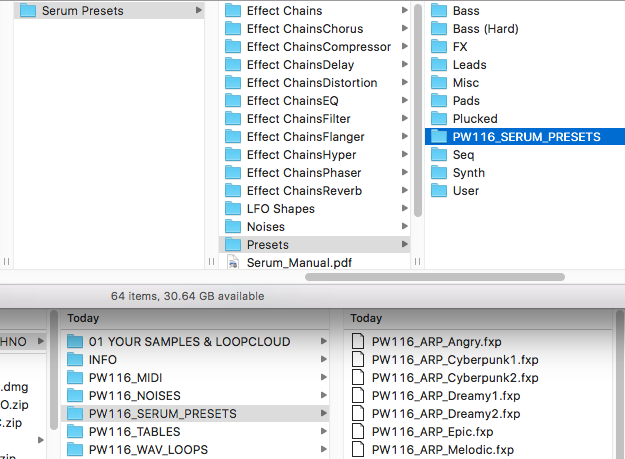
The first good news: you don’t have to close your DAW. Simply navigate to Serum’s Menu in the top-right, and select Show Serum Presets Folder.
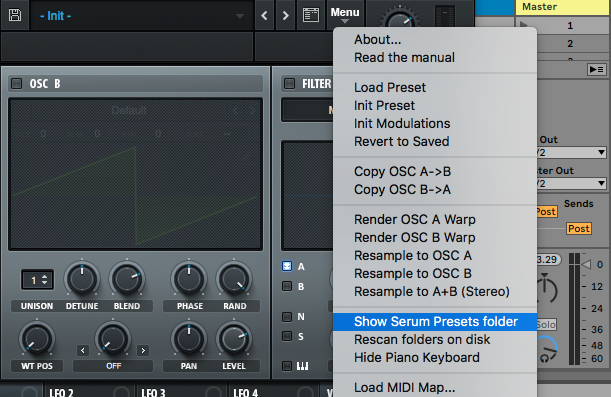
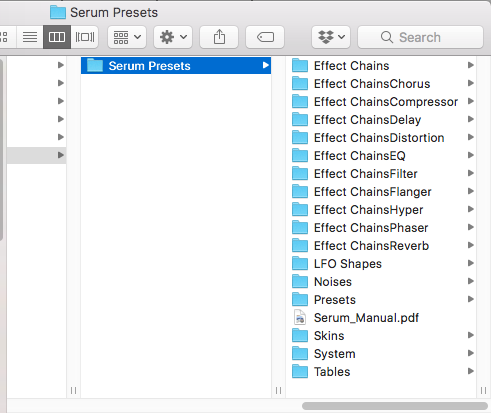
Your OS’s file browser will open up at the correct system folder containing Serum’s factory presets.
2. How to Add your New Serum Presets
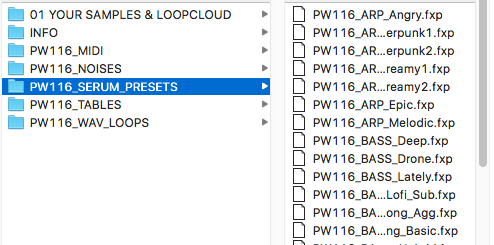
Here we’ve downloaded and unzipped our Melodic Techno - Serum Presets pack. Among the folders, there’s one containing ‘SERUM_PRESETS’. Folder names may vary, depending on the pack, of course.
All Serum presets have the file extension FXP – regardless of whether you’re on Mac or PC.
Now we can copy or move the entire new folder from our Downloads into the Serum Presets folder that we opened via Serum, in the ‘Presets’ folder, as shown here.
When we return to Serum, go back to the same menu and select Rescan folders on disk.

Our new presets now show up alongside Serum’s Factory bank.
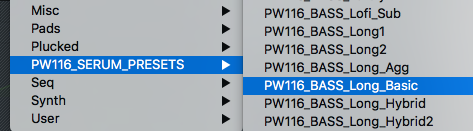
It’s worth renaming the folder to something more relevant. You can do this using your OS file browser, and Rescan the folder in Serum once again for this to take effect. See our notes about how best to organise your Serum presets at the end of this article for more info.
3. Installing Serum Noises, Wavetables and LFOs
With your presets installed, sometimes the newly-created wavetables, noises and LFOs, made by the sound designer will be installed as part of the FXP patch, but sometimes not.
If your preset fails to produce noise when loaded, you may need to load the required wavetables into Serum as well. Serum can also bring up an error message when it can’t find a certain element, as shown below.
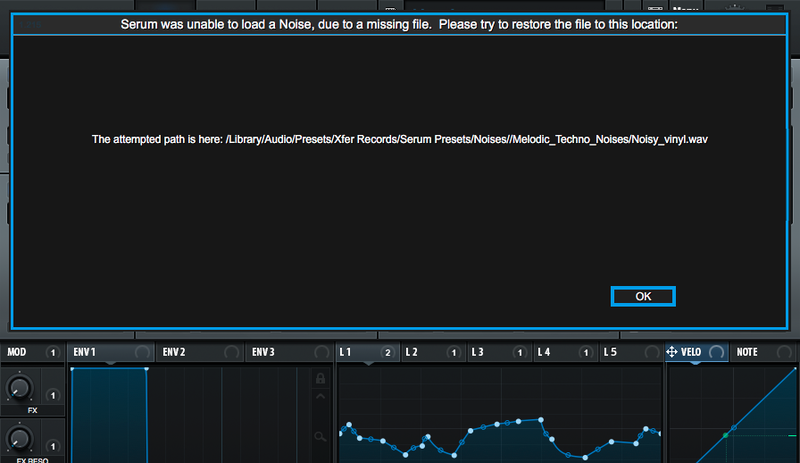
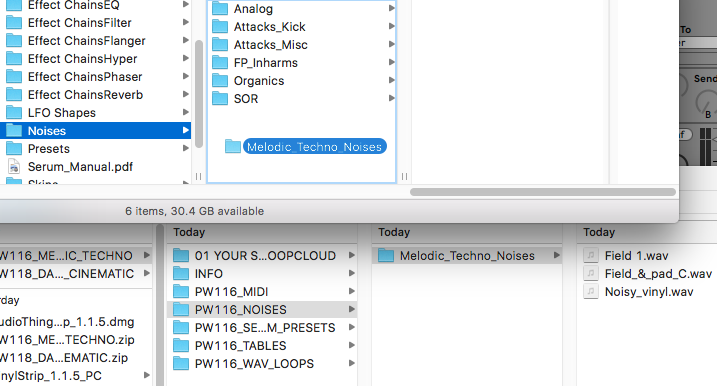
In this case, your downloaded preset pack should contain custom wavetables, noises and/or LFOs to drag into Serum’s other preset folders. Depending on the developer, the destination could be in the User folder for the Noise, Wavetable or other element, but the most likely way to get the sound working is to simply drag the included folder straight into the relevant directory in Serum. Don’t forget to Rescan folders on disk after this.
4. Using Imported Wavetables, LFO Shapes and Noises in your own Serum Patches
Once any Noises, ‘Tables’, and LFO Shapes are imported into Serum, you can also freely bring them into any patch you’re working on elsewhere.
5. Organising your Third-Party Serum Presets
You might have noticed Serum’s User folder, where it stores presets that you save yourself. We recommend not installing whole Serum preset packs here, to prevent confusion. It’s even more useful to save your presets in a folder of their own if your pack is based on a particular genre (such as a pack like Tropical House - Serum Presets, or a certain mood, like our pack Dark Cinematic - Serum Presets.
Remember that Serum can’t access folders within folders, so if you do attempt to install your third-party packs within the User folder, you can only drag the individual FXP presets in – only one layer of folders will ever be visible, and that’s the top layer with ‘Serum Presets’