
How to Get your Kick and Bass to Sit Nicely in the Mix
Out of all the elements of music production, getting your kick and bass sounds to sit well together is one of the hardest to get right – but it’s also one of the most crucial steps in getting a professional-sounding mix.
As it turns out, bass elements are hard to manage because they’re frequencies we’re not used to hearing with clarity. Bass is deep, dark and harder to put your finger on, and the techniques needed to get your low-end under control are just as murky.
Here are seven ways to get your kick and bass to work as a coherent whole.
See available Kick samples and loops at Loopmasters
See available Bass samples and loops at Loopmasters
1) Choose the Right Sounds from the Start
No matter how many techniques you use or how many tips you find, your kick and bass will never line up perfectly if you don’t select complementary sounds for each.
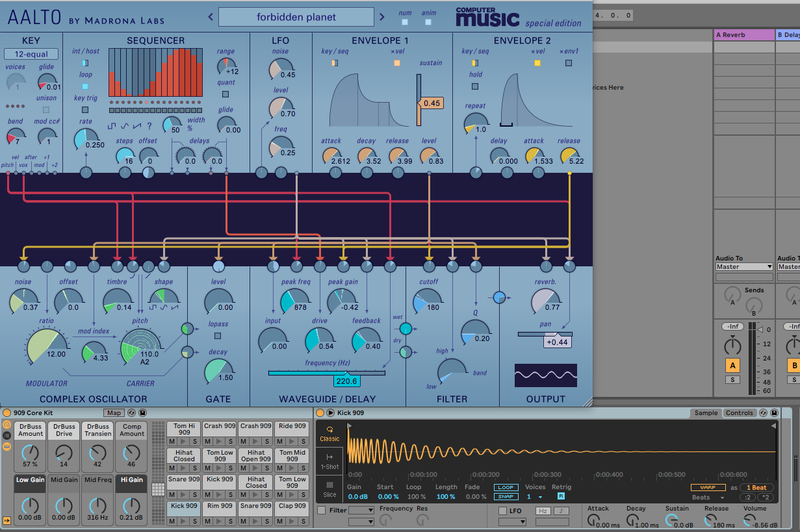
If you’re starting a new track, pay close attention to the sounds you’re choosing; if you’re already some way through a project and the kick and bass aren’t gelling, don’t be afraid to throw out the old sounds in favour of new samples or patches.
So what are you looking for in a kick and a bass sound?
2) Returning Kicks and Basslines
Kick and bass can’t work together if they playing the same notes and activating the same frequencies. Most often, you’ll have to make a decision about which one of these two elements will tickle the lowest, sub frequencies of your track, and which will be slightly higher up, giving its partner space to carry the weight.
Use a frequency analyzer to determine the highest peak in your kick (as shown below) and then make sure the bassline isn’t hitting the same frequencies.
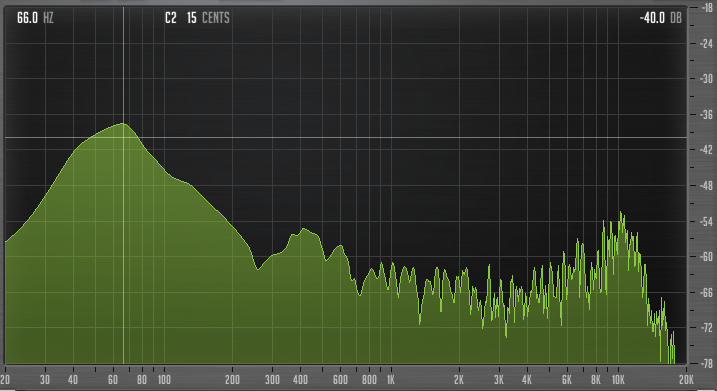
This means either changing the MIDI notes of your bassline or tuning your kick drum in its synth or sampler, all the while keeping an eye on the frequency analyzer to ensure the two are separated.
3) Reference Just the Bass
Referencing your track against commercial mixes is a vital part of today’s production skillset, and there’s a special way to compare just your bass frequencies.
By adding a low-pass filter to your master, then listening to your track in comparison to another commercial mix, one by one, you can reference the bass frequencies only, and hear how they stand up to each other in terms of level, tuning and separation.
If you’re using monitors that have a good low-range response, or using a dedicated subwoofer, try putting your hand to the speaker cone while doing this and literally feeling the sonic response. Remember, bass is felt more than it’s heard, per se.
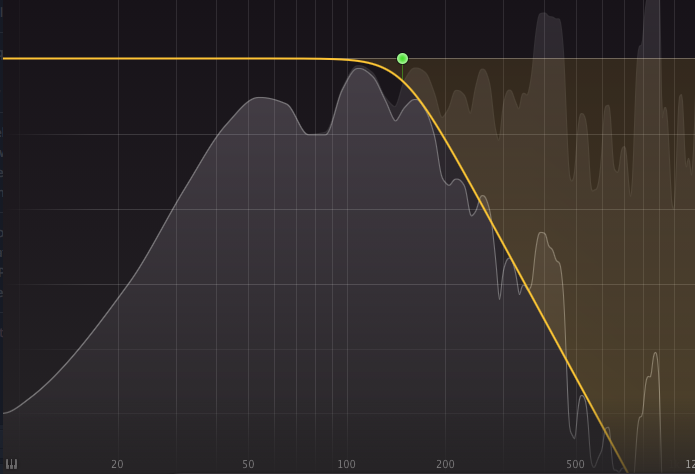
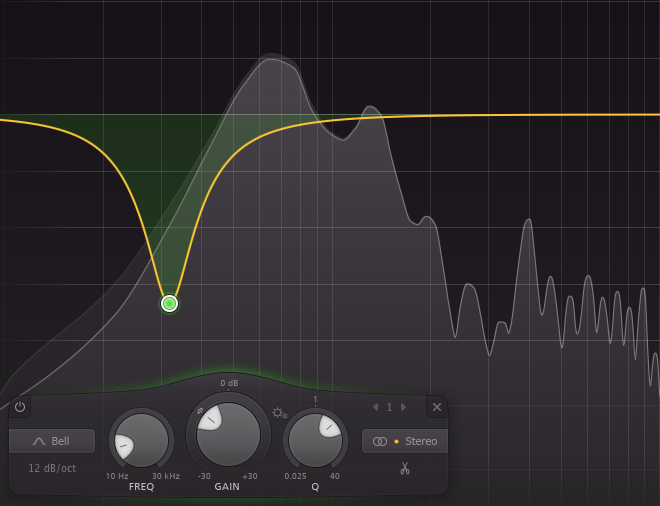
4) Use EQ to Carve Space for Kick and Bass
Remember using a frequency analyzer to see where your bass and your kick were hitting, and retuning one to fit with the other? You can also try EQing to cut space out of one sound where the other has its most dominant energy.
5) Sidechain Compression
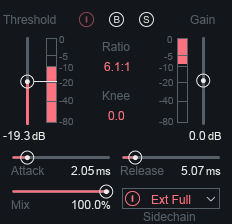
A bit more effective than EQ is quick sidechain compression. Add a compressor over the bass track, and trigger its sidechain input from the kick’s channel. Set the Threshold so that the kick activates compression over the bass.

Crucially, use fast Attack and Release times, and set the Ratio to taste, bringing the bassline down by a few dB every time the kick hits.
The result of this should be a very fast volume reduction, or ‘ducking’ of the bass when the kick plays. If you listen to the whole signal without the kick (you’ll have to make sure the kick’s send is set to pre-fade, before bringing the kick’s fader down), you’ll probably notice the bass ducking downwards whenever the muted kick plays.
Actually, when brought back in, the kick’s signal should mask the fact that the bass is dipping down, making the overall effect one of a strong kick, separate from the tone of the bassline, which gives its energy after the kick has disappeared.

Consider duplicating the kick signal to make a dedicated sidechain ‘Trigger’ signal that is routed to the kick but isn’t actually heard in the mix. This ‘ghost’ signal lets you program a pumping sidechain effect when the kick isn’t actually playing, drop out the pump at some points, or extend or shorten the length of the ducking.
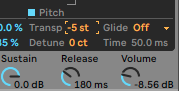
6) Retiming and Delaying your Bassline
If re-tuning, EQing and sidechain aren’t cutting it, consider simply moving your bass later in time in comparison to your kick. By dragging on the audio or MIDI regions on your DAW’s timeline – with Snap to Grid disabled, of course – you can slightly nudge your bassline so that the notes play slightly after those crucial kick hits.
If you’re using a duplicated sidechain or ‘ghost’ trigger to activate compression over the bassline, consider moving this forward, earlier in time, activating the compressor over the bass ever-so-slightly before the kick comes in.
7) Dynamic EQ Sidechain
A sort of combination of all the above techniques, dynamic EQ is similar to EQ, but each band’s gain is like a little compressor activating a select group of frequencies.
This means that with dynamic EQ, you get something with the best bits of EQ and compression – an EQ band that only activates when the frequencies under its control have breached a certain level. Not only that, but depending on the plugin in question, individual bands can be triggered by sidechaining.
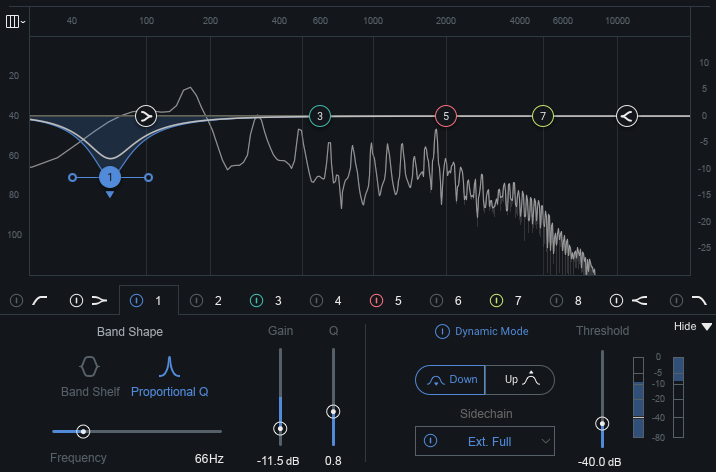
The upshot here is that you can perform ‘frequency-selective ducking’, combining compression and EQ techniques to duck only the lowest parts of your bass when the kick plays. This gives the bass even more power in the mix, keeps its higher frequencies ringing out while the kick is playing, and doesn’t detract from the kick, which can poke through the mix just the same.