In the world of plugin effects, FabFilter stand at the highest peak of the highest mountain, a serious contender for the crown of world’s favourite music software developer. With their attitude of reinvention towards plugin design, the Dutch company pick apart every processor and determine exactly what it needs to be for the digital age.
You may know FabFilter for their ubiquitous Pro-Q, their innovative dynamics cure-all Pro-MB, their top-notch distortion toolkit Saturn, or one of many other top-rated, well-designed AU and VST plugins. Often rated as the providers of the best EQ, best compressor and best reverb among other lofty credits, their reputation is well deserved, and in this article, we’ll take you through the basics of the top fabfilter plugins, getting you started with these top-quality mixing tools.
IN THIS GUIDE
How to use Pro-Q
- Getting Started with Pro-Q
- Analyzer Freeze
- Assigning Bands Stereo Properties
- Setting up Dynamic Bands
How to Use Pro-C
- Basic Controls
- Setting up FabFilter Pro-C for Sidechaining
- Using Pro-C for parallel Compression
How to Use Pro-R
- Using FabFilter Pro-R's Reverb Curves Display
- How Pro-R's Reverb Controls Work
How to Use Saturn
- Getting Started with Saturn
- Working with Multiband Distortion in Saturn
- Modulating Distortion in FabFilter Saturn
- How to Use Pro-MB
How to use Pro-Q
FabFilter’s Pro-Q is one of the most comprehensive EQs in the world today, and in this quick Pro-Q user guide, we’ll get you up and running with its most crucial features in seconds.
Don’t forget to check out some Common EQ Mistakes when you’re up and running with Pro-Q, to find out how to use it even better.
Getting Started with Pro-Q
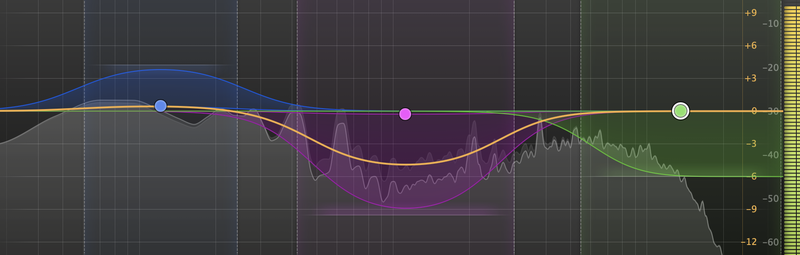
When you first load up FabFilter Pro-Q, it will show the frequency spectrum of the audio going through it alongside a flat yellow line in the main display. Hover over this yellow line and click to insert a band at any point.
You can drag the node you just created in order to bring the band’s gain up or down, and change its frequency. You can hold Ctrl (PC) or Cmd (Mac) to adjust the band’s Q setting from here.
When you’ve selected a band, you can take more comprehensive control over its actions in the floating display that appears at the bottom of the Pro-Q interface. Here you can also change Gain, Cutoff and Q in a traditional, parametric way, and there are plenty more controls here too.
Now let’s add another band into the equation in the same way as the first. By clicking the yellow baseline at its extreme left or right edges, the band is automatically created as a shelf cut or boost.
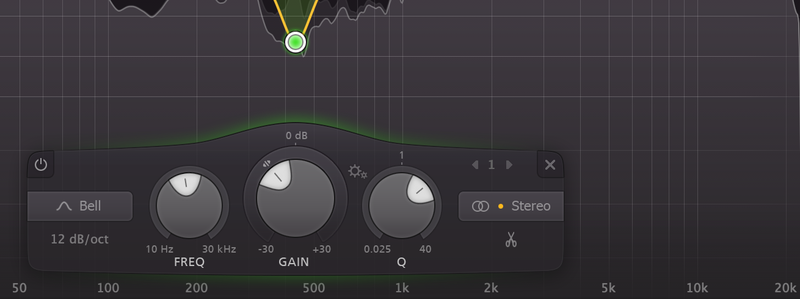
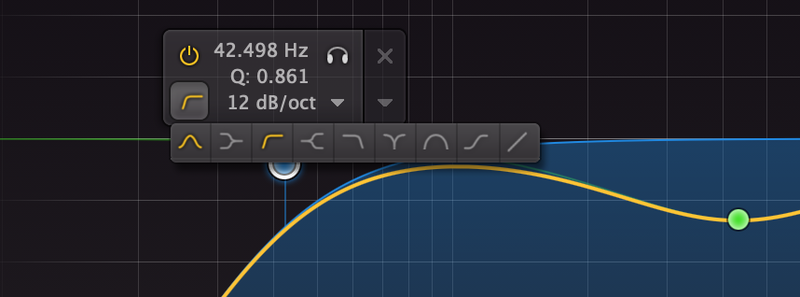
If we want to change this band to a different type, there are two quick ways to do it: while mousing over the node we can select a different type as in the image below. Actually, we can select a lot of properties about the band from this panel alone: its shape, its slope, its stereo placement and loads more.
Analyzer Freeze
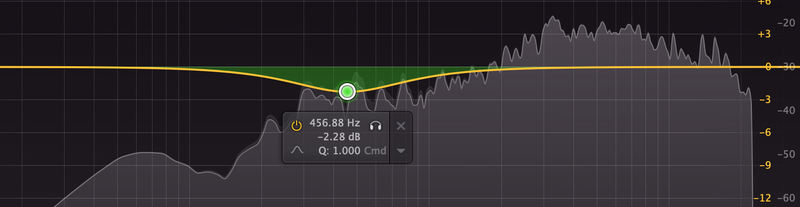
Hold your mouse away from a band’s controls, in the lower portion of the frequency spectrum, and the whole band’s spectrograph will ‘fill in’ and slow down. Pro-Q will also identify some of the harshest frequency spikes while in this mode, pointing them out to you. You can actually grab nodes at these points and create sharp notches where frequencies need removing.
Assigning Bands Stereo Properties
Another great feature of FabFilter Pro-Q 3 is the ability to assign individual bands as left, right, mid or side only.
The default ‘Stereo’ setting just means that both left and right channels will be affected by an EQ band, while Left means that the band will only take effect on the left side.
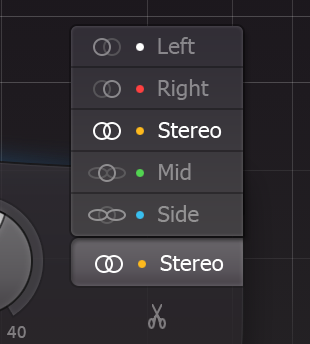
Mid and Side translate, very basically, to Mono and Stereo. The Mid channel processes any mono information – ie, whatever is the same in both speakers – while the Side channel carries only stereo information.
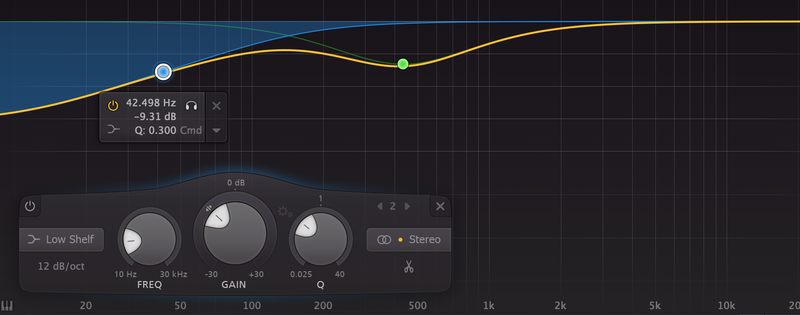
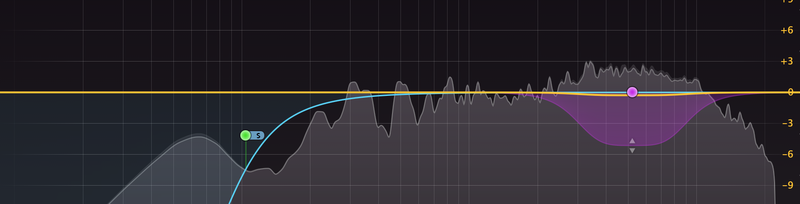
This can be useful, for example, when removing very low bass frequencies from the stereo panorama and keeping them in the middle of the mix only. To do this, you’d insert a high-pass filter, with a cutoff of around 120Hz, that only affected the Side channel of the mix, as below.
Find out more about Mid/Side EQ techniques here.
Setting up Dynamic Bands
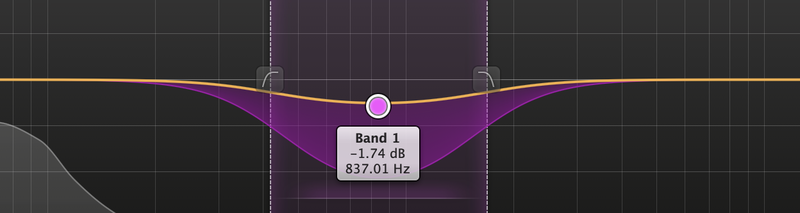
Since version 3, Pro-Q has been able to make its bands dynamic. This means that each can be used as its own compressor acting only on certain frequencies. To make a band dynamic, simply drag down the collar around the Gain knob.
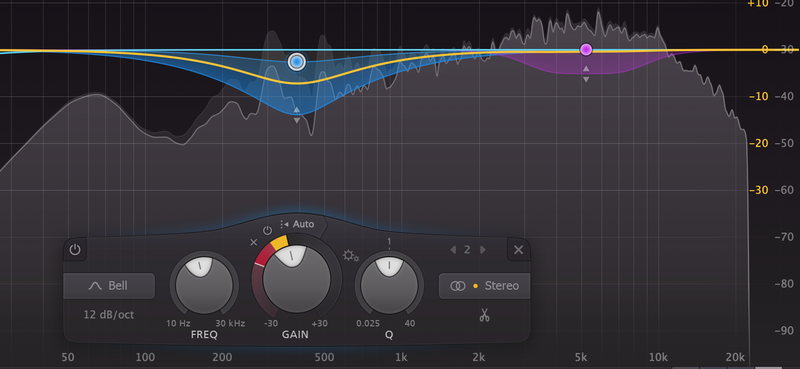
This band will now move in response to the audio going through it. The gain knob itself needn’t be moved to make this work. The Threshold of each band can be set by clicking where it says Auto in order to take a little more control over the audio.
How to Use Pro-C
Whether you need a compressor for basic signal-level duties, or you’re looking for bus ‘glue’, mastering dynamics processing, adding punch, or sidechaining, Pro-C is a do-all effect with talents for any duty. Here’s a user guide for FabFilter’s Pro-C compressor.
Basic Controls
Load up Pro-C and it will likely immediately start compressing your signal. You can see the traditional compression transfer curve shape on the left of the interface, and on the right you can see an oscilloscope view showing how compression is being applied to the signal. This is a very informative way of setting up your signal.
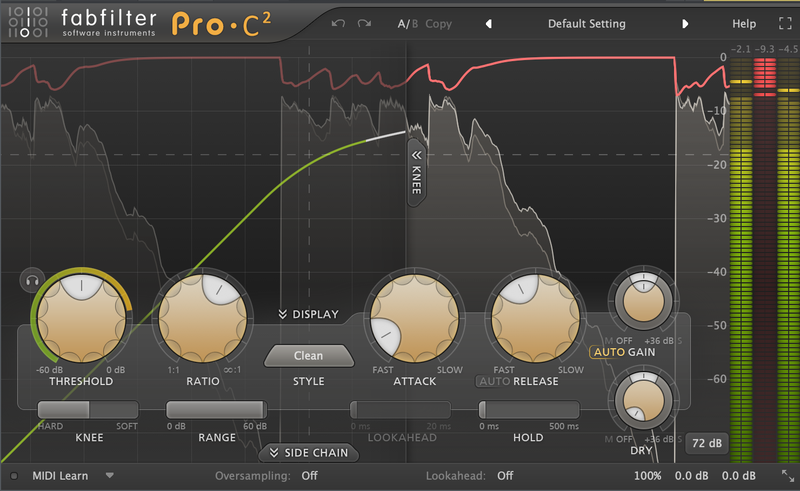
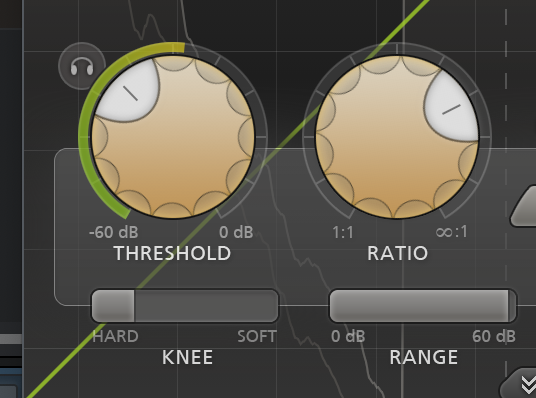
In the bottom left, you can tweak the Threshold and Ratio. We’ve set the Knee more towards Hard to show the sharper curve you might be used to from your existing compressors when loaded up. There’s also Attack and Release settings. You can see all the results of your changes and the gain reduction they’re triggering in the live oscilloscope view.
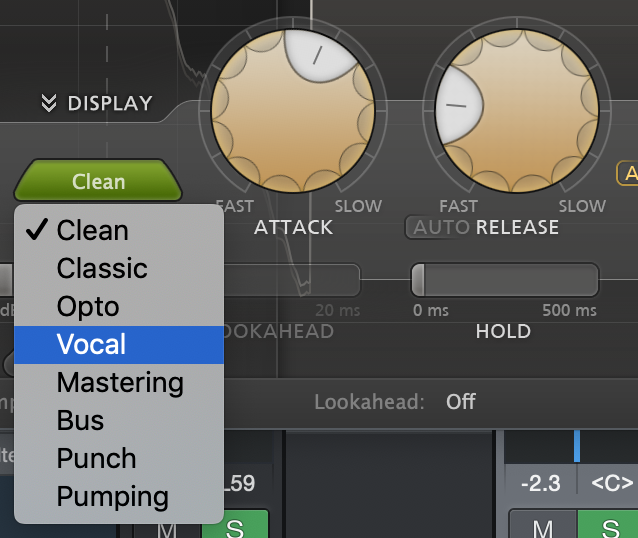
Pro-C also lets you select between nine types of compression, imitating classic compressors and the responses that work best for things like Mastering, Drum Bus, Vocals and so forth. The default type, Clean, is a very transparent model that will do well in most cases.
Setting up FabFilter Pro-C for Sidechaining
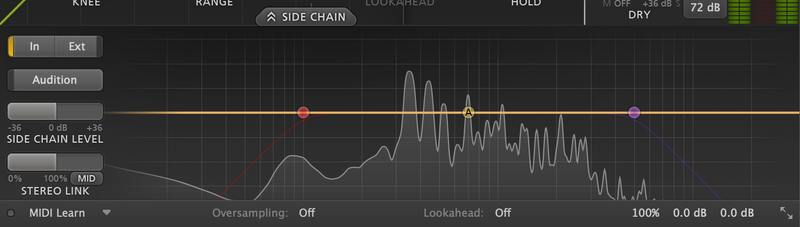
You can use Pro-C as a sidechain compressor, which will help getting instruments such as kick and bass to sit together in the mix. Get the routing right in your DAW first (check its manual if you don’t know how to do this), and then click the Side Chain button at the bottom of the Pro-C interface.
Select Ext instead of In, and you should see the frequency spectrum of your sidechain input signal in this lower pane. Your compression is now being triggered by this sidechain, but is happening to the channel that Pro-C is inserted on. There are EQ controls here for affecting the sidechain signal.
Using Pro-C for Parallel Compression
In order to ‘blend’ or ‘mix’ Pro-C’s output with the original, dry signal, simply turn up the Dry Level and adjust the Wet Gain to combine the two together. Most compressors use a ‘Mix’ control to remove the compressed signal, but Pro-C uses two separate controls – one for each of the controls.
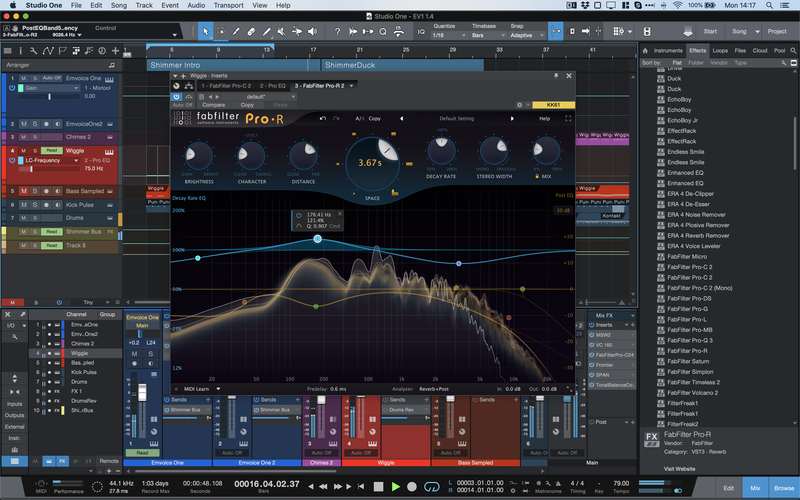
How to Use Pro-R
One of the most recent additions to the FabFilter VST plugins stable, Pro-R tackles that most inaccessible of DSP duties: Reverb. There may be far fewer controls than most reverbs on this one, but Pro-R’s features work together under-the-hood to give you a great reverb sound with as much control as its rivals, and some features that you won’t get anywhere else.
Using FabFilter Pro-R’s Reverb Curves Display
The first thing to take your notice when you load Pro-R should be the dual curves, putting you in mind of their Pro-Q EQ plugin.
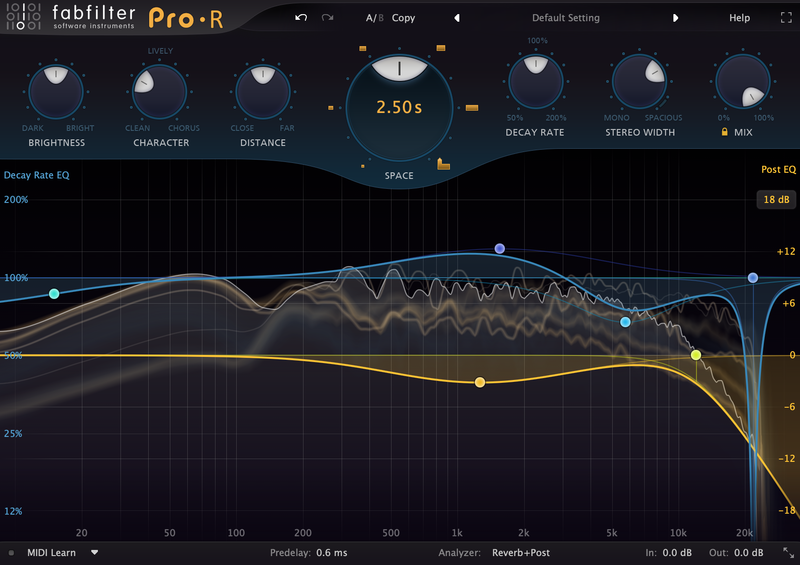
The yellow curve is the simplest one to understand – it’s a EQ curve determining the frequencies present in the wet signal level of the reverb. Just like in FabFilter’s Pro-Q, you can create bands, change frequencies, adapt Q, and do much more besides.
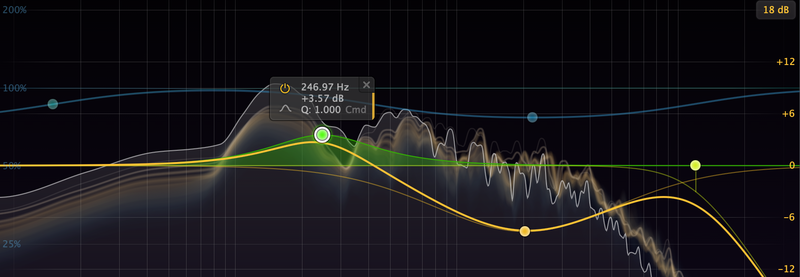
The blue curve in Pro-R, on the other hand, is very different. It’s still based on frequency, and works in the same way as an EQ, but instead of the curves controlling the boost or cut of each band, they control the reverb decay time for different frequencies.
So boosting a band at, say, the fundamental frequency of the instrument that’s playing, will cause those frequencies to have a longer decay time than the rest of the spectrum. The effect is that the tone is more pronounced and sustained, and therefore can make a deeper impression in the mix.
Boosting an important part of the frequency spectrum using the blue decay curve and then cutting it slightly using the yellow EQ curve is a standard trick to give a mix element a little more power and notoriety without it taking up too much headroom.
How Pro-R’s Reverb Controls Work
The controls at the top of Pro-R don’t seem close to what’s available in other modern digital reverbs, but they work harmoniously together to offer some easy-to-understand parameters that can help you dial in the sound you need.
In the middle of the top bar, the Space control lets you affect both the timing and the shape of the perceived virtual space. On the left half of the knob’s range, you’ll find setting equivalent to small, medium and large rooms; on the right half of its range, you can access medium and large halls, and the cavernous cathedral-style virtual spaces.
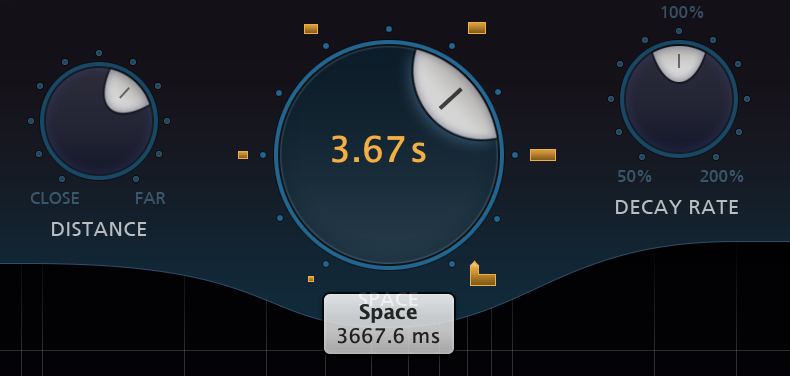
The Decay Rate parameter acts as a modifier, allowing you to adapt the selected Space’s reverb time by up to half or double, keeping the type of Space itself constant. Meanwhile, the Distance control determines where the sound source appears to be in relation to the listener, automatically blending reflections and increasing Pre-Delay based on only one control.
There’s a dedicated Pre-Delay knob at the bottom of the interface, too, if you want to go old-school. This can be tempo-synced, which is a great addition.
Pro-R’s Character control slides from Clean to Lively to Chorus settings, and anywhere in between. At Clean, the reflections aren’t modulated, some randomness is added at the Lively setting, and Chorus introduces a lot of modulation to the signal.

The Brightness parameter makes the reverb signal emphasise the higher or lower reflections in different ways, giving a more earthy or shimmering tone, depending on which way you tip it.
Finally, the Stereo Width and Mix controls allow you to widen the reverb signal and blend it in with your original sound if used on an insert channel. If you’re using Pro-R on an aux/return channel, make sure to set Mix to 100%.
How to Use Saturn
It’s the plugin (AU, VST and AAX) that’ll get your sounds hot under the collar. The name Saturn is a play on the word Saturation, which as a term can be interchangeable with distortion. Saturn does its particular brand of distortion as a multiband processor, meaning you can set up different distortion treatments for different parts of the frequency spectrum. Let’s have a look…
Getting Started with Saturn
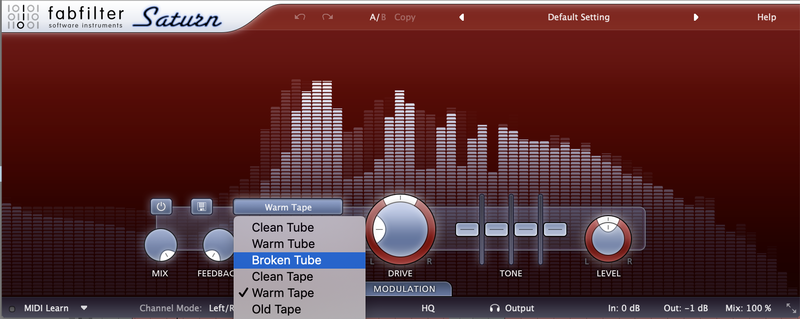
When you first load Saturn, you’re greeted with the frequency spectrum of the audio that’s going through it. In the bottom panel, we have parameters that’ll let us take control over the distortion. Start by having a look at the distortion types we can apply – there are 16 of them.
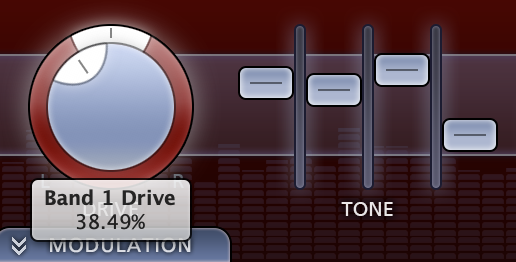
Once you’ve selected a distortion type, you can apply that distortion effect more and more strongly using the Drive control. You can also pan the signal from the outer collar of this same effect.
The four Tone controls acts as a sort of EQ filter network, sculpting the output. Remember though, these bands work in series, so a higher band will have less of an effect if the band below it has been turned down – distortion most often works by adding frequencies above the original signal.
Working with Multiband Distortion in Saturn
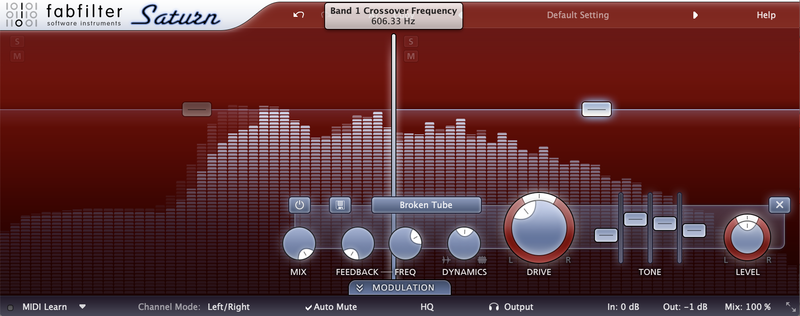
Hover your mouse cursor towards the top of the frequency display region, and you’ll see a Plus Sign appear. Click it and you’ll split the plugin’s processing into two. This means that you can create new settings that will only affect the lower or higher parts of your frequency spectrum.
You can choose where the lower and upper parts are separated by dragging the vertical divider line left and right. You can create setups of up to six bands.
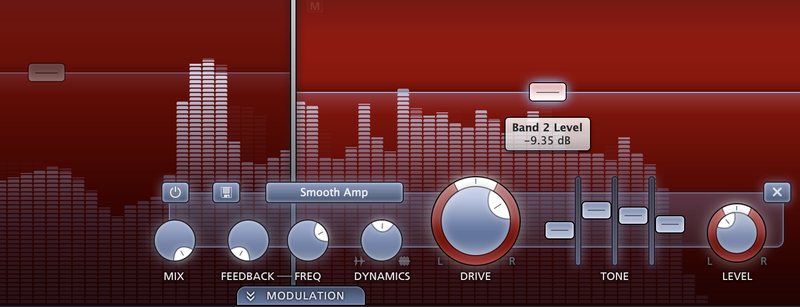
Below, as we select the right-hand, upper band, we can tweak the Drive amount and Type to apply just those settings to the upper band, leaving the lower one with the original settings we had before. The bands’ output levels can be raised or lowered altogether using the horizontal ‘faders’.
Modulating Distortion in FabFilter Saturn
Using the Modulation tab at the bottom of the interface, we can unfold a whole panel for messing with the signal. Click Add Source and select New XLFO to bring out an LFO module in this bottom panel.
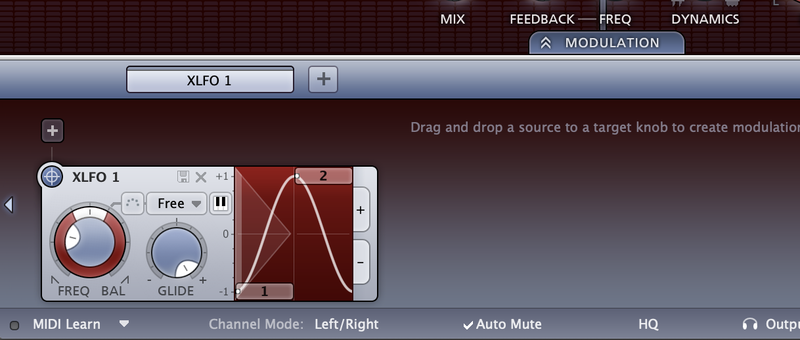
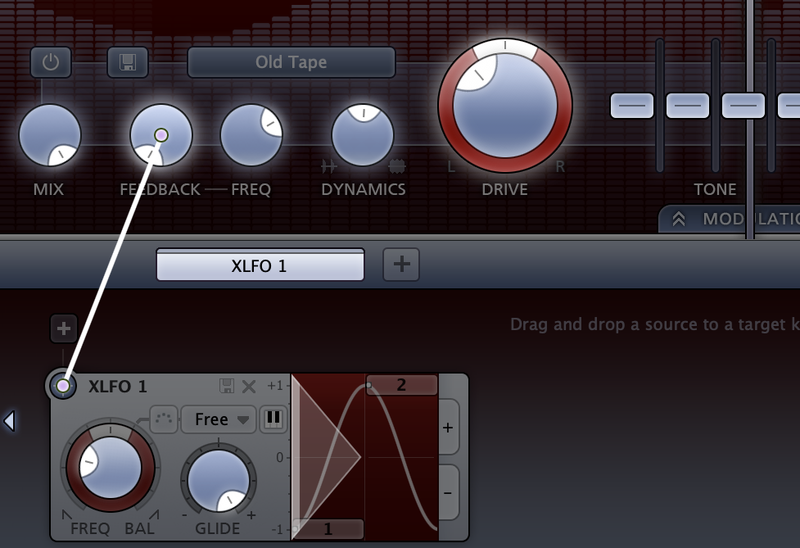
Click the crosshairs button in the top-left of the plugin and drag it to a parameter on the interface in order to move that parameter up and down rhythmically, based on the settings of the LFO. Great targets include the drive amount, a band’s Mix level, and even the crossover frequencies between bands.
There are plenty more modulators, like traditional envelopes, followers and MIDI inputs, and almost every parameter within Saturn can be modulated by them. The sliders above each modulators determine how strong their modulation will be on each target parameter.
How to Use Pro-MB
FabFilter’s Pro-MB is a multiband dynamics device that’s capable of compression, expansion and both at once for different frequency bands. Here’s a brief user guide for getting up and running with this effect plugin.
A lot like Pro-Q, you’ll have to create a band by clicking the horizontal yellow line before you get started. Once this is created, it does look a lot like Pro-Q, but there’s a key difference…
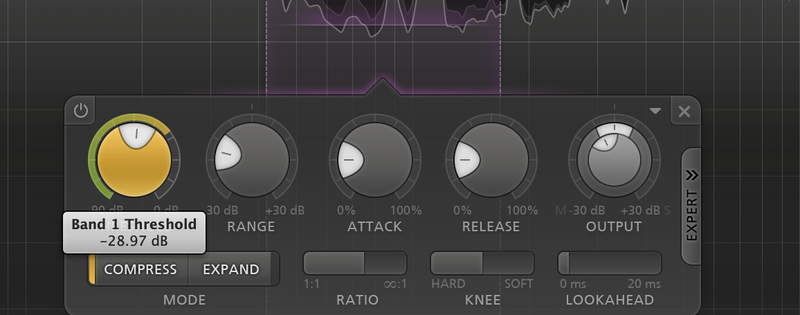
The controls that pop up when you create a band aren’t actually EQ controls – they’re dynamics controls, as you’d get in a compressor or expander plugin. You can set Threshold, Ratio, Attack, Release and more to get a compression effect on just the band you’ve selected.
You can use Pro-MB a lot like an EQ, by simply adjust each band’s output, but the dynamics usage is what it’s built for. New bands can be clicked into existence by clicking on the yellow line, and the width of each band can be adjusted by dragging left or right on its handles.