Every recording musician and post-production engineer has come across this issue at one time or another: volume levels across clips (formerly known as regions in Pro Tools) that simply don’t match.
The time-consuming workaround to this problem in Pro Tools 9, or virtually any DAW, is to ride the faders in real-time to try and match inconsistent levels. Of course, it’s also possible to draw in volume automation to match the levels, but this “shot in the dark” approach can be inaccurate as the waveform view doesn’t update to reflect gain changes.
The Clip-Based Gain feature in Pro Tools 10 provides a much quicker and visually appealing solution. Using the clip gain line you’re able to adjust the gain for individual clips and match their relative levels. You’ll notice right away how the waveform view updates in real-time to reflect the clip gain changes. Very impressive!
Once you’ve made changes to the clip gain you can move, cut, copy, paste that clip anywhere in your session safe in the knowledge the clip gain settings will stay attached to the clip. Good-bye volume automation!
This one new feature has the potential to dramatically change the way we edit audio, and dare I say, even enjoy editing audio! Let’s take a look at how to get started using clip-based gain.
Step 1 – Enable Clip Gain Info View
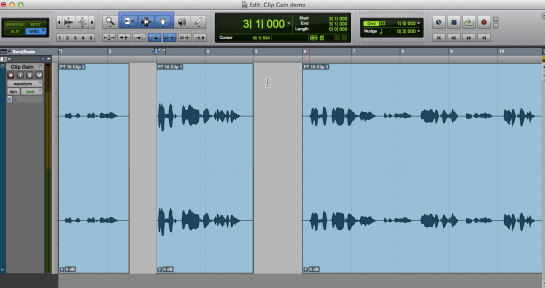
In this session we’ve got three clips all recorded in different environments. As you can see from the waveforms, clip 1 is the quietest, clip 2 has the highest waveform, while clip 3 has some loud and quiet sections. Our aim is to quickly match the levels across all the clips.
The clip gain view is already enabled. Take a look at the bottom left corner of each clip which displays the fader icon and 0dB indicator, which means no clip-based gain has been applied to the clip.
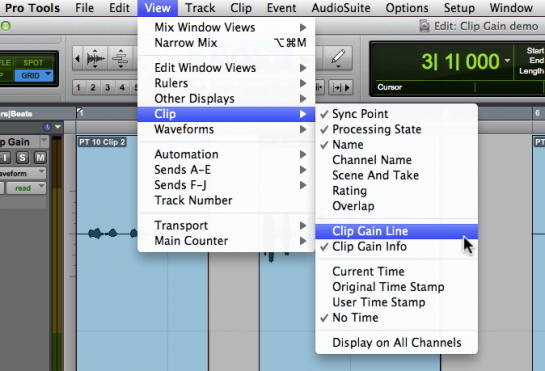
First, we can enable the Clip Gain Line from by choosing: View Clip Clip Gain Line:
Step 2 – The Clip Gain Fader
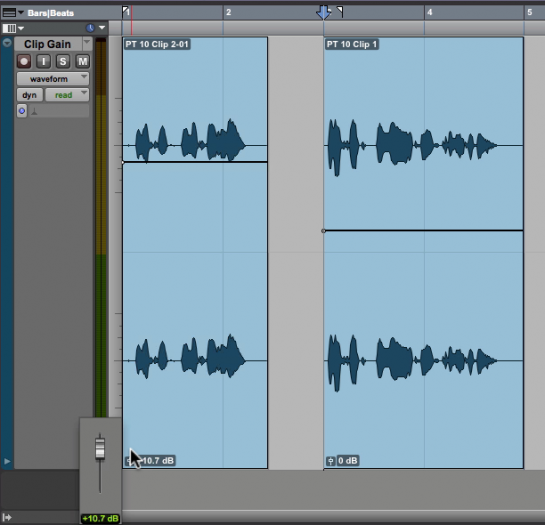
To adjust the gain for an entire clip either use the grabber tool to drag the Clip Gain Line along the vertical axis or drag the fader icon in the bottom left of the clip.
As you do so, you’ll notice a larger gain fader appears and the amount of gain you’re adding to (or subtracting from) the clip is displayed in dB. This can act as a handy way to quickly see which clips have had gain applied to them.
And as you move the fader you’ll also notice the waveform overview getting taller or shorter in real-time. If you hold down the Command key you’ll be able to change the Clip Gain at a finer resolution.
Note: All of these changes made using the Clip-Based Gain feature take place pre-mixer that is, before effects and levels on the channel.
Step 3 – Working With Breakpoints
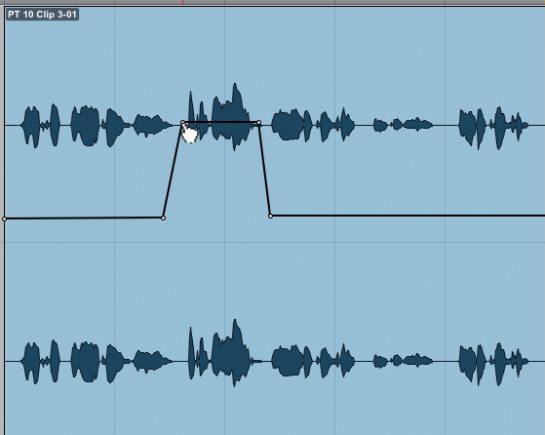
So far, so good. Adjusting clip-gain across a whole clip is pretty easy to get the hang of. But what if you have varying levels within one clip? There’s no need to split the clip: using breakpoints (much like automation) you can draw in new gain values to be adjusted in a certain section only.
Click with the pencil tool on the Clip Gain Line to create a breakpoint. Using the Grabber tool drag each breakpoint to the desired level. (Logic and Final Cut users might like to think of breakpoints as nodes and keyframes, respectively).
As you drag the breakpoints you’ll notice the waveform adjusts accordingly making it easier to match the sections of audio visually.
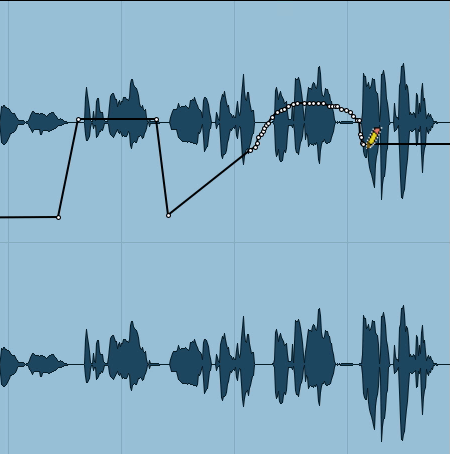
Step 4 – Drawing Dynamic Clip Gain With The Pencil Tool
Select the pencil tool again and this time drag to draw a number of breakpoints which will represent Clip Gain.
You can always redraw the line with the pencil tool if needed.
Remember that after adjusting levels using the Clip Gain feature you can cut, copy and move that clip around, keeping the gain attached to the clip!
Step 5 – Further Options And Tips
There are a lot of useful shortcuts and tips to help make Clip-Based Gain an indispensable part of your editing workflow.
I’d encourage you to explore some of these by right-clicking on a clip and looking under Clip Gain sub-menu. From here you can bypass and clear Clip Gain and even copy it from one clip to another. Importantly, you can choose to render the Clip Gain into the clip and show/hide the Clip Gain Line, too.
Original source here.


