Making your own playable instrument from single samples need not be a chore. Darren Burgos shows how to make chopped up vocal stabs ideal for Trap, Hip Hop and House in a few clicks in Logic Pro X.
When digging through a sample collection of bass, synth, vocals, or effects, wouldn’t it be great to easily “play” the sound/sample across the keys right then and there? Vocal stabs that move up/down in pitch, bend into subsequent notes, and sound chopped or stuttered are common in Trap, Hip Hop and House. Playing single note bass, synth stabs, and chords are common in Techno and Deep House. With just a few clicks we’ll make a playable MIDI instrument from a single sample.
Step 1: Open an EXS24 and Add a Sample
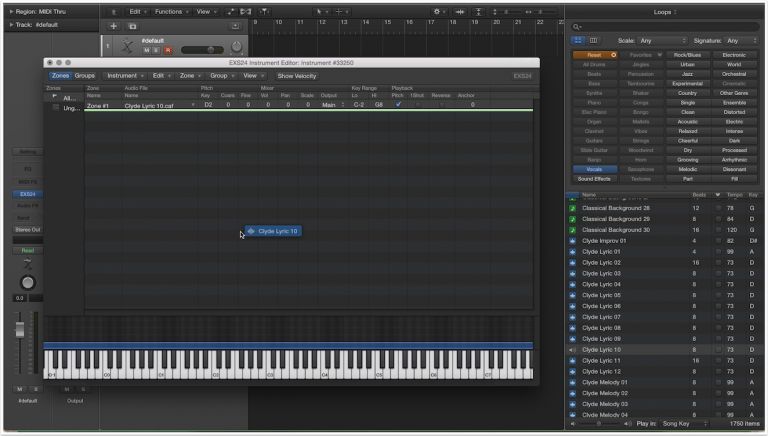
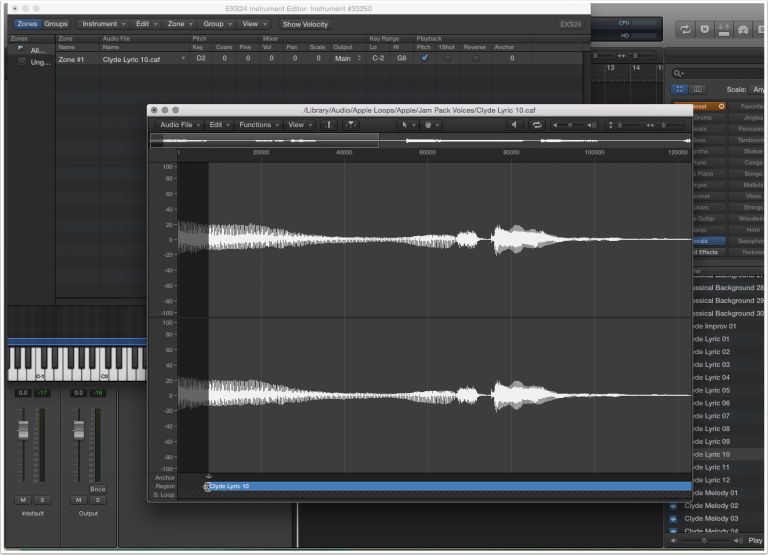
Create a new software instrument in Logic with key command Option-Command-S, then add a stereo EXS24 to the track’s instrument slot. Click EXS24’s Edit menu to open the Instrument Editor. While this window is open, press F to open the Browsers window. From the “All Files” tab, navigate to the location of your sample library and simply drag the audio you wan’t to use directly onto the empty Instrument Editor. You can just as easily drag an existing audio region from the arrange/workspace, and even directly from Logic’s loop browser. Once the sample is dragged in, you can immediately start to play it. So anyone can follow along with this, I used the vocal Apple Loop “Clyde Lyric 10.” You can easily search for it in Logic’s loop browser. Whichever sample/audio clip you used, try playing now on your MIDI controller.
You can easily replace the sample with anything else you’d like. Find the audio you’ll be using then drag it straight on top of the existing sample zone that’s displayed in the list. When you do this, you’ll see an “alias” arrow come up signifying that you are replacing the sample with the one you’re dragging in. All the instrument parameters retain their adjustments, but the sample is swapped out.
Step 2: Edit the Start Position
Often the start of the sample isn’t hitting fast enough, or in the right position, but you can easily edit it. Click the edit button at the top right corner of EXS24 to again open the Instrument Editor (if it’s not already open).
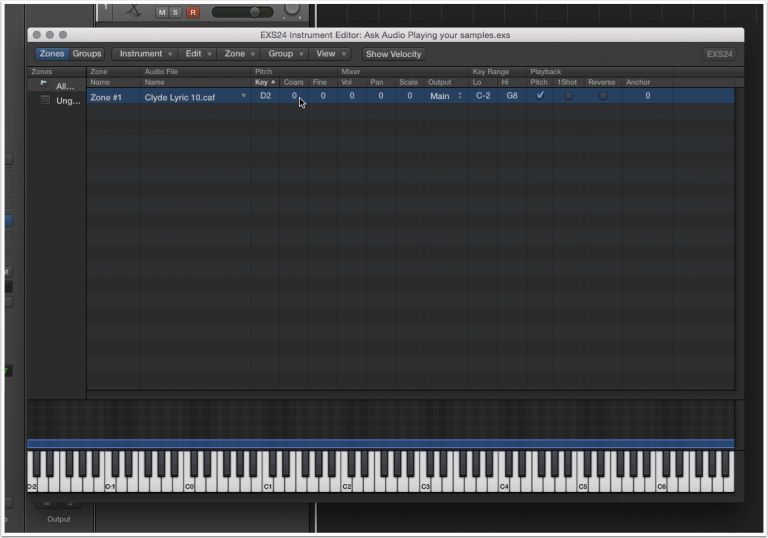
You’ll see the list in front of you that shows all the samples currently in use within the instrument. Double-click the name of the sample in the list (there should only be a single sample or “Zone” if you’re following along).
This will launch the Sample Editor window. Point to the far left corner of the blue strip below the waveform. When the left corner adjustment icon appears, click hold and drag in to the right. This can be slightly tricky, but keep trying till the adjustment icon appears. Line the start position closer to where the recording begins, or farther into the sample. Try playing the instrument while you adjust this start position.
Step 3: Adjust the Pitch
Close the Sample Editor window so you’re again looking at the Instrument Editor screen. At this point you’ll be asked to save the sound. Name it, and save it. You may think that this sample plays too high, or you might want to pitch it so it plays the correct key on the MIDI controller. If you know the key of the sample, you can simply choose it from the key column in the Instrument Editor. If you don’t know the key, use the “Coarse” column and adjust by ear. Leave the Instrument Editor window open for the next step.
Step 4: Loop a Section of the Audio
So when using a single short audio recording, the sound can sometimes end before you want it to. If we set a loop in the EXS24, the sound will “sustain” (like in my example audio below) instead of ending abruptly, or moving on to another area of the sample/recording. From the Instrument Editor’s “view” menu select “Zone: Loop.” A new column will appear in the Instrument Editor. Click the “On” column button in the Loop area that appears. Double-click the name of the Audio File in the list of samples to once again open the Sample Editor. Swipe across an area of the recording you’d like to loop. If you want the pitch to sound stable, highlight an area that doesn’t change in pitch like I did in the example image below. Once the area is selected, choose “Selection -> Sample Loop” from the Sample Editor’s Edit Menu.
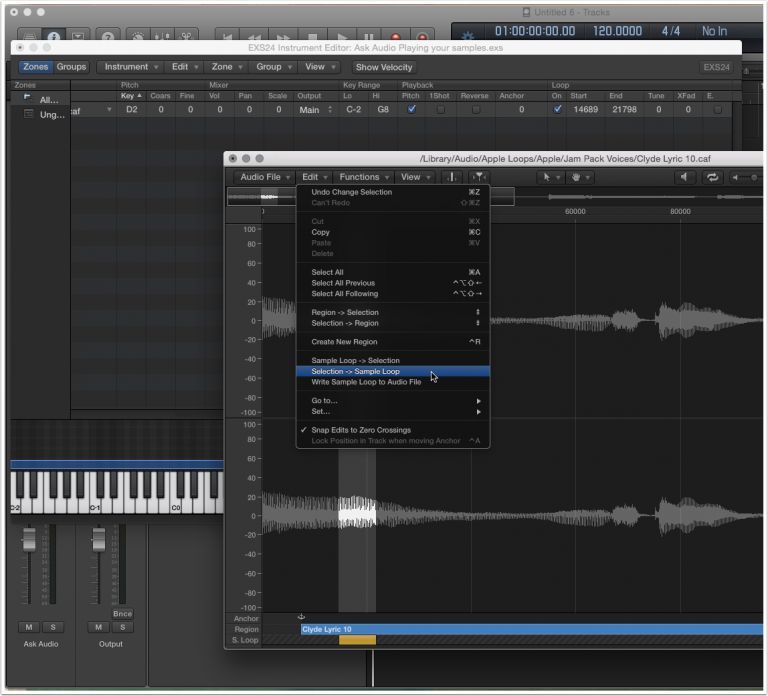
If the loop doesn’t sound perfect, readjust it. You’ll notice a yellow colored area below the waveform in the “S. Loop” row. Simply grab either side of the yellow bar to adjust. Back on the Instrument Editor in the loop section, adjusting the “XFade” parameter will smooth out the loop. Try a value of 100 or more. Close the Instrument Editor and save the instrument when it asks.
Step 5: Make the Sound Bendable
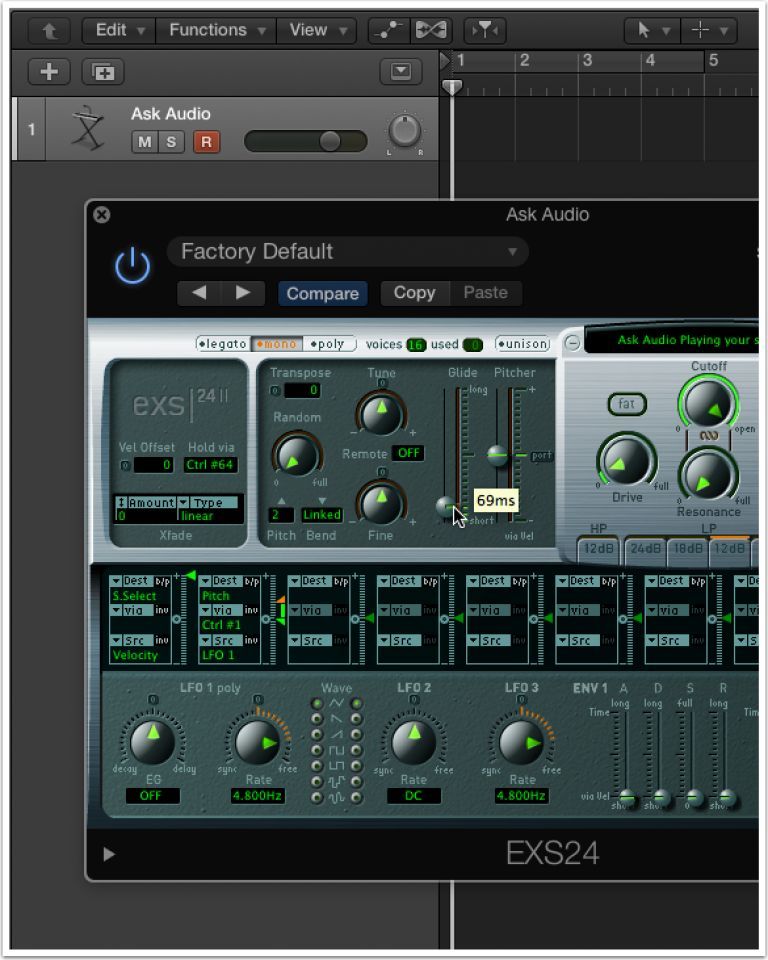
So this sound “bends” into any new notes pressed we’ll want to made some changes on the EXS24 interface. If either/or the Instrument Editor or Sample Editor are still open, you can close both now. On the top left side of EXS24, click the mono button. Now, while playing on your controller, slide up the Glide parameter to taste. Depending on the tempo of the song or that you’re playing at, this value should always be set “by ear” till it bends in time with your song.
Step 6: Play in some MIDI Notes
Now that you have this playable MIDI instrument, go and record some MIDI notes. You can stutter it like you would have as a simple audio region by pressing the same note repeatedly, but now you can play notes and create pitched hooks too. Thanks for reading!
Soure: here