Drums are the backbone of most styles of music, and thanks to technology, anyone with a semi-competent computer can program a decent beat. Modern DAWs and grooveboxes can go a long way towards providing a nice groove, but their on-the-grid nature can leave beats feeling mechanical and robotic. That’s fine if you’re going for styles like techno and house, but some styles of music need a more human feel.
Producers working in hip hop, drum & bass or LoFi genres might opt to search out drum samples, layering breaks and loops to add that sense of groove, but these can get you stuck with someone else’s feel and vibe. It’s not for the faint of heart, but programming your own drums if the best way to get your own, unique feel in your music.
So whether you’re using a drum ROMpler like Addictive Drums, or synthesizing your own drums, how can you get the best of them in your music? How does a real drummer inject that hard-to-pin-down groove into their playing? And how can we mimick it in MIDI programming?
IN THIS GUIDE
Human Drum Parts
Avoid Repetitive Samples
Off the Grid - Dequantizing
Programming Ghost Notes
- A Simple Way to Program Ghost Notes
More Realistic Fills
More Drum Tips
Human Drum Parts
Of course, if the intention is to emulate the playing of a real drummer, you’ve got to remember their limitations, and the chief among this is their number of arms and legs (that’s two and two, if you didn’t realise).
Staying on the ‘painfully obvious’ train, a drummer’s hands are free to hit whichever drum or cymbal they want: the snare, the toms, the hi-hat, the crash or ride cymbals, and anything else. The only exception is the kick drum, which is always played using a pedal, operated by the right foot. So in the below image, the left-side combination of hits is possible (kick, snare and tom); but the right-side combination of hits is impossible (snare and two toms).

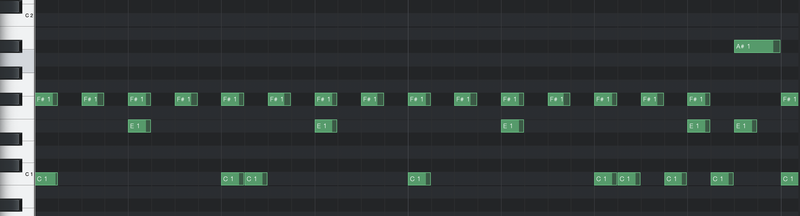
The left foot rests on the hi-hat pedal, where it can vary the tension between the two cymbals, or close them to make a sound. That ‘pedalled hat’ sound is usually found at the MIDI note G#, while the other two hi hat sounds are found at F# (closed) and A# (open).
Most drum-focused samplers will automatically set up a choke group so that the F# or G# closed hi-hat hits will automatically stop the A# open hi-hat sample, so you rarely have to worry about the nuances of getting these right.
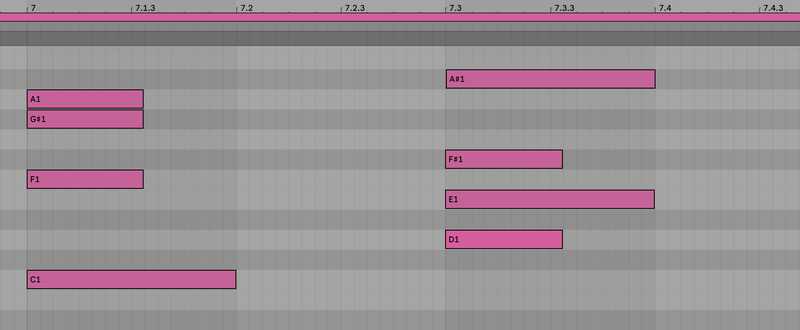
In the below example, the left-side combination of hits is, again, possible, with the hi-hat being closed using G#, toms being played on A and F, and the kick played on C. The right-side combination of an open hat on A#, a closed hat struck with the stick on F#, and two snares (D and E) is definitely not possible for a real human to play.
Avoid Repetitive Samples
Most drum ROMpler software, such as XLN Audio Addictive Drums and FXpansion’s BFD will usually take care of this for you, but if you’re building drums using one-shot samples, it might require a bit of thought.
The human ear is very sensitive, and hearing the exact same hit over and over again may become obvious over time, or if those hits are played in quick succession. In drum machines, this is known as the machine gun effect, as the same snare is played over and over again – often as a roll during a build-up – and becomes a stuttering, repetitive mess. While velocity variation can go a long way towards stopping the machine gun effect, as we’ll show you later, samplers have a better way of dealing with it.
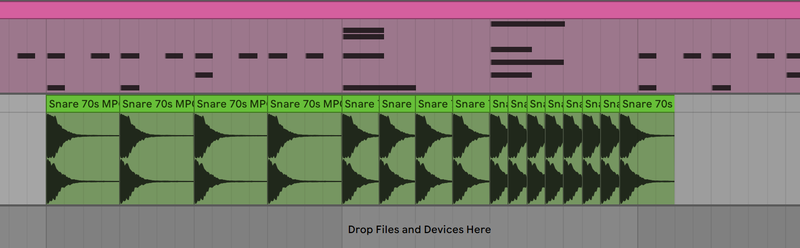
Round-robin sampling is the idea of getting multiple alternative versions of the same sample and playing these subtly different variations in turn, helping to keep things more natural. Under the hood, a drum instrument will usually have multiple samples of drums for different velocity levels, but each of those velocity levels should contain multiple similar samples for variation.
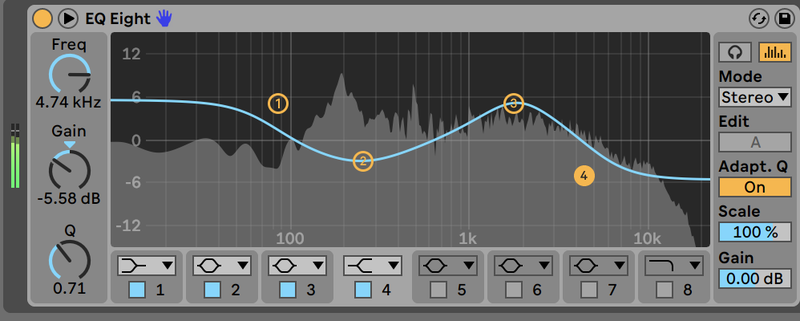
If you’re working with raw samples, you can attempt to find a similar but very slightly different version of the same snare to alternate with your original snare – our Loopcloud software can help a lot with this. Your other option is to slightly change the original sample and create a new version by processing with EQ, gain and saturation, in order to export and replace half the instances of the original sample.
Off the Grid – Dequantizing
The modern computer-based music setup is great for its ability to perfectly time music and note on the timeline’s grid, but timing of that much precision and accuracy isn’t actually something a real drummer can achieve. Quantizing isn’t just unrealistic for a real human drummer – it’s unwanted too, taking away from the groove. Luckily, most DAWs have Humanizing functions exactly with this de-quantizing in mind.
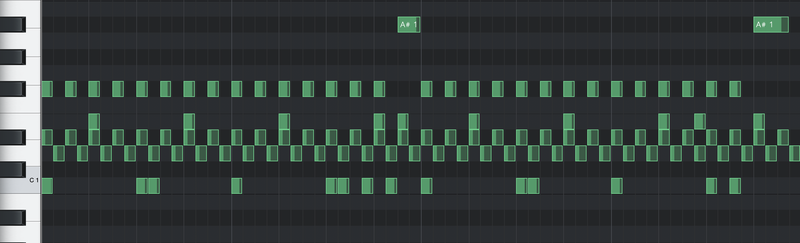
It’s not just the exact start times of notes that need to be shaken up to keep that human feel. Let’s start with a quick look at velocity programming. Keeping every single hit at the exact same velocity value is a surefire way to turn your track into a mess of dynamics.
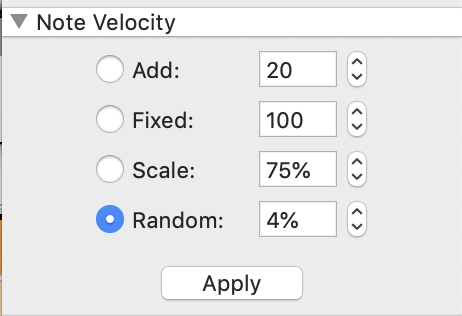
Above in Reason, we’ve set the Velocity values to vary throughout the track by up to 4% up or down. Since velocity goes up to a maximum value of 127, that’s about plus or minus 5 as the maximum value that should be added or removed for any note. This amount of variation is realistic – real drummers can’t hit every single note at exactly the same intended strength, but they can get pretty damn close.
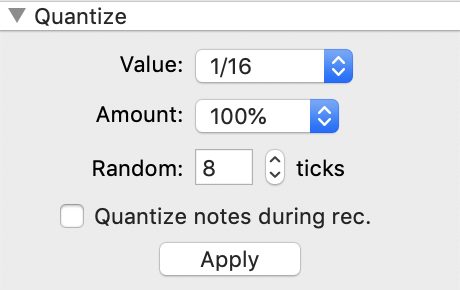
Timing is similar, but a real drummer tends to be far closer to accuracy when it comes to timing – they do practice for years to get their job as right as possible. In Reason’s Tool Window, as below, we introduce a random quantization value by up to 8 MIDI ticks (that’s the smallest unit of MIDI timing, and it does depend on your master tempo). For faster-tempo music, a maximum of 12 MIDI ticks should be a realistic value to make things human.
Programming Ghost Notes
Drumming is very much about dynamics. Unless a drummer’s slamming out break-neck heavy-metal, the difference between the loudest and quietest hits are quite exaggerated when it comes to drums. Sure, producers might end up compressing a drummer’s playing anyway, but the difference between softer and harder hits can still be felt in the frequencies they generate as harder-struck drums and cymbals ‘open up’ more. A great example of the low-down side of dynamics is ghost notes.
Ghost notes are generally played on the snare while the main beat is playing. These low-velocity hits serve as extra ‘hints’ of rhythm, but are so low-down that they’re almost subconscious. You might not easily hear them when they’re there, but there’s something missing when you take them away. Because these notes are so low down, it’s hard to get a handle on where to place them in MIDI drum lines.
A Simple Way to Program Ghost Notes
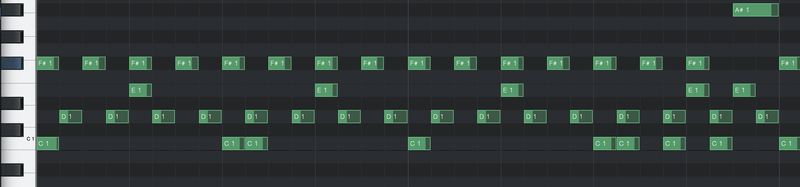
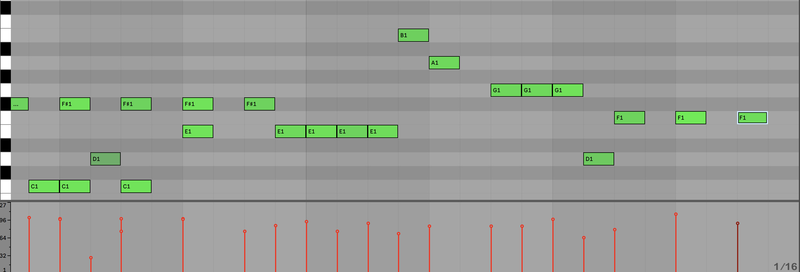
Start with your beat programmed, as is. For now, move all the snare notes so they’re on the same note. We’ll need a second snare note for this easy trick to work…
Next, identify the sixteenth notes in your beat. If your kick’s on 1 and 3 and your snare’s on 2 and 4, there four sixteenths between each kick and snare, and there are sixteen of them in the whole bar – hence the name. Draw them in, but alternate them between the note D# and D, as below. Keep the velocities of these notes around 40.

Imagine that these notes are being played by a second drummer, and they’re hitting them in the order Right, Left, Right, Left, Right, Left – all the D#s are played by the right hand; all the Ds are played by the left. There’s already a lot of groove added to the beat using these notes – although it’s not realistic as a beat a single drummer could play.
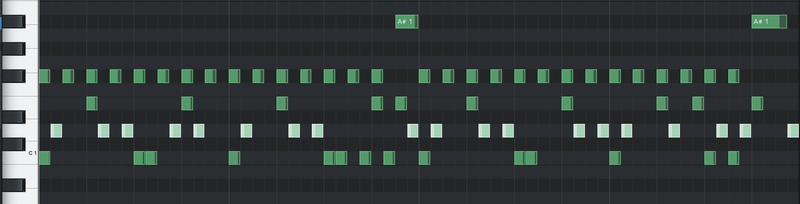
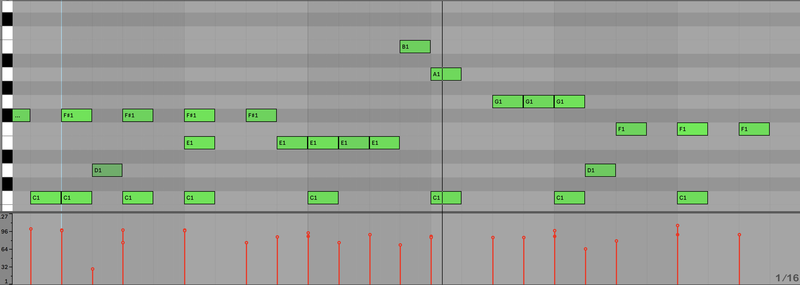
Now we’re going to remove every single one of the right-hand, D# notes. The reason: a drummer’s right hand is usually busy riding the hi-hats or ride in a beat like this, and the left-hand is stuck on the snare. While the left hand is bored, the ghost notes are an extra way for it to add some feeling to the pattern. Listen to the beat now, and it’s both realistic and has some extra feeling.
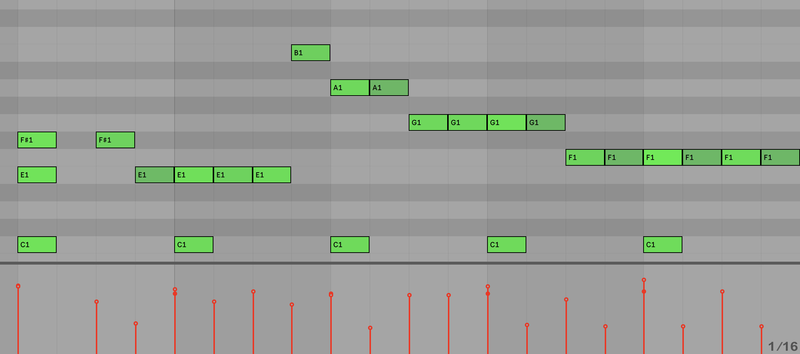
The final step is to go through the those left-hand beats and take about half of them out. Of course, you could go as far as you want with this, leaving more or less in, depending on the feel you’re going for. The central point here is that the best ghost-note placements go on those notes that the left-hand would have played when playing the sixteenth-note roll.
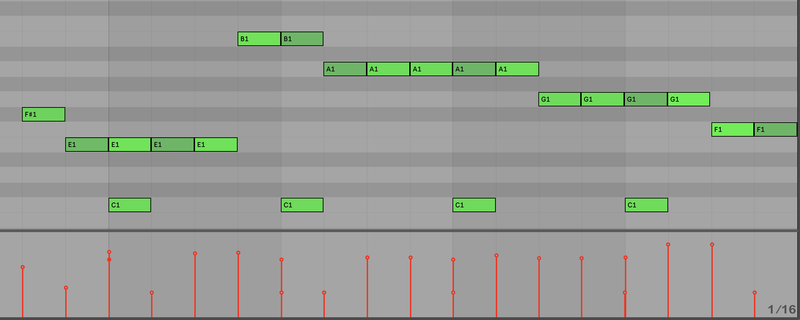
After this, if you’re feeling saucy, you can start programming drags with your virtual left hand. These quickly-played double notes work great at the lead into kick drums, and depending on your virtual drums, you might have ready-to-roll drag samples baked in on specific MIDI notes.
More Realistic Fills
Fills are another staple of drum playing – virtual or otherwise – helping a beat and the song it’s supporting to transition through sections and keep the momentum flowing. Programming fills doesn’t need an in-depth lesson for what notes to pick: simply pick out a rhythm using the snare and the toms, and keep the general trend as one that moves from higher toms to lower ones.
You might come out with a fill that looks a little like the one below, with the beat progressing towards the end of a bar, and then the hits of the fill being pecked out one by one. You might have even thought about which notes to emphasise using different velocities, and you could have something that looks like the below MIDI. Well done, but there’s more work to do.
The first thing to see to is the kicks. Fills can be very syncopated and make things feel like time is going off-kilter, especially if they involve the snare. For this reason, it’s common for the kick drum to keep the beat, hitting on each quarter-note to keep things regular, as below.
Next, we get a little more help from our friends the ghost notes. A second tactic to make fills, which often makes them sound more natural, is that instead of having each note picked out from the silence below, we instead turn the whole fill into one big roll, with the fill notes picked out as high-velocity against a background of low-velocity notes.
Below, we’ve ‘filled in’ all the gaps of the fill on the drum last played. The idea is that the drummer is actually hitting notes every sixteenth-note, but only the ‘fill notes’ are loud, creating a nice dynamic effect that also keeps the momentum going.
Here’s the effect represented again with a different pattern, leaving a few more of the notes at low-velocity. As the virtual drummer rolls down the kick, every sixteenth-note is played, but the ones that are picked out as higher-velocity are the ones that make up the actual fill.
More Drum Tips
Once you’ve programmed your perfect virtual drums, it’s time to get mixing and designing the sounds that will best work for you. Check out our articles on how to get punchy drums in the mix for a few more pointers on how to come out sounding like a beatmaking legend.