Vocal chops are a staple of many genres of music. From main room EDM to underground UKG; and UK grime to US hip hop – vocal chops are loved by musicians across the genre spectrum, and across the world.
There are several techniques and tools you can use to achieve great vocal chops in your productions. You can use samplers and drum racks, or you can just slice up raw audio in your DAW’s timeline. In this article we’ll take you through a few of our favourite methods, starting with the simplest and ending with a more complex method.
Simple single syllable chops
The simplest style of vocal chop is to take a single syllable or sung note and load it into a sampler. With this done you can play the sung syllable as you would any instrument. Let’s take a look at how to do it.
Step 1: Find a vocal sample
The first step when creating vocal chops of any kind is to find a vocal sample to work with. Of course, you can grab a vocal clip from an old record or acapella, however if you want to commercially release your track then you may run into some copyright issues further down the road. It’s much safer to get a sample form a royalty free source like Loopcloud.
In the Loopcloud app we’ll search for ‘Vocal One Shots’ and then audition a few options until we find something we like.
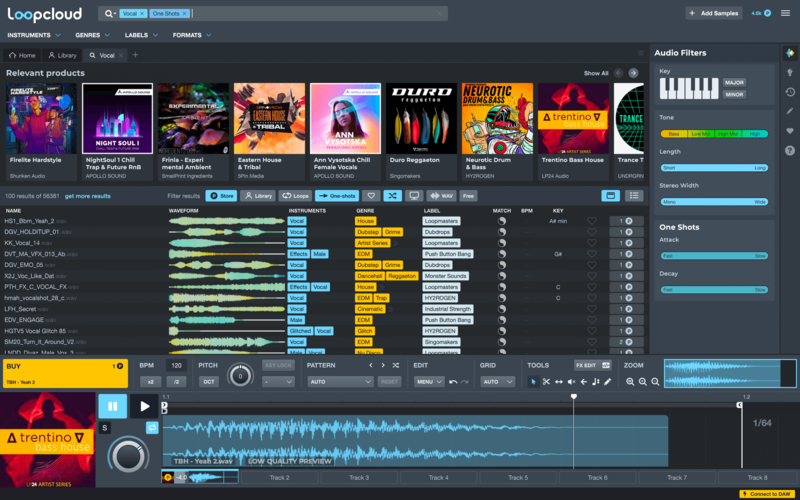
The sample “mp1vs_vocal_shot_0832_f#” (from HY2ROGEN’s 1000 Vocal Shots) pack sounds like it will work well. Let’s buy it and then drag and drop it into our DAW. We’re going to be working in Ableton Live, but these techniques are applicable in any digital audio workstation.
Step 2: Load the sample into a sampler
Once you’ve found the right sample to chop, it’s time to load it into a sampler. You can use any sampler for this task; we’re going to be using Ableton’s Simpler.
Load the sample into your sampler as per usual. If you know your way around a piano keyboard, you may want to tune the sample so that the note produced by your sampler corresponds to the key you press on your keyboard. Some samplers automatically detect the pitch of samples loaded into them and adjust the root note appropriately, Simpler doesn’t but you can use your Ableton’s in-built tuner to manually repitch your sound.
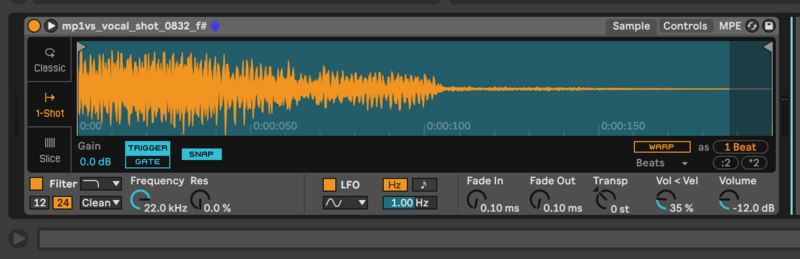
Depending on how you want to play your vocal chops, you may want to turn on one shot mode. This means that when you trigger the sample it plays all the way through, it also makes the sampler monophonic. Using this mode will give you more of an old-school, classic chop sound.
Step 3: Time to play!
Now all that’s left to do is play in a melody – it’s really that simple! There’s no right or wrong way to write a vocal chop melody, but thinking of the chop as a melodic and rhythmic element can really help you get slick sounding chops.
Chopping audio files manually
Another way to create vocal chops is to manually cut up the vocal sample in your timeline. This is more time consuming than writing a vocal chop melody with a sampler, however some people prefer this workflow. It also gives you the ability to apply extra creative processing, such as timestretching, to samples on the fly.
Step 1: Find a vocal sample
Just like last time, the first step is to track down a vocal sample to work with, let’s see what we can find on Loopcloud. To give us more material to work with, let's find a slightly longer vocal phrase this time.
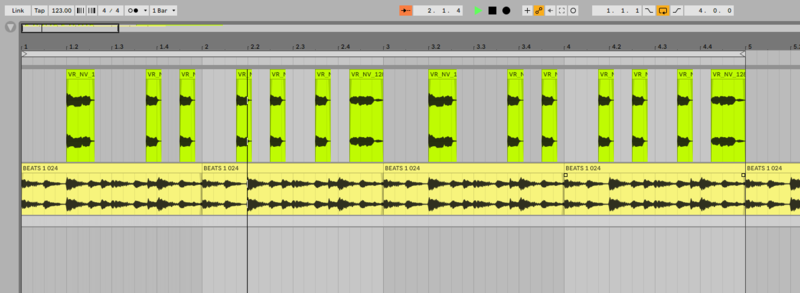
The second half of the sample ‘VR_NV_128_Em_Lost_My_Voice_Chorus_Vocal_Main’ from Vocal Roads’ Nightclub Vocals pack is perfect. Download it and drag it into the timeline of your DAW.
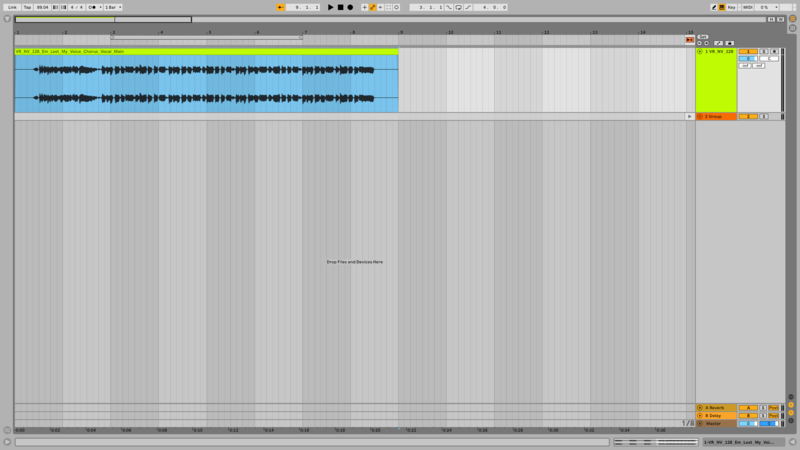
Step 2: Chop the sample
This next bit is largely up to you and your creativity. Listen through to the sample and slice sections that you like. Once you’ve built a palette of samples, arrange them in your timeline in a way that sounds nice.
Bonus Tips
Having a drum beat to write to can really help when deciding where to play chops. When you’re arranging a pattern on your timeline rather than playing it in, it can be very hard to place samples in the places that groove the most.
Working with raw audio allows you to get a bit more experimental than when working with a DAW. Use this to your advantage and try applying some extra creative processes to your samples. Why not try repitching or reversing your audio chops?
One cool thing to do is timestretching. You can get some really cool textures by activating warp mode and stretching out samples to make them longer. Go subtly, or put it as far and extreme as your DAW’s timestretching functions will let you.
Building a vocal chop rack
A great way to combine the two methods we’ve discussed so far is to build a vocal chop rack. This involves building a sampler instrument with different vocal chops loaded on each key. This method can take a little bit of time to set up but gives you great creative control, and allows for intuitive melody writing with a MIDI keyboard.
Step 1: Find some samples
We begin once again by finding a great vocal sample to work with on Loopcloud. This time let’s find a couple of vocal samples that we can combine together into one vocal chop rack.
Loopcloud is not only an amazing resource for finding and auditioning new samples to add to your collection, it’s also a powerful cloud-based sample management tool. Upload your sample collection to Loopcloud and it will analyze each file and assign metadata such as instrument type and tempo. Now, when you search for a particular type of sample, it will also present you with options from your own library that match your search criteria.
In this instance, Loopcloud has presented a great vocal sample from my collection called ‘XTC 385’. Let’s drag that into our DAW.
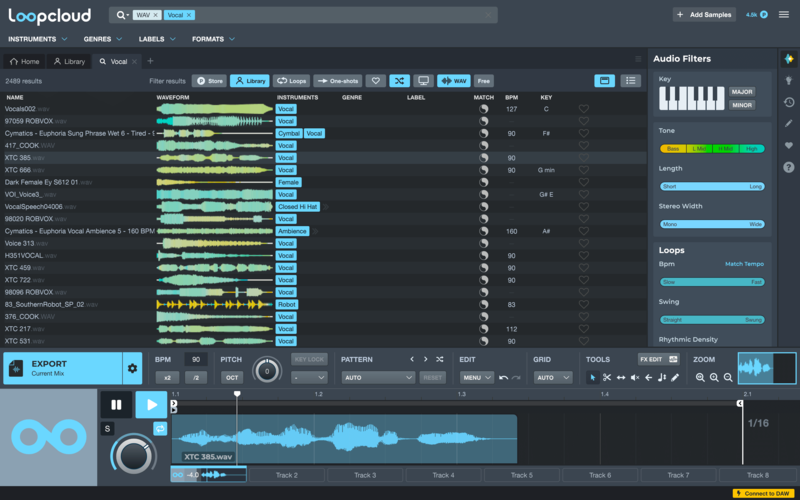
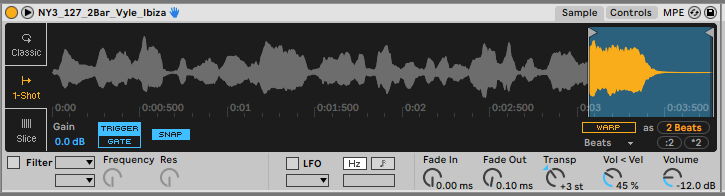
Let’s grab another sample, this time from the Loopcloud store. We can filter Loopcloud’s search results so that it only shows Store results using the toolbar at the top of the list of search results. The sample ‘NY3_127_2Bar_Vyle_Ibiza’ from the New York Rap Acapellas Part 3 pack contrasts nicely with our other vocal sample. Let’s download it and drop it into our DAW.
Step 2: Slice the samples
Time to go through our samples and slice them up. Don’t worry about all the samples being in tune at the moment, we can sort that out once we’ve loaded our one shots into our sampler.
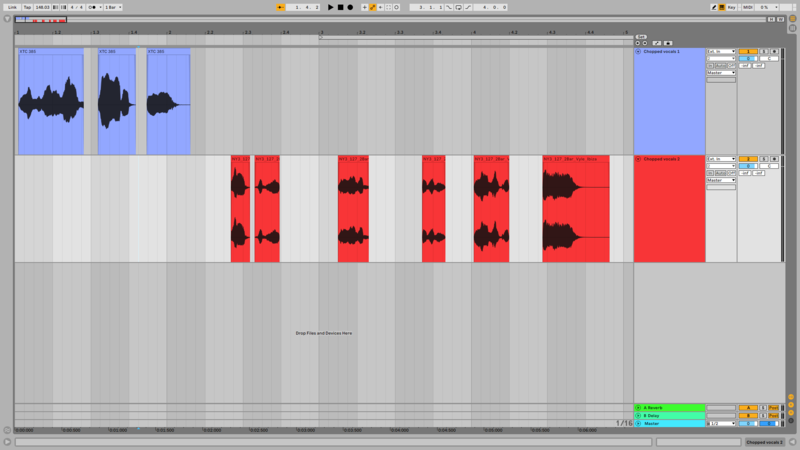
When choosing which part of the samples to slice up, look for audio snippets that you think will work well as one-shot stabs. Sustained vowels such as ‘aah’s and ‘ooh’s often work well for this purpose. Catchy phrases or multi syllable words such as ‘love you’ and ‘dancing’ are also great options.
Step 3: Load up your sampler
Next let’s load our samples into a sampler so that we can trigger and play them. You can do this process with any sampler that allows you to load multiple samples and load them on different keys on the keyboard. Stock samplers such as Logic’s Sampler, Ableton Live’s Sampler and FL Studio’s DirectWave all work well.
You can also use drum rack builders such as Ableton Live’s Drum Rack and Logic’s Drum Machine Designer. Using a drum rack builder is reminiscent of using an Akai MPC which was, and still is, a favourite sampler of many iconic producers. It’s also really quick and easy to assign samples to MIDI notes, all you have to do is drag and drop samples onto their corresponding pads.
As we’re working in Ableton Live, we’re going to use Live’s Drum Rack instrument.
Step 4: Tweak your samples
Whether or not you're working in a sampler or a drum rack designer, you can repitch each sample that you’ve loaded so it sits well with your tune. This is great for key matching two different sample sources. It’s also great for playing the same samples at different pitches for building melodies. This is a time to experiment, get creative and see what you can come up with.
A unique advantage of working in a drum rack designer is that you can apply separate effect chains to each sample. This means you can apply things such as spot delay and reverb to individual vocal chops for a bit of extra interest.
Step 5: Play a melody
Now it’s time to write a melody! Writing a melody with different vocal chops is a process of trial and error, it’s not like working on a chromatically tuned instrument. Our advice is stick on a drum beat and just mess around with a MIDI keyboard until you’re familiar with the samples you have loaded. Once you get to this stage melodies tend to just jump out at you.