Turning your samples into something completely twisted is easy with Fruity Granulizer. Fruity Granulizer is a plugin that utilizes the granular synthesis technology. Granular synths split a WAV sample into several tiny pieces (called grains), which are then played back according the settings of the plugin. The length and spacing of these grains can also be adjusted.
Fruity Granulizer can also be used to stretch a sample without affecting its pitch and vice versa and it does that exceptionally well. However, if you push the parameters a bit further and do a little automation, you can create some REALLY interesting and unusual special effects with it.
This tutorial will show you how to stretch and twist a sample turning into something completely different. These kind of weird fx do really make an impact to the listener if you use them well in your songs.
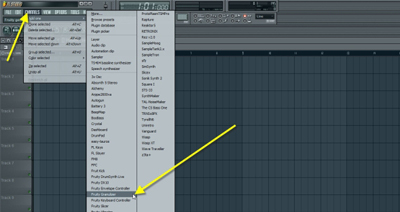
The first thing to do is to load the Fruity Granulizer:
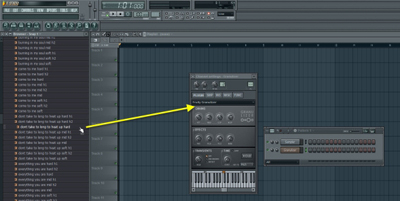
Drop a sample into the Granulizer:
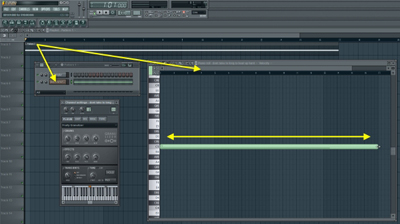
Create an empty pattern to Playlist (press F4) and open the Piano Roll view of the Granulizer and create a 16 bars long C5 note:
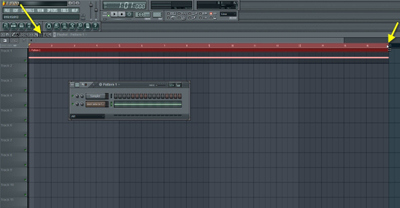
Go to the Playlist and make a selection that is 16 bars long. This is because we will create automation clips that are going to to be 16 bars long. Making a selection like this before creating the clips will automatically extend them to cover the whole selection range:
Open up the Granulizer.
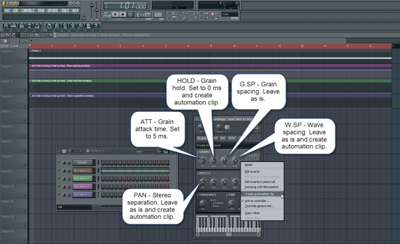
We are going to concentrate on the following parameters:
- ATT - Grain attack time, sets the attack and also decay length of each grain (fade in fade out).
- HOLD - Grain hold, specifies the length of each grain.
- G.SP – Grain spacing, controls the grain spacing in playback.
- W.SP – Wave spacing, controls the amount of grains generated from the wave sample.
- PAN - sets the stereo separation between even and odd grains.
Now, turn the Grain attack time (ATT) to 5 ms. This will set the attack and decay time of the grains to minimum so we get grains that have very short attack and decay.
Adjust the Grain hold (HOLD) to 0 ms.
Leave the Grain spacing (G.SP) to 100% (the default setting).
Also, leave the Wave spacing (W.SP) to 100% and PAN to as is.
Create automation clips for the Wave spacing (W.SP), Grain hold (HOLD) and PAN. You do this by right clicking on each controller knobs and choosing Create automation clip from the pop-up menu.
Tips: Grain spacing and Wave spacing parameters works closely together. If you wan’t a normal sample playback set them both to 100%. If you just wan’t to slow down the sample, leave the Wave spacing to 100%, but adjust the Grain spacing above 100%. If you wan’t to speed up the sample, drop the Grain spacing below 100%. When doing this, also experiment with Attack and Hold parameters for different attack/decay time and grain lengths.
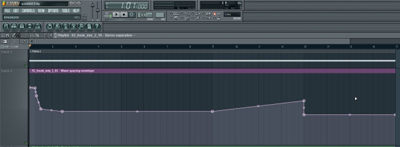
Now, go to the Playlist and zoom in to the Wave spacing automation envelope. Edit the automation points to make the envelope to look something like this:
What we are doing here is we drop the Wave spacing value approximately where the word “long” starts in the vocal sample and as the length of each grain is set to minimum via the Grain hold controller, this’ll make the word “long” sound like “looooooooooooooooong”.
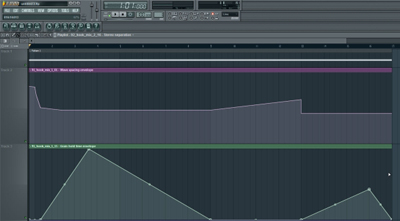
Next, edit the Grain hold automation envelope (green one). Turn it into this:
This’ll control the length of the grains creating a very strange effects.
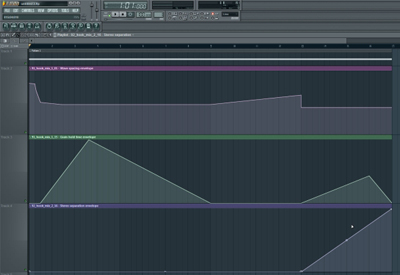
Now, edit the PAN automation envelope (blue one):
This makes the stereo separation to gradually increase starting from the bar 13 and as the Grain hold automation makes the grain lengths to increase at the same time, it’ll create a nice stereo effect that feels like the sound is bouncing rapidly from left to right.
We hope you have enjoyed this tutorial and hopefully it will get your creative juices flowing!
Original source here.


