FL Studio comes with a few different sampler options, but by far the most powerful is the comprehensively featured DirectWave. It covers all the bases you’d expect from a modern soft sampler and also some which make you think ‘why can’t every sampler do this?’
One shining example of this is DirectWave’s ability to quickly and easily create a sample instrument of any VST in FL Studio, allowing you to collaborate with people who may not have the same third party plugins as you.
CONTENTS
DirectWave Quick Start Guide
Loading a Sample
Playing Samples Across the Keyboard
Start/Loop Points
Tuning Samples
Filter
Tweaking Samples in DirectWave
Amp Module and ADSR Envelope
Filter Module
LFO
Mod Matrix
Using Multiple Samples
Adding Effects
Sampling VSTs
DIRECTWAVE QUICK-START GUIDE
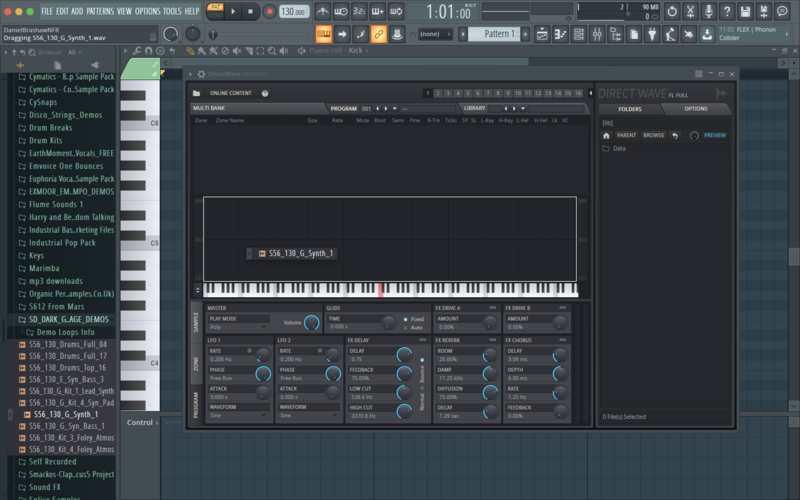
LOADING A SAMPLE
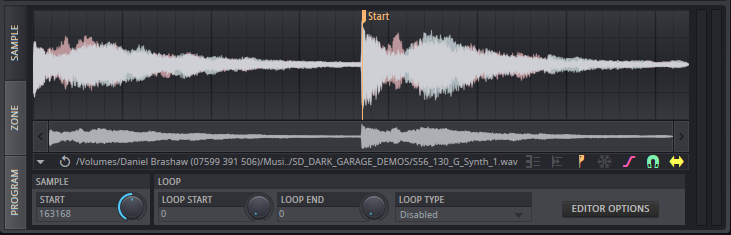
First things first, let’s load a sample. We’re going to be working with the free taster pack of Sample Digger’s Dark Garage. The clip ‘S56_130_G_Synth_1’ sounds like it would make a cool instrument, to load it simply drag it in from the browser window and drop it into DirectWave’s interface.
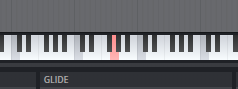
PLAYING SAMPLES ACROSS THE KEYBOARD
DirectWave will automatically pitch the sample across the keyboard, however your sample will not necessarily be in tune with the piano keyboard. You can easily change the root note of your sample by right clicking on the virtual keyboard in the DirectWave UI.
START/LOOP POINTS
To change the start point of your sample simply go to the SAMPLE tab at the bottom left of DirectWave and drag the ‘Start’ tab to the appropriate starting point.
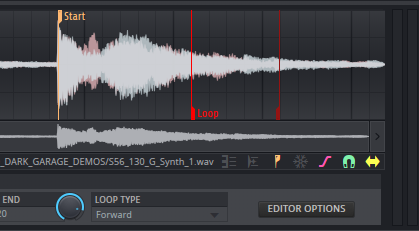
To make a simple, infinite loop for leads or pads select ‘Forward’ from the loop type menu and drag the Loop tabs to set your loop.
TUNING SAMPLES
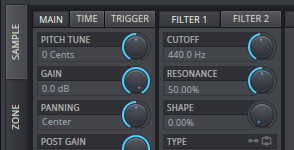
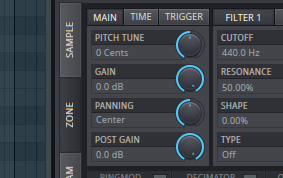
Even if you’ve set the root note of your sample, it may not be perfectly in tune. This can be tweaked via the ZONE tab using the PITCH TUNE knob.
FILTER
The ZONE tab also houses the filter and amp units. Here you can edit classic parameters like cutoff, resonance and the ADSR envelope. There’s also a couple more options available in the filter and amp sections but we’ll go into more detail on these later

TWEAKING SAMPLE PROPERTIES IN DIRECTWAVE
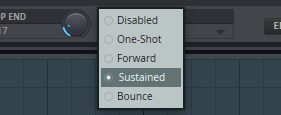
You can alter the trigger mode of your sample via the Loop Type drop down menu in the SAMPLE tab. If you have loaded some drum samples you may want to trigger your sample as a one shot, playing all the way through as soon as a MIDI note is triggered. To do this simply select ONE SHOT from the menu. If the loop mode is disabled then your MIDI notes will act as a gate, only playing the sample for as long as the note is held.
We already covered the basics of looping in DirectWave, but there’s a lot more flexibility within the Loop Type drop down menu.
Forward means the sample is repeated jumping back to the Loop Start once. In Sustained mode the looped region will play while a key is held. The region beyond the Loop End will play on key release - in order to hear this you will have to set a slow release via the amp envelope. Bounce loops the sample forwards and then in reverse until the key is released.
If you want to reverse the sample for some interesting sound design, then simply press Alt+Left.
AMP MODULE AND ADSR ENVELOPE
You can find DirectWave’s amp envelope in the ZONE window. Here you can adjust the attack, decay, sustain and release to sculpt your sound, in our example we’ve created a classic pad sound by setting a slow attack and release.
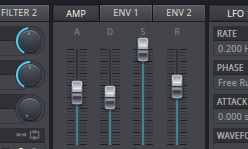
Behind the amp envelope you will also find two more envelopes which can be used to modulate most of DirectWave’s parameters, very handy for detailed sound design! We’ll explain how to use these later in the Mod Matrix section
Basic controls such as Gain and Panning can be found in the leftmost section of the ZONE panel under the MAIN unit.
FILTER MODULE
DirectWave, unlike most stock samplers, has a dual filter section. This is fantastic as it gives you that little bit of extra control when it comes to building a killer instrument.
To turn either of the filters on simply select an option from the TYPE drop down menu. Once one of, or both of your filters are on, you can alter all the standard filter parameters such as cutoff, resonance and shape.
When both of your filters are on you have the option of running them either in parallel or series. To change this simply select one of the two options to the right of the TYPE drop down menu in Filter 1.
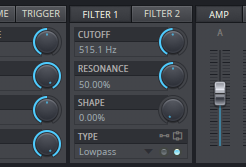
Parallel means that audio is routed through the two filters separately from one another whereas Series means that the audio goes through Filter 1 first and then Filter 2. Which you choose will depend on the type of sound you’re going for.
LFO
As well as two filters, DirectWave users are blessed with two LFOs to modulate parameters with. Each of the LFOs is identical, with knobs for Rate, Phase, Attack and Waveform.
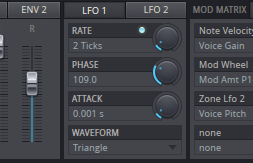
Rate sets the frequency of the LFO, if you activate the blue button to the left of the dial the LFO will sync to the BPM of your project. Phase sets the point in the waveform where the LFO will begin modulating from, Attack sets how long after playing a note the LFO will begin to modulate and Waveform simply determines the shape of the LFO’s oscillations.
MOD MATRIX
To assign the LFOs and Envelopes to modulate parameters, you have to use DirectWave’s Mod Matrix. Found via the ZONE tab, the Mod Matrix has four banks of four modulation pairings allowing you to have up to 16 unique modulation sources and destinations.
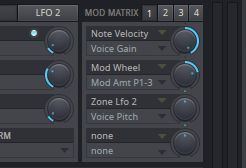
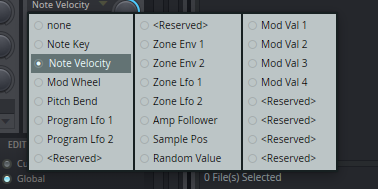
Each modulation pairing has two drop down menus and a dial. The top drop down menu allows you to pick the modulation source. This could be the velocity of a note, the mod wheel on your MIDI controller, an LFO or any one of the options in the below image
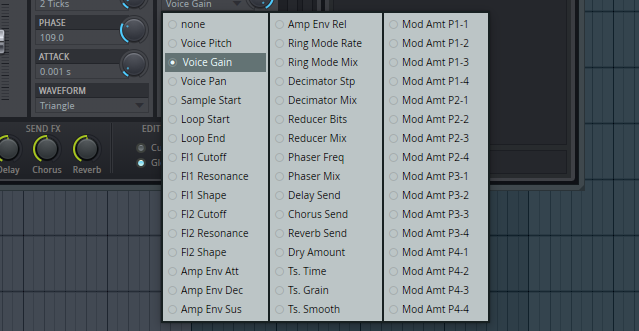
The bottom drop down menu houses the modulation destinations. You can use this menu to manipulate a whole host of destinations including the mod amounts of other modulation pairings - the full list of modulation destinations can be seen in the below image.
The dial to the right of these drop down menus determines the modulation amount and can be set at a positive or negative value.
USING MULTIPLE SAMPLES
Working with multiple samples in DirectWave is very quick and easy thanks to an intuitive visual mapping system. Multiple samples are loaded in an identical manner to single samples, simply drag and drop the samples into DirectWave from your sample browser.
By default every sample will be mapped to every key which, unless you’re trying to make a cacophonous mess, is unlikely to be the sound you’re looking for.
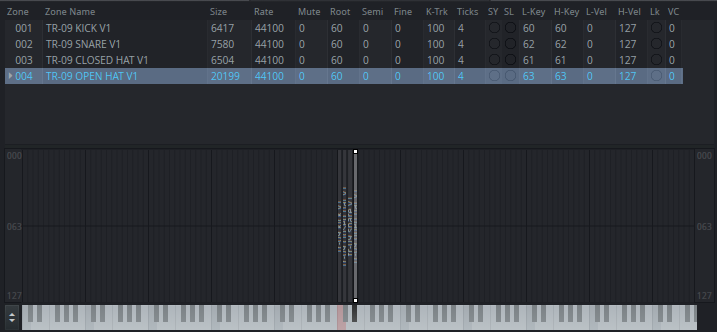
In our example we’ve loaded a kick, snare and an open and closed hi-hat into DirectWave. We want to assign each of the samples to a different individual key so we can play in a simple beat.
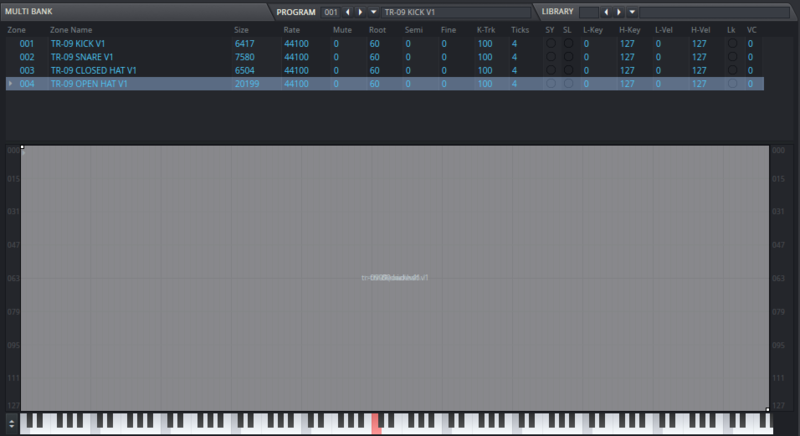
To assign each sample to a key simply highlight the sample name in the list of samples at the top DirectWave and resize the corresponding rectangle in the keyboard area below. The x-axis determines which notes will play each sample and the y-axis determines which velocities will activate each sample. In our example we’ll set each sample to be triggered at every velocity for simplicity, but this is useful for building more complex instruments.

We’ve now created a simple drum instrument with one key activating each sample. Each sample can be manipulated separately in the bank and Sample tabs, however changes made in the Zone tab are global and will affect every sample uniformly.
ADDING EFFECTS
DirectWave comes with a few in built effects including a chorus, reverb and delay. You can set the send levels to each of these effects at the bottom of the ZONE panel and the parameters of each unit can be altered via the program panel.

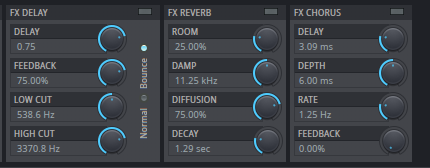
At the bottom of the ZONE panel there are also Ringmod, Decimator and Quantizer units which can all be used to mess with your sounds.
SAMPLING VSTS
A very unique ability of the DirectWave is that it can sample any VST in FL Studio, creating a DirectWave instrument which will save on CPU and also allow you to collaborate with others who may not have the same third party plugins as you.
This is easily done by right clicking on any loaded VST in the pattern window and selecting Create DirectWave instrument.
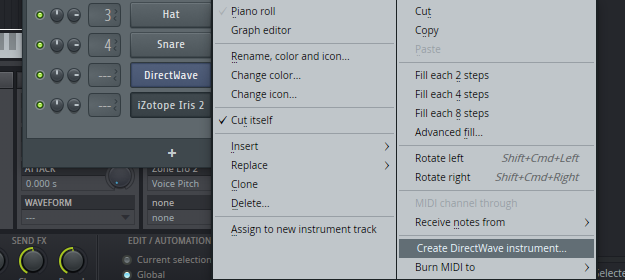
Now simply choose a name for the instrument and choose where you want to save it. A dialogue box will open allowing you to customize the range of your instrument amongst other parameters such as the number of velocity layers and sample rates. Then press Start and your VST will be sampled, simple as that!