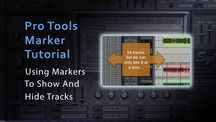
Here’s a Pro Tools marker tutorial which shows you how to use markers ti show and hide tracks in you sessions.
Navigating around big Pro Tools sessions can be a nightmare at times, yet many of us don’t utilise the power that the simple marker offers. Not only can they mark out sections of a song on the timeline, but they can be used to instantly get access to certain instruments or groups, or even to recall certain settings around a region.
The idea here is to use the humble Marker to navigate to certain groups of instruments. As you can see in the following screen shot, this particular session has an abundance of tracks, but (because I like to view them at medium height) we can only see a certain number at a time.

If we need to then find our Guitar tracks, we need to be adept at using our scroll wheel on the mouse. There’s nothing wrong with doing it this way, but there is an easier way. It just takes a little setup.
Step 1
Find your Guitar tracks! Select each guitar track by holding down the shift key and selecting them with the mouse in the ‘Track’ window on the left, or within the edit window itself. Once selected, the track names will be in shadow in the track window and highlighted in the edit window.

Step 2
Now navigate to the drop down menu in the track window and choose ‘show only selected tracks’.

Selecting this will hide all other tracks in the session, but it won’t deactivate them. They are still there, just not visible.
Step 3
Press the ‘enter’ key on the numerical tab to bring up your new memory location dialogue. Alternatively use the shortcut command+5 to bring up the ‘memory locations’ window and choose new memory location from the drop down menu.

With the memory location dialogue window up we can now configure some settings, set yours the same as the pic below.

Name it something appropriate, ensure that the time properties are set to none, and the general properties are set as ‘Track Show/Hide’. Now just press OK. This will now show up in your memory locators list as number 1. There is one last step to make this effective.
Step 4
Now go back to your track drop down menu and choose ‘show all tracks’

Repeat the process that you completed in step three, except now we are creating a memory locator to show all tracks. Check the settings below

Now you should have a memory locations window that looks like this

So when you select ‘guitars’, all other tracks will be hidden, and when you select ‘all tracks’, all of your tracks will be shown again.