Here are a few quick tips I always remember when mixing my tracks. I use Logic Pro and/or Ableton Live 8 for writing my tracks and use Logic for mix downs, but these tips can be applied to other sequencers.
These might seem obvious to some people, but for those starting out and want to get their tunes sounding a bit more professional, then hopefully this will help.
1. Separate the drums.
For maximum control over your beats, never have the kick, snare, hi hats or percussion on the same channel. Initially it’s often easier to programme beats in a drum machine or sampler on the same channel. But by giving each the kick, snare, hats etc its own channel you have more control on mixing and EQing the individual hits thus giving you a tighter drum section. So if you write beats in Ultrabeat or Impulse etc, separate them out.
2. Tune the drums
This might sound like a weird thing to do because you could say that drums do not have a key. Well this where you are wrong, especially in the case of kicks which are made up of undertones. Load your kick into a sampler and tune it to the root note of your bass line. Either tune by ear or use the tuner in Logic to help and notice how much tighter it sounds with the bass.
3.Use the analyser
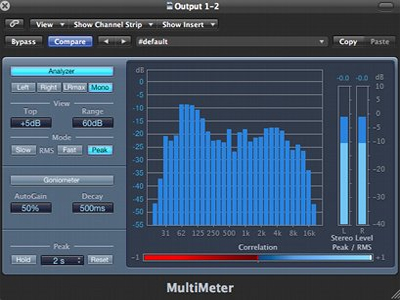
Unless you have an amazing kick ass studio you aren’t going to hear all the frequencies that each sound gives out. Also most home set ups aren’t acoustically correct so there’ll be lots of standing waves and weird anomalies. However the Analyser or Multimeter will always give you a true representation of your track.
What I do is get a released track I like the mix of, analyse the EQ and then try and emulate it on my mixdown. Also I use it to analyse individual channels and EQ out unwanted frequencies such as subs in lead synths and guitars or maybe add a few subs to bass lines that you can’t quite hear.
4. Make use of the return channels
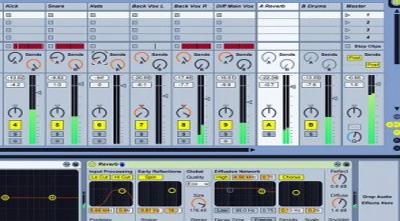
Return or bus channels, as they are known in Logic, are handy in sending many channels of audio into one channel. For example, if you wanted to add a bit of reverb on backing vocals, main vocals and strings you could send them to a return channel with reverb effect on this, rather than putting reverb on all these channels separately. Also you can control the amount of mix from each channel you send to the reverb bus as well. For example you could have more reverb on the backing vocal than the main vocal by sending more to the reverb channel than the main vocal.
Other good use of bus channels is sending all the drums to a return and adding a bit of compression and reverb to tighten the overall mix and give it some air. So in effect you are separating the drums out (as in tip 1), tuning, EQing and compressing the individual hits, then bringing them back together to tighten them up as a whole.
5. Listen to your mix in your car
Jonny at Oscillate Studio swears by this. Unfortunately my crappy Micra has a tape deck so I don’t have the technology. But listening to mixes on different speakers is essential to getting a perfect mixdown. So burn your mix onto a CD and play it in the car and on the crappy stereo in the kitchen and then go back to the mix and tweak. Getting the perfect mix takes time, so don’t despair if it takes several goes to get it right. Then once the mix is done send it off to the professionals to get mastered (in other words nice and loud) which is another story in itself.


