FL Studio is known for being an open and flexible DAW. In this tutorial Gary Hiebner explores the different ways to apply automation using automation clips, channel automation & per note automation.
One thing I like about FL Studio is how open and flexible it is. There’s always more than one way to go about doing something. Whether it be audio routing, instrument assigning, step sequencing or pattern programming. In this article we'll look at some different options you have around automation using: automation clips, channel automation editing or per note automation, each with their unique benefits. Let’s take a look at how to use these automation techniques.
Automation clips
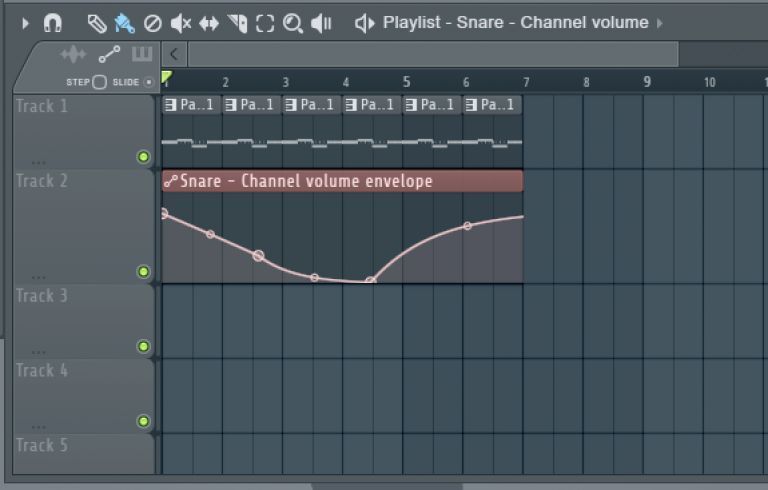
Automation clips are simple to create in FL Studio, and you can automate almost any parameter in FL, be it your effects, instruments or third-party effects and instruments. Let's see how to automate the volume on a track for example. Let's say you wanted to add an automation clip for the volume on your snare channel. You could either right-click on the snare volume on the Channel Rack, or right-click on the volume fader of the snare track in the mixer window. I'm going to use the Channel Rack volume knob. Then on the popup menu that launches, select ‘Create automation clip.
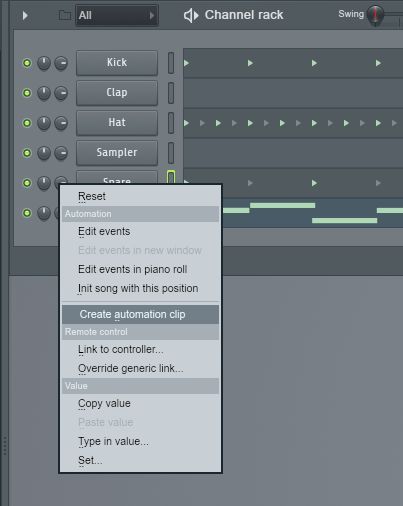
This will create an automation channel in your rack, and on the playlist (you can use the shortcut F5 to show and hide the playlist window) you see your automation clip for the volume.
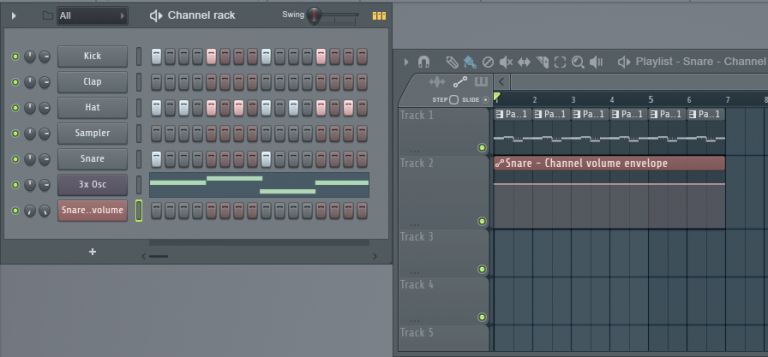
You can right-clip on this clip to create automation node points and then you can draw in and shape your volume automation. This works well for parameters that you want to change over a length of time. For example maybe you want your snare pattern to fade out over the last 5 seconds of your song.
But what if you want finer control of your automation? Then you can use either channel editing controls or per note editing to fine-tune your channel tracks.
Channel Automation Editing
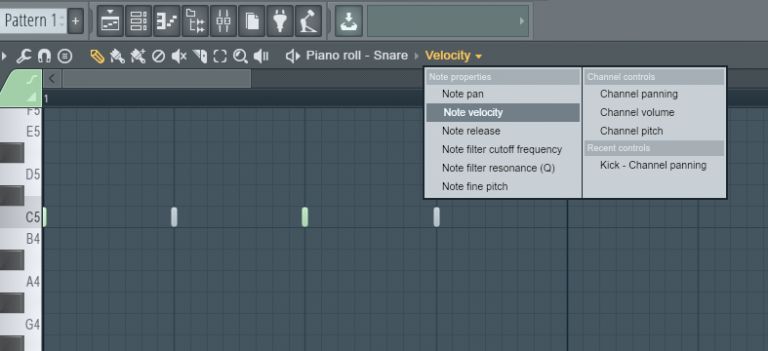
So with channel automation editing this can be done in the Piano Editor. Use F7 to open up the Piano Editor. Let's use the Snare track again. Now in the top right you'll see Piano Roll—Snare—Velocity. Click the arrow next to the Velocity name and choose Channel Volume under the Channel Controls section.
Now you can draw in like a pen tool the volume automation changes on the lane below the piano roll. You have much finer control with this method and can draw in detailed automation changes.
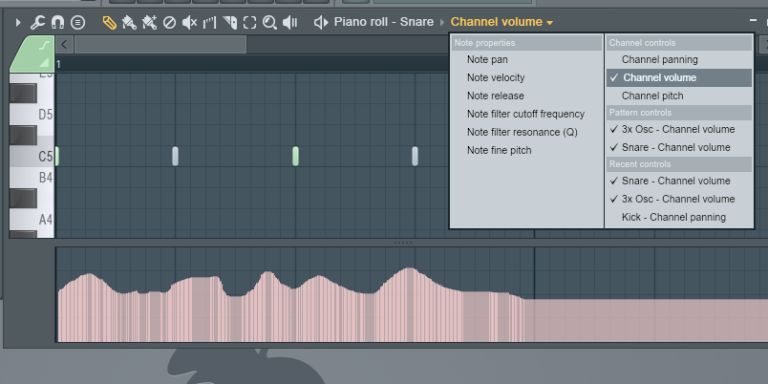
So maybe you prefer editing the volume this way. Try out some of the other options too. You can create great pitch bend effects using the channel pitch option as well. Select this and draw in fine pitch change over your pattern.
You’ll see the other channel control you can edit is panning. And when you start adding extra instruments you’ll see extra controls options appearing here depending on the instrument.
Per Note Editing
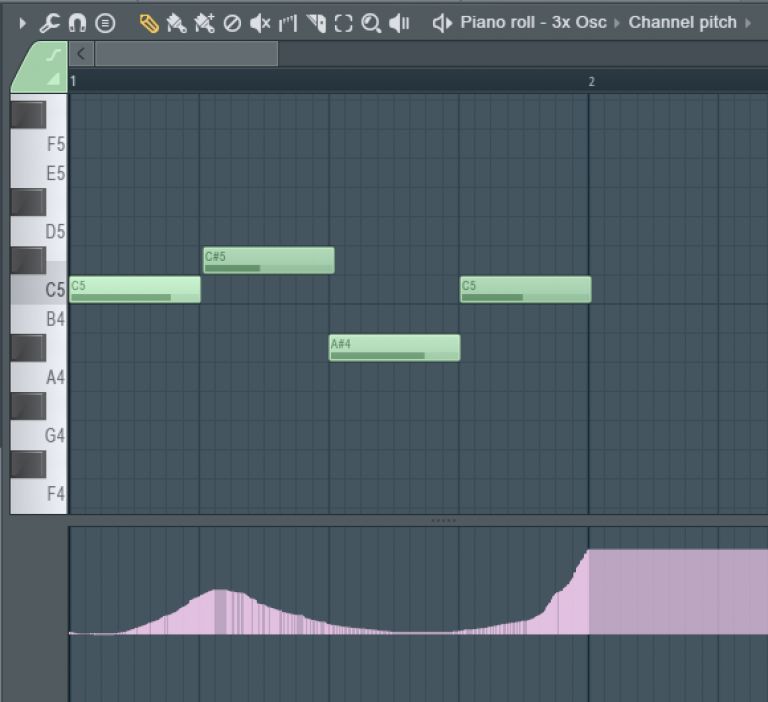
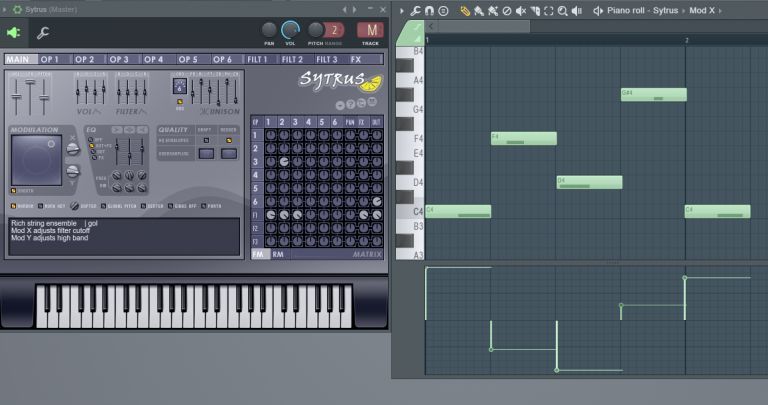
With Per Note editing you can make automation changes at the note level, so each time a different note is played you can assign a different value. This is also done in the Piano Editor. You can use F7 to show and hide the Piano roll. Go back to the top right and look under the note properties here. You’ll see you have your note velocity and note pan properties. So for example you can go in and pan each note from a note level, so you have precise control of each note value. And then you have some extra note properties. These come in handy when working with FL’s instruments. Let’s demonstrate this using the 3 x Osc instrument. Add this as an instrument to the channel rack. Program or record in a pattern and then go to the Piano roll window for this track. Go to the upper right and choose Piano Roll > 3x Osc > Pan under the Note properties. Now go in and add a different pan setting for each note.

You'll notice when you use other instruments like Harmor, and Sytrus that you have extra Note properties that you can edit such as the modulation X and Y values. This can bring about some really interesting results when manipulated. Try this out with Sytrus. Program in a pattern. Then draw in some mod X and Y note edits, and then hear how this manipulates the Mod X and Y parameters on the instrument at the note level.
Conclusion
So that’s how to use the different forms of automation editing in FL Studio. As you can see, you have quite a variety of choices. You can either use automation clips, channel controls, or note editing. This flexibility really helps spur on creative ideas. So get in there and test out these different automation options.
Original Source: Here